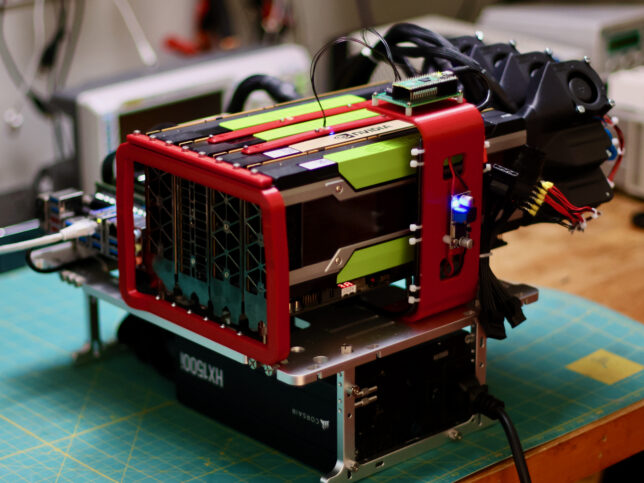
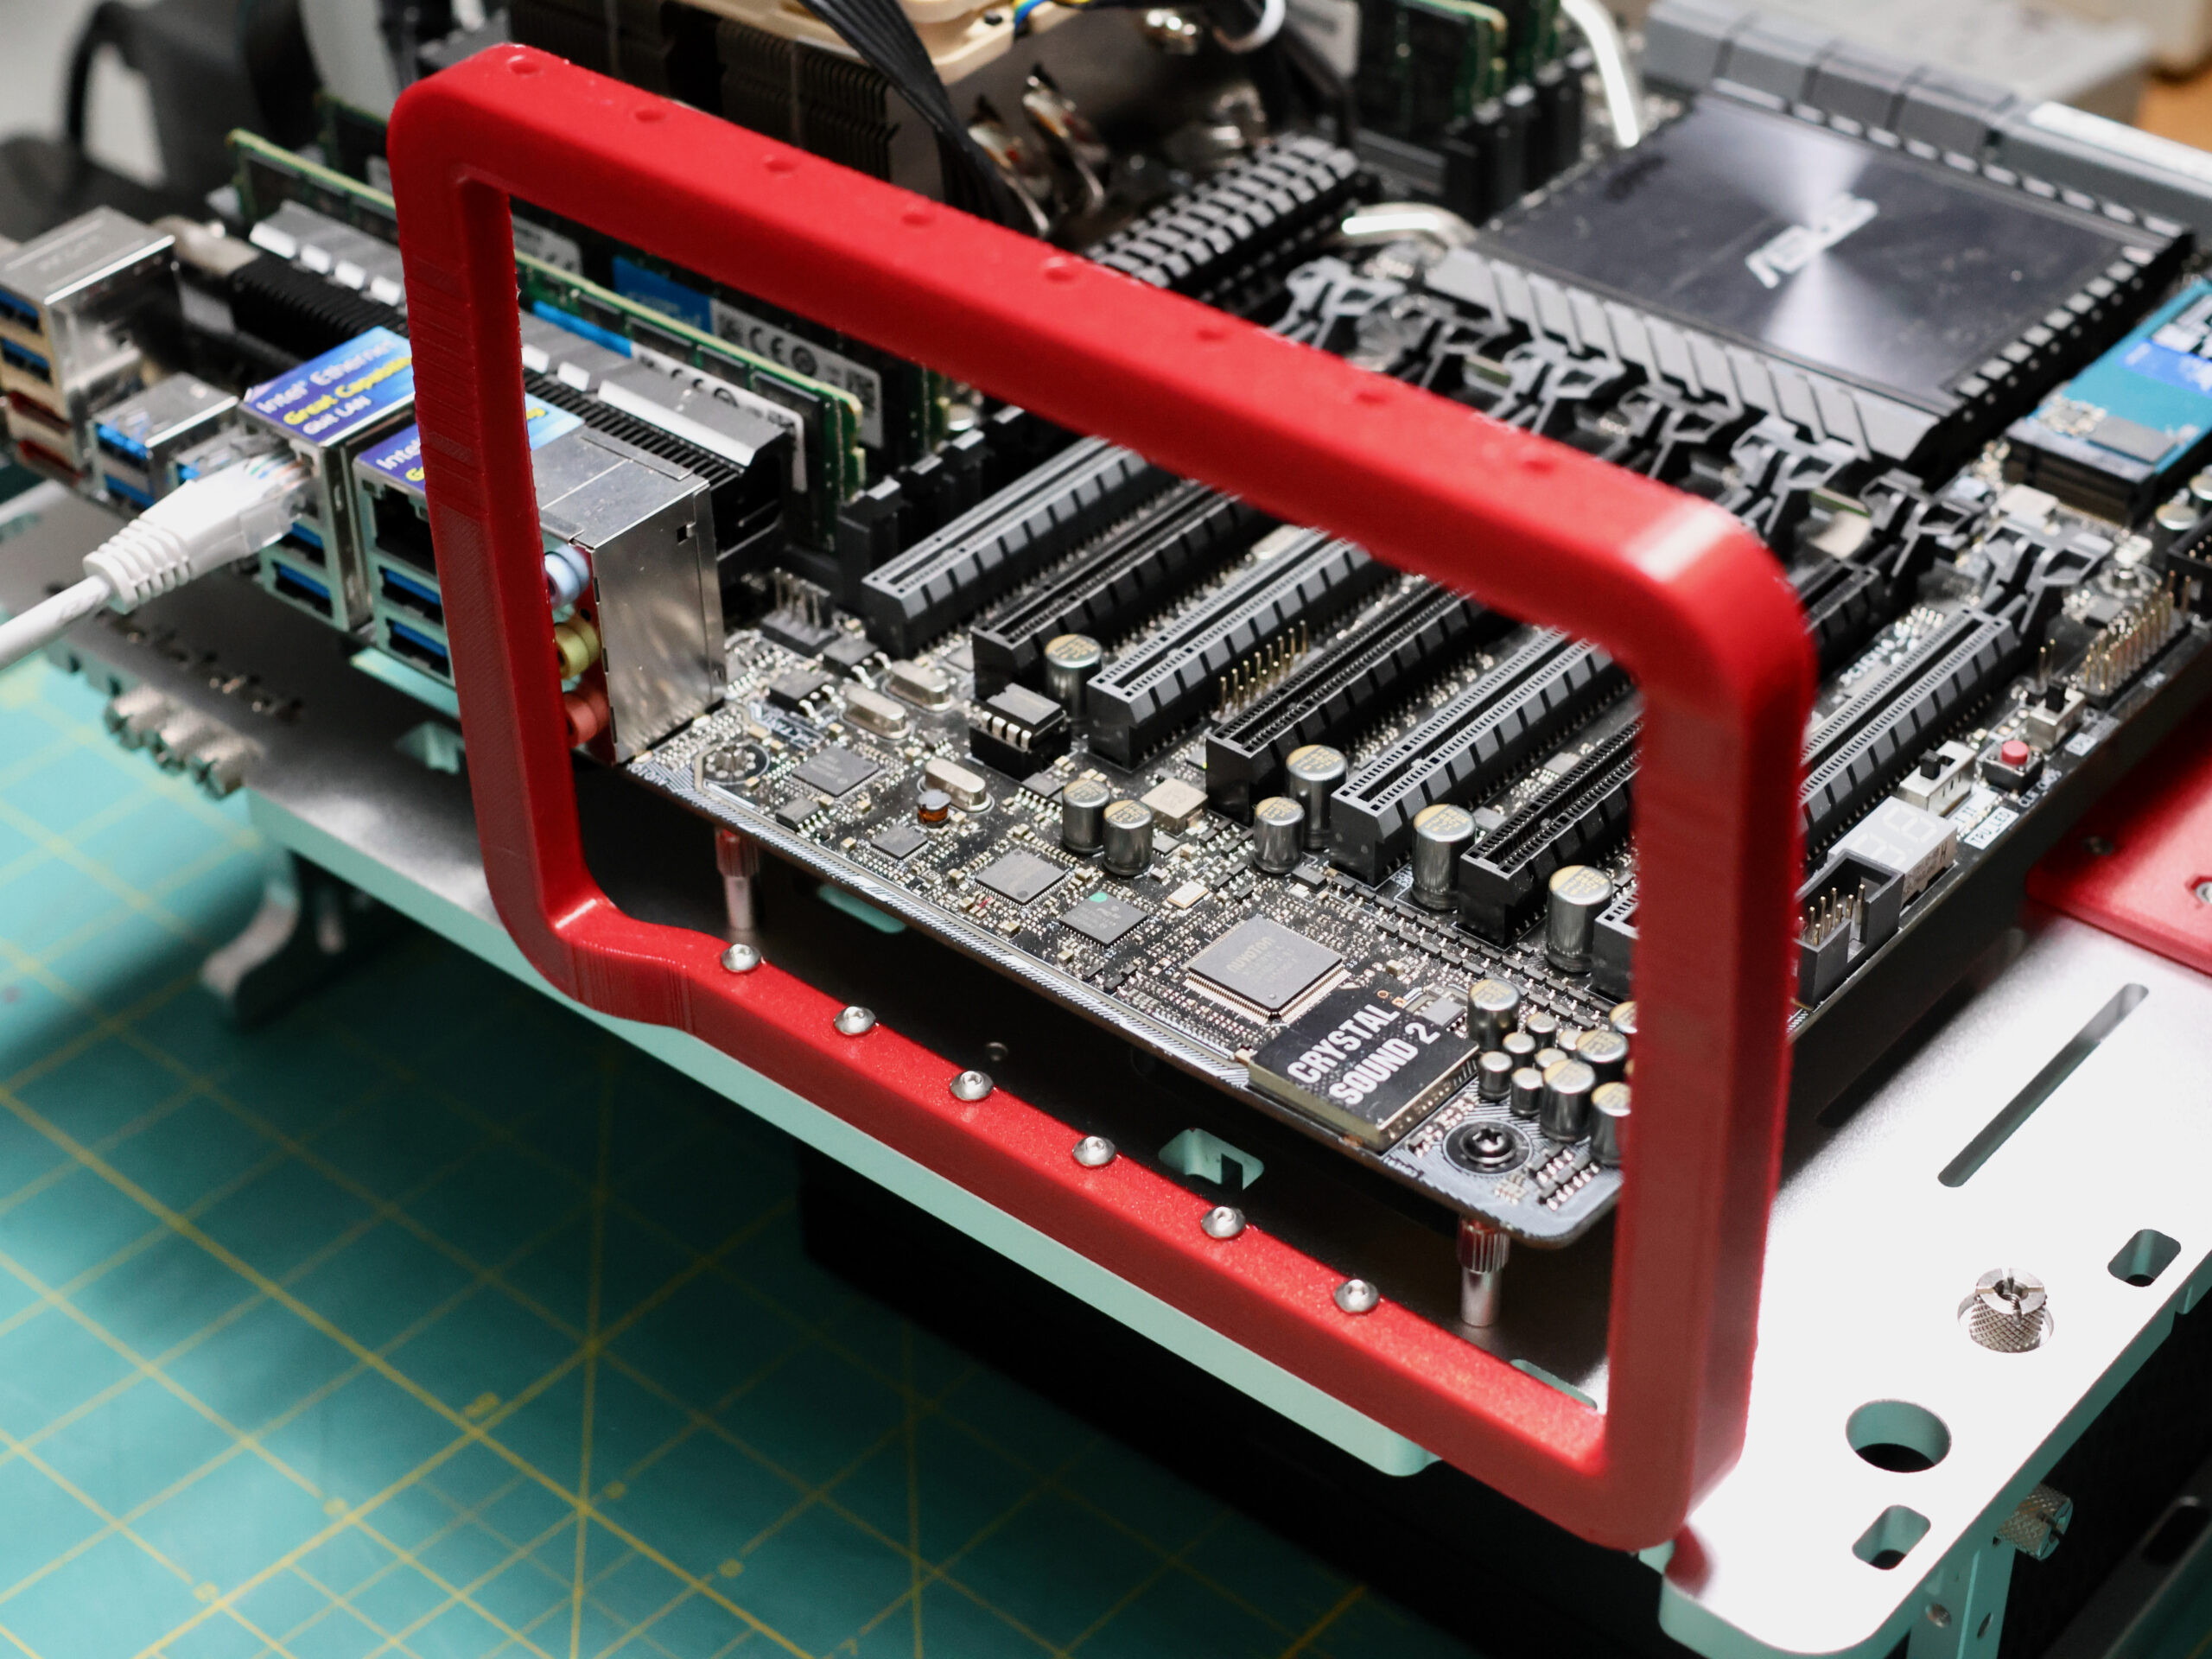
In the conclusion of my previous homelab post, I pled to the eBay gods begging for a 4xP100 system. My prayers were heard, possibly by a malevolent spirit as a V100 16GB for $400 surfaced. More money than I’d be willing to spend on a P100 but the cheapest I’d ever seen a V100, I fell to temptation. To use all four cards, I needed something bigger than the Rosewill RSV-R4100U. Enter the OpenBenchTable, and some 3d printed parts I designed to be able to securely mount four compute GPUs:
OBT had been on my radar for a while and will serve as a great… test bench for work related to this computer. Amazingly, the manufacturers are honest about the Open part of the name and the CAD files for the chassis are freely available to download and build off of. The rest of the computer is the standard set of cheap and cheerful X99 parts:
| Product | Price | |
|---|---|---|
| Motherboard | ASUS X99-E | $192.00 |
| CPU | Intel Xeon E5-1680 v4 | $94.95 |
| CPU Cooler | Noctua NH-L9x65 | $59.95 |
| Memory | 4x 32GB DDR4 | $94.95 |
| Power Supply | Corsair HX1500i 1500W | $147.70 |
| Case | OBT v2 | $199.00 |
| Storage | 1TB WD Blue NVMe | $54.00 |
| GPU 1-3 | P100 16GB | $360.00 |
| GPU 4 | V100 16GB | $400.00 |
| Total | $1,602.55 |
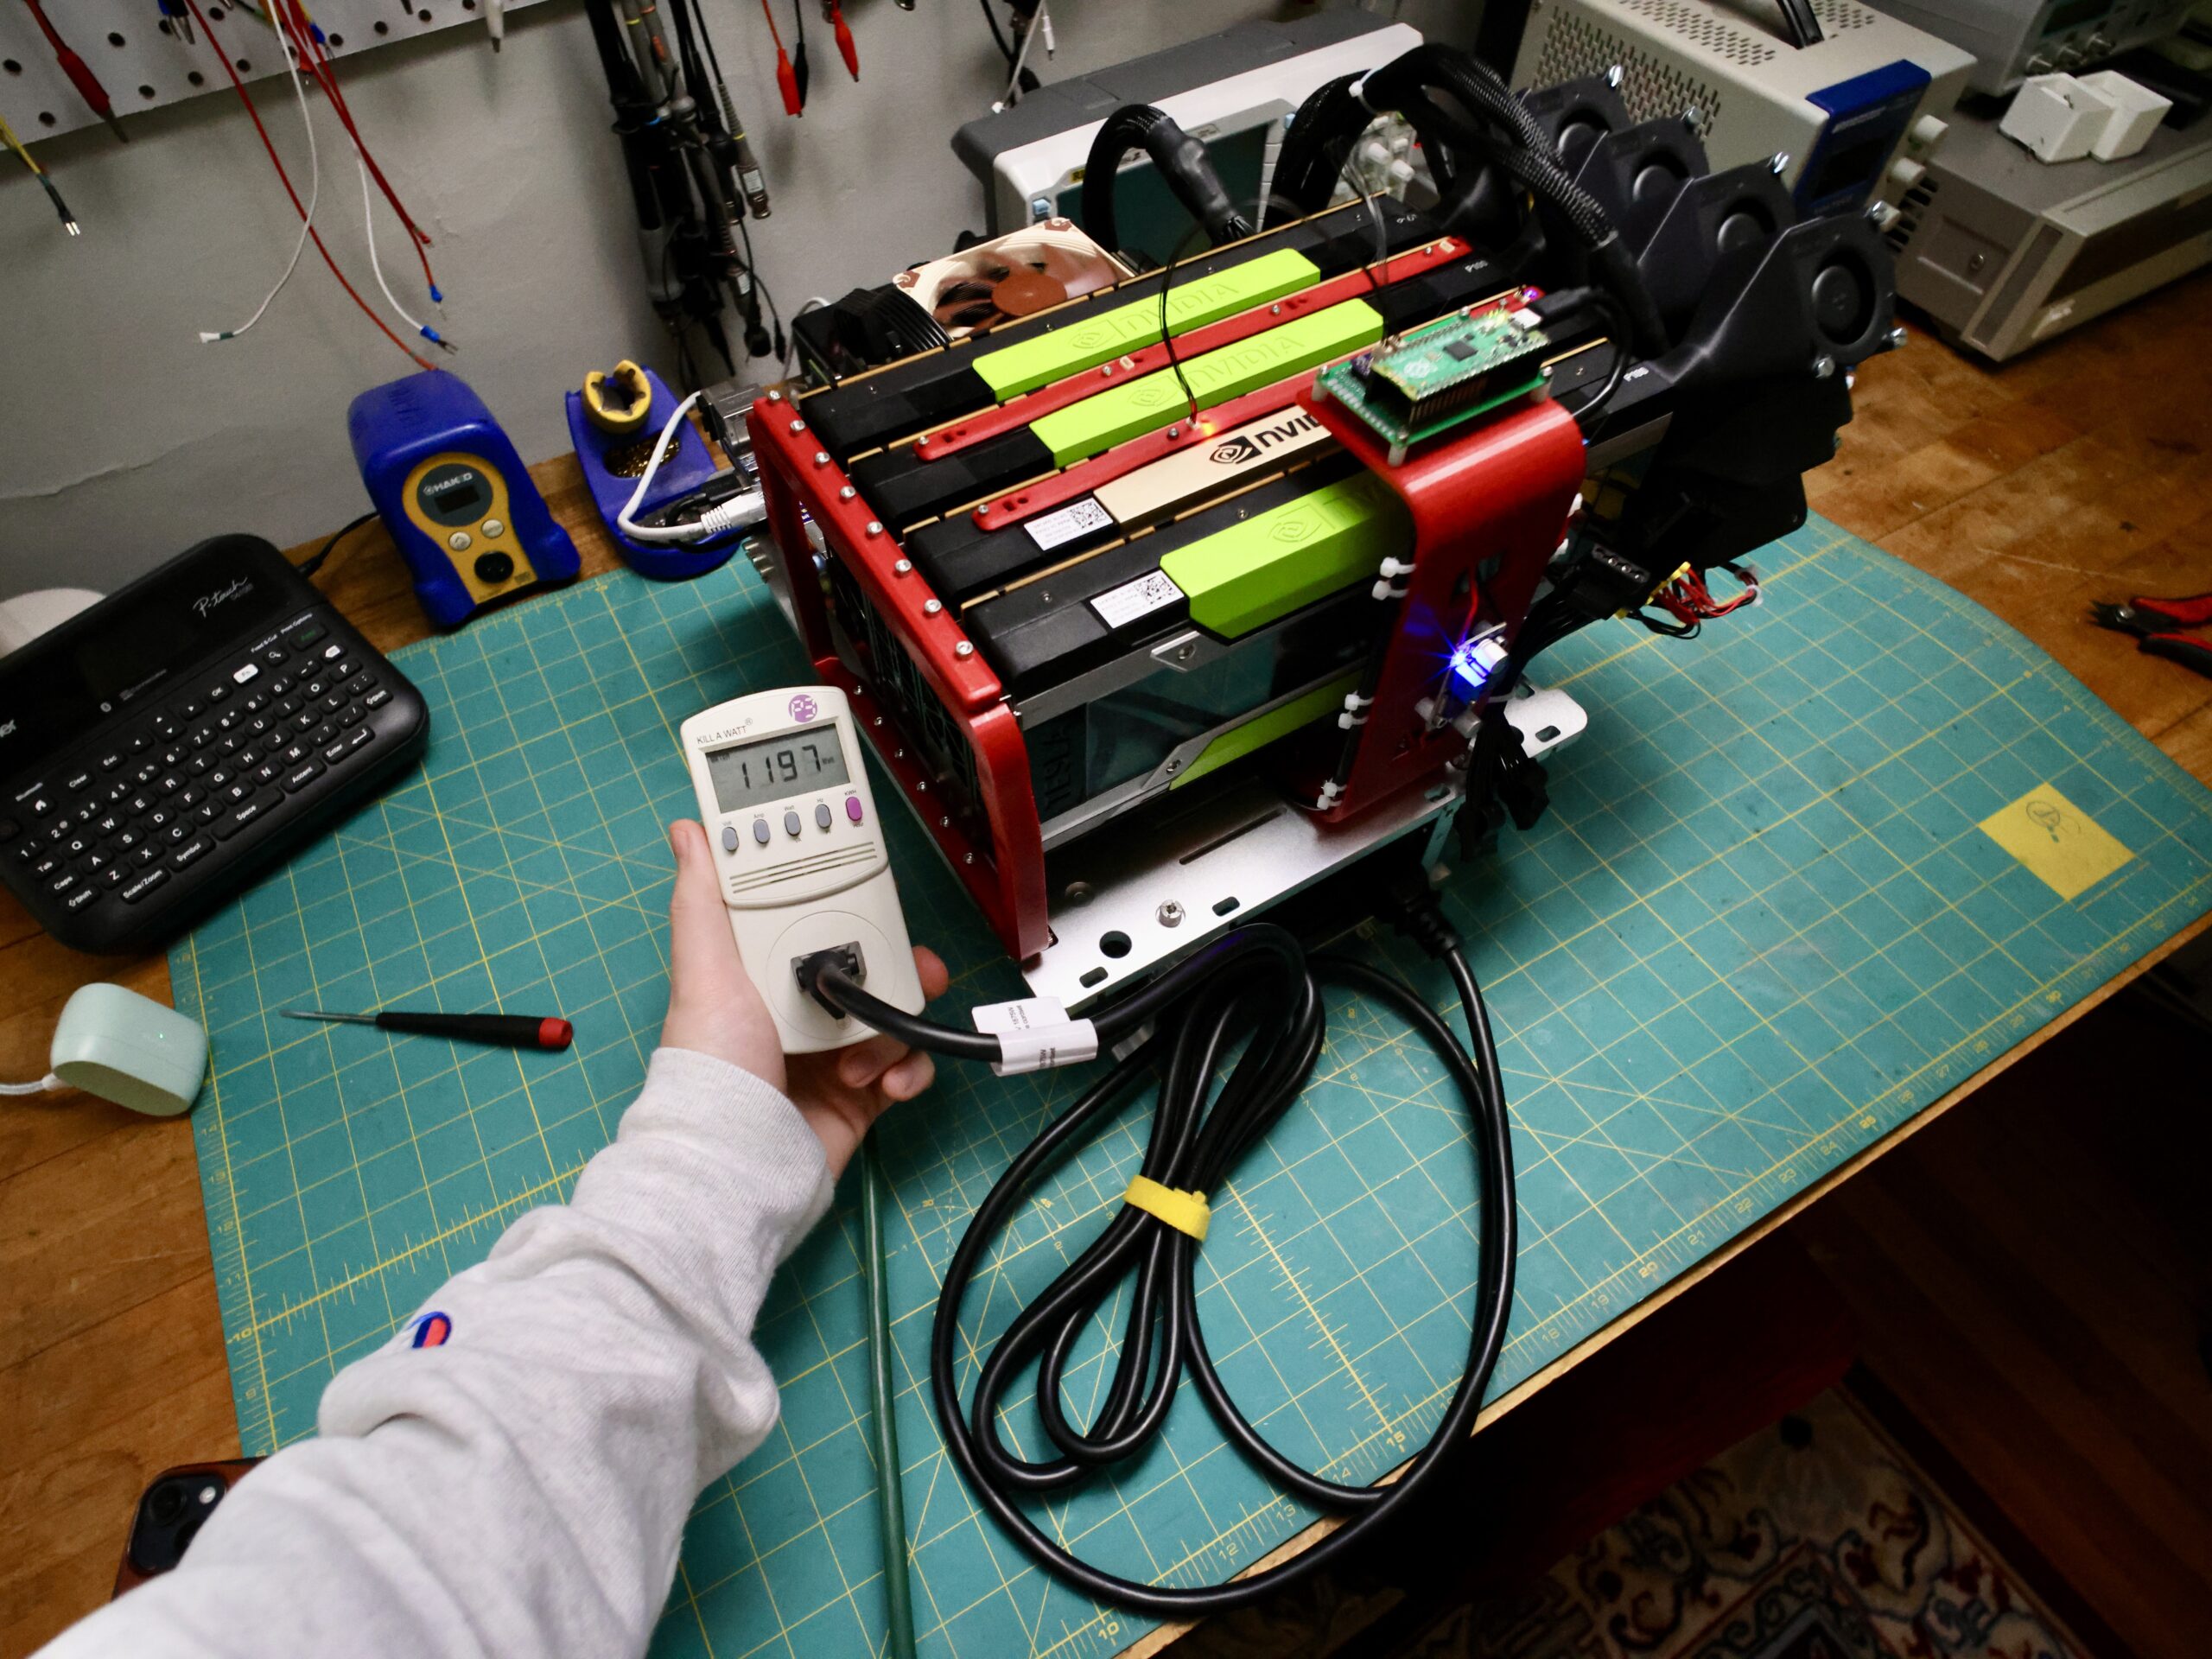
Even though Ollama was invoked in the previous post, these days I’ve been back at my roots working on an AI image processing project. For the curious though, this box can do over 5 tokens/second on Deepseek R1 70B. I’ve done no optimization whatsoever and could actually use some pointers on the best way to benchmark a system like this. Here are more photos of the build:

I livestreamed the migration of the system to the OpenBenchTable and the design of the PCIe bracket, here is that in 30 seconds:
PCIe Bracket Mount for OpenBenchTable
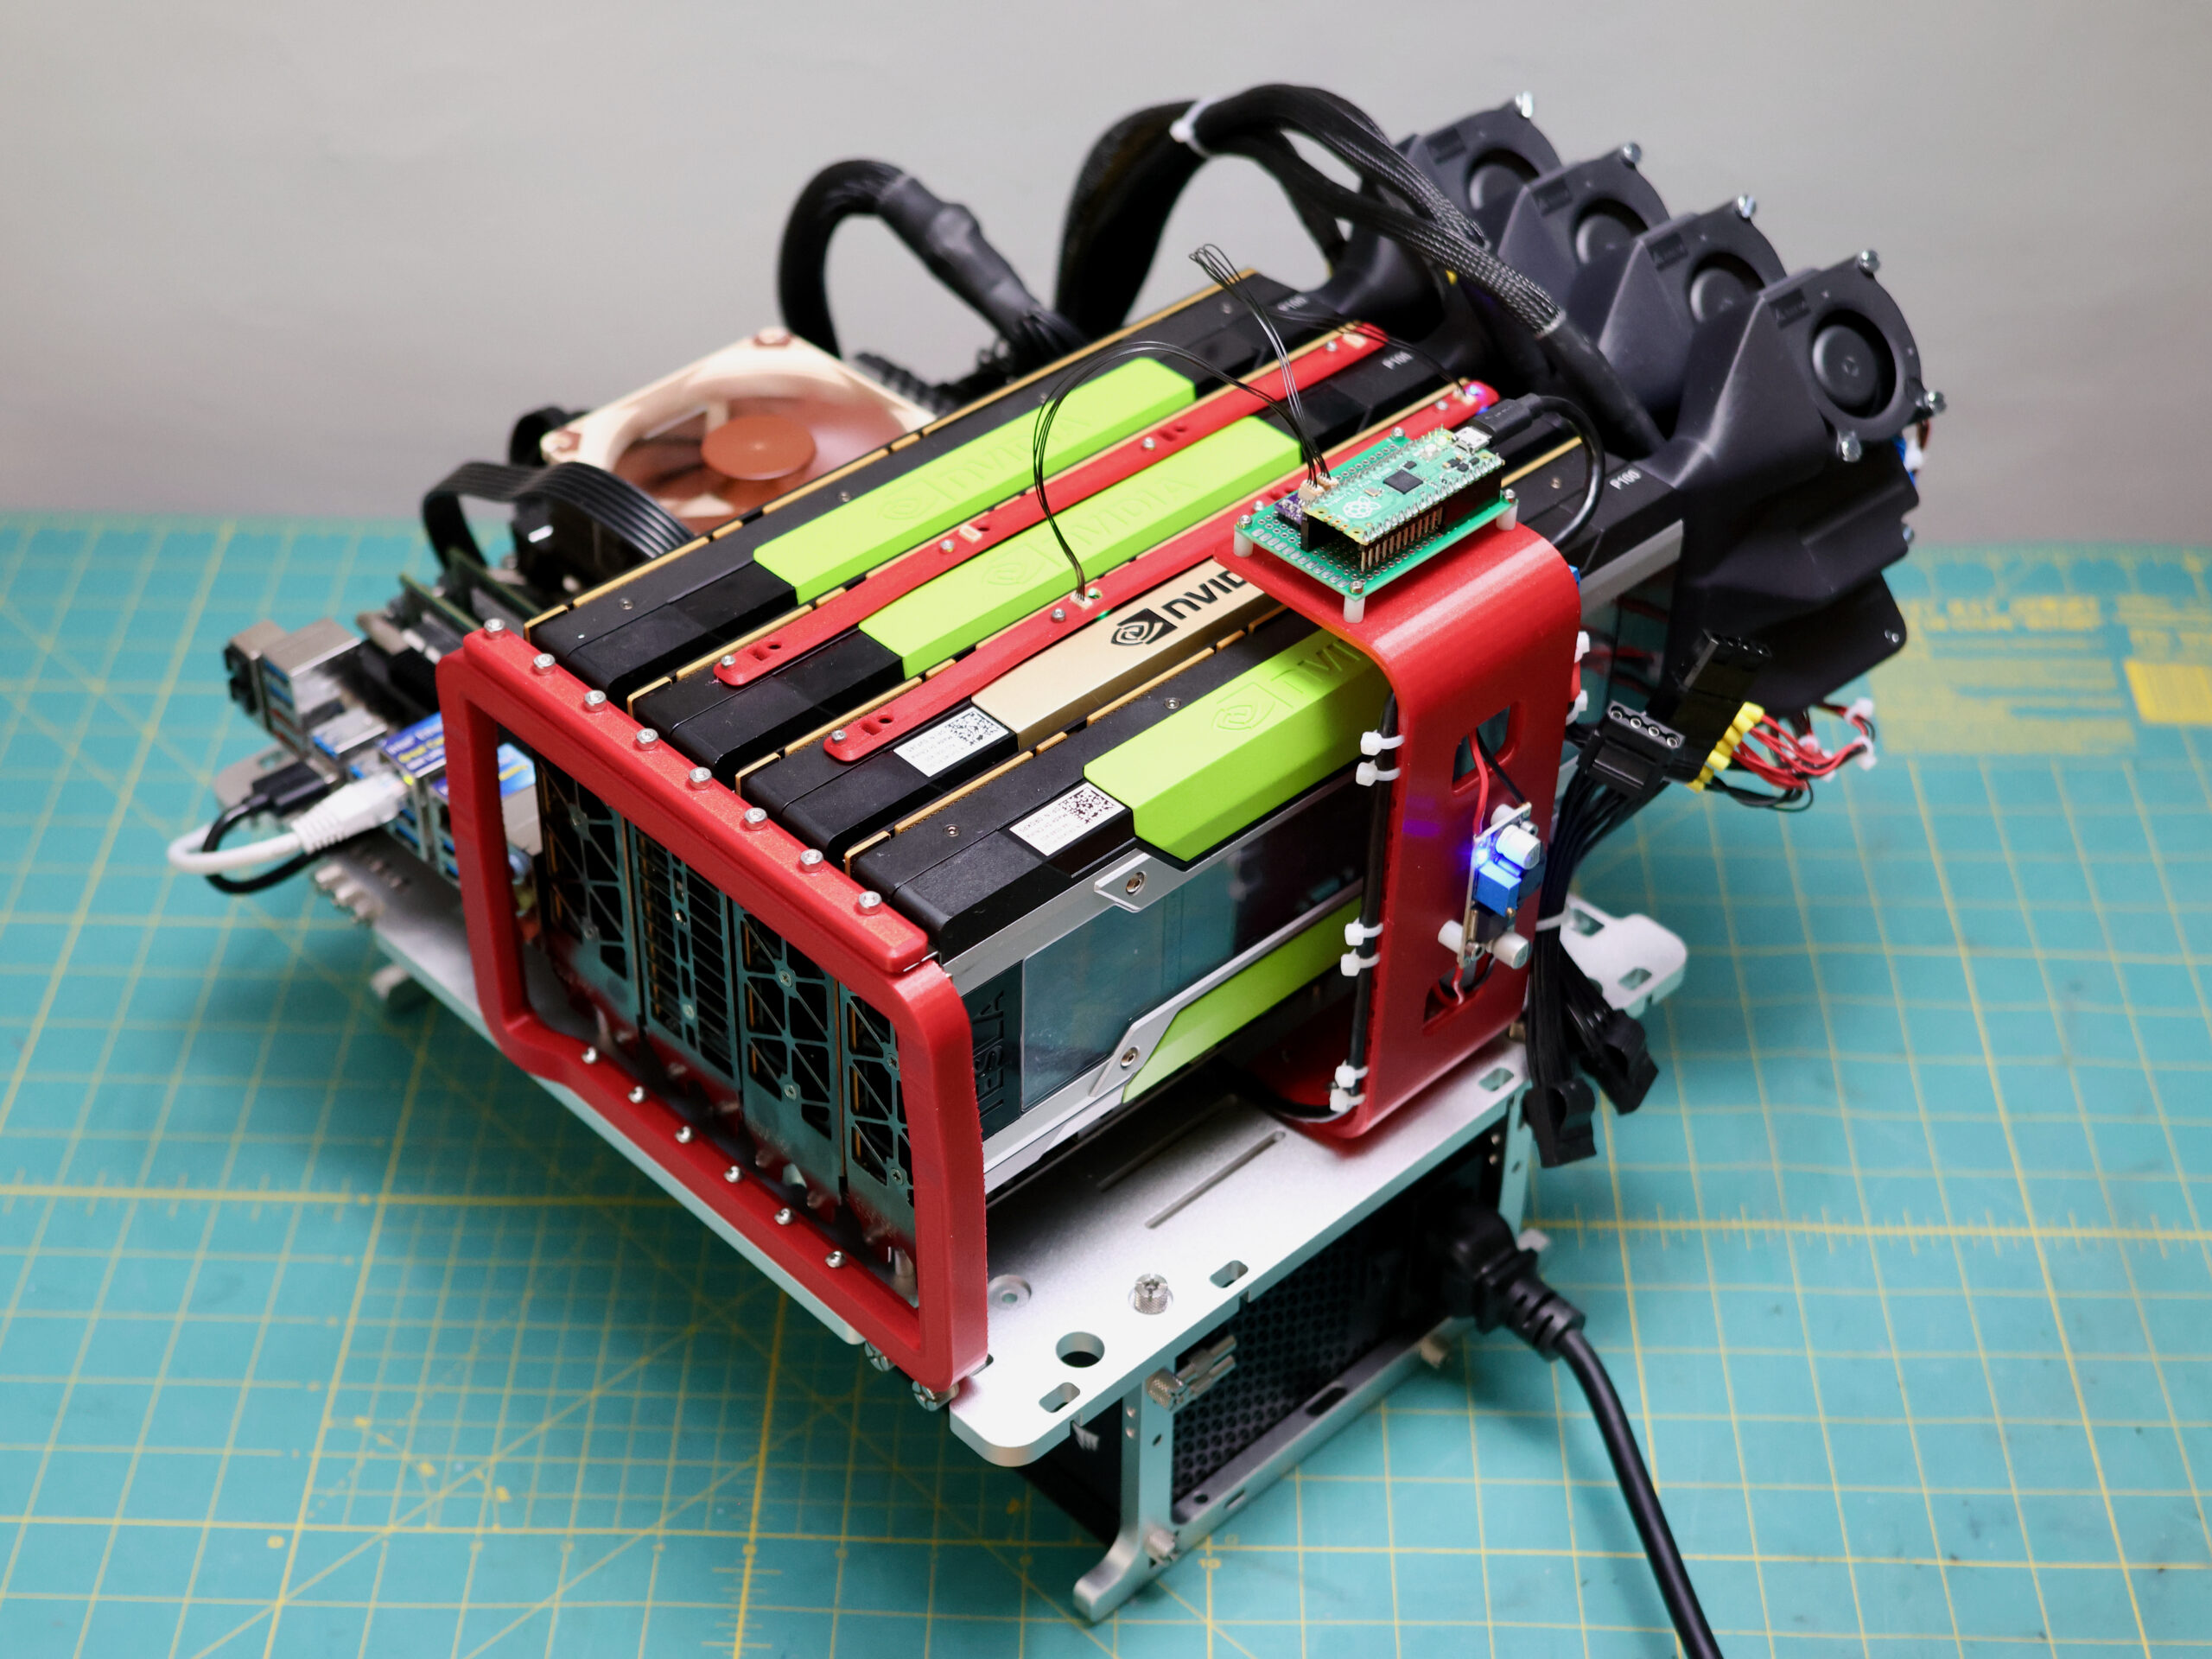
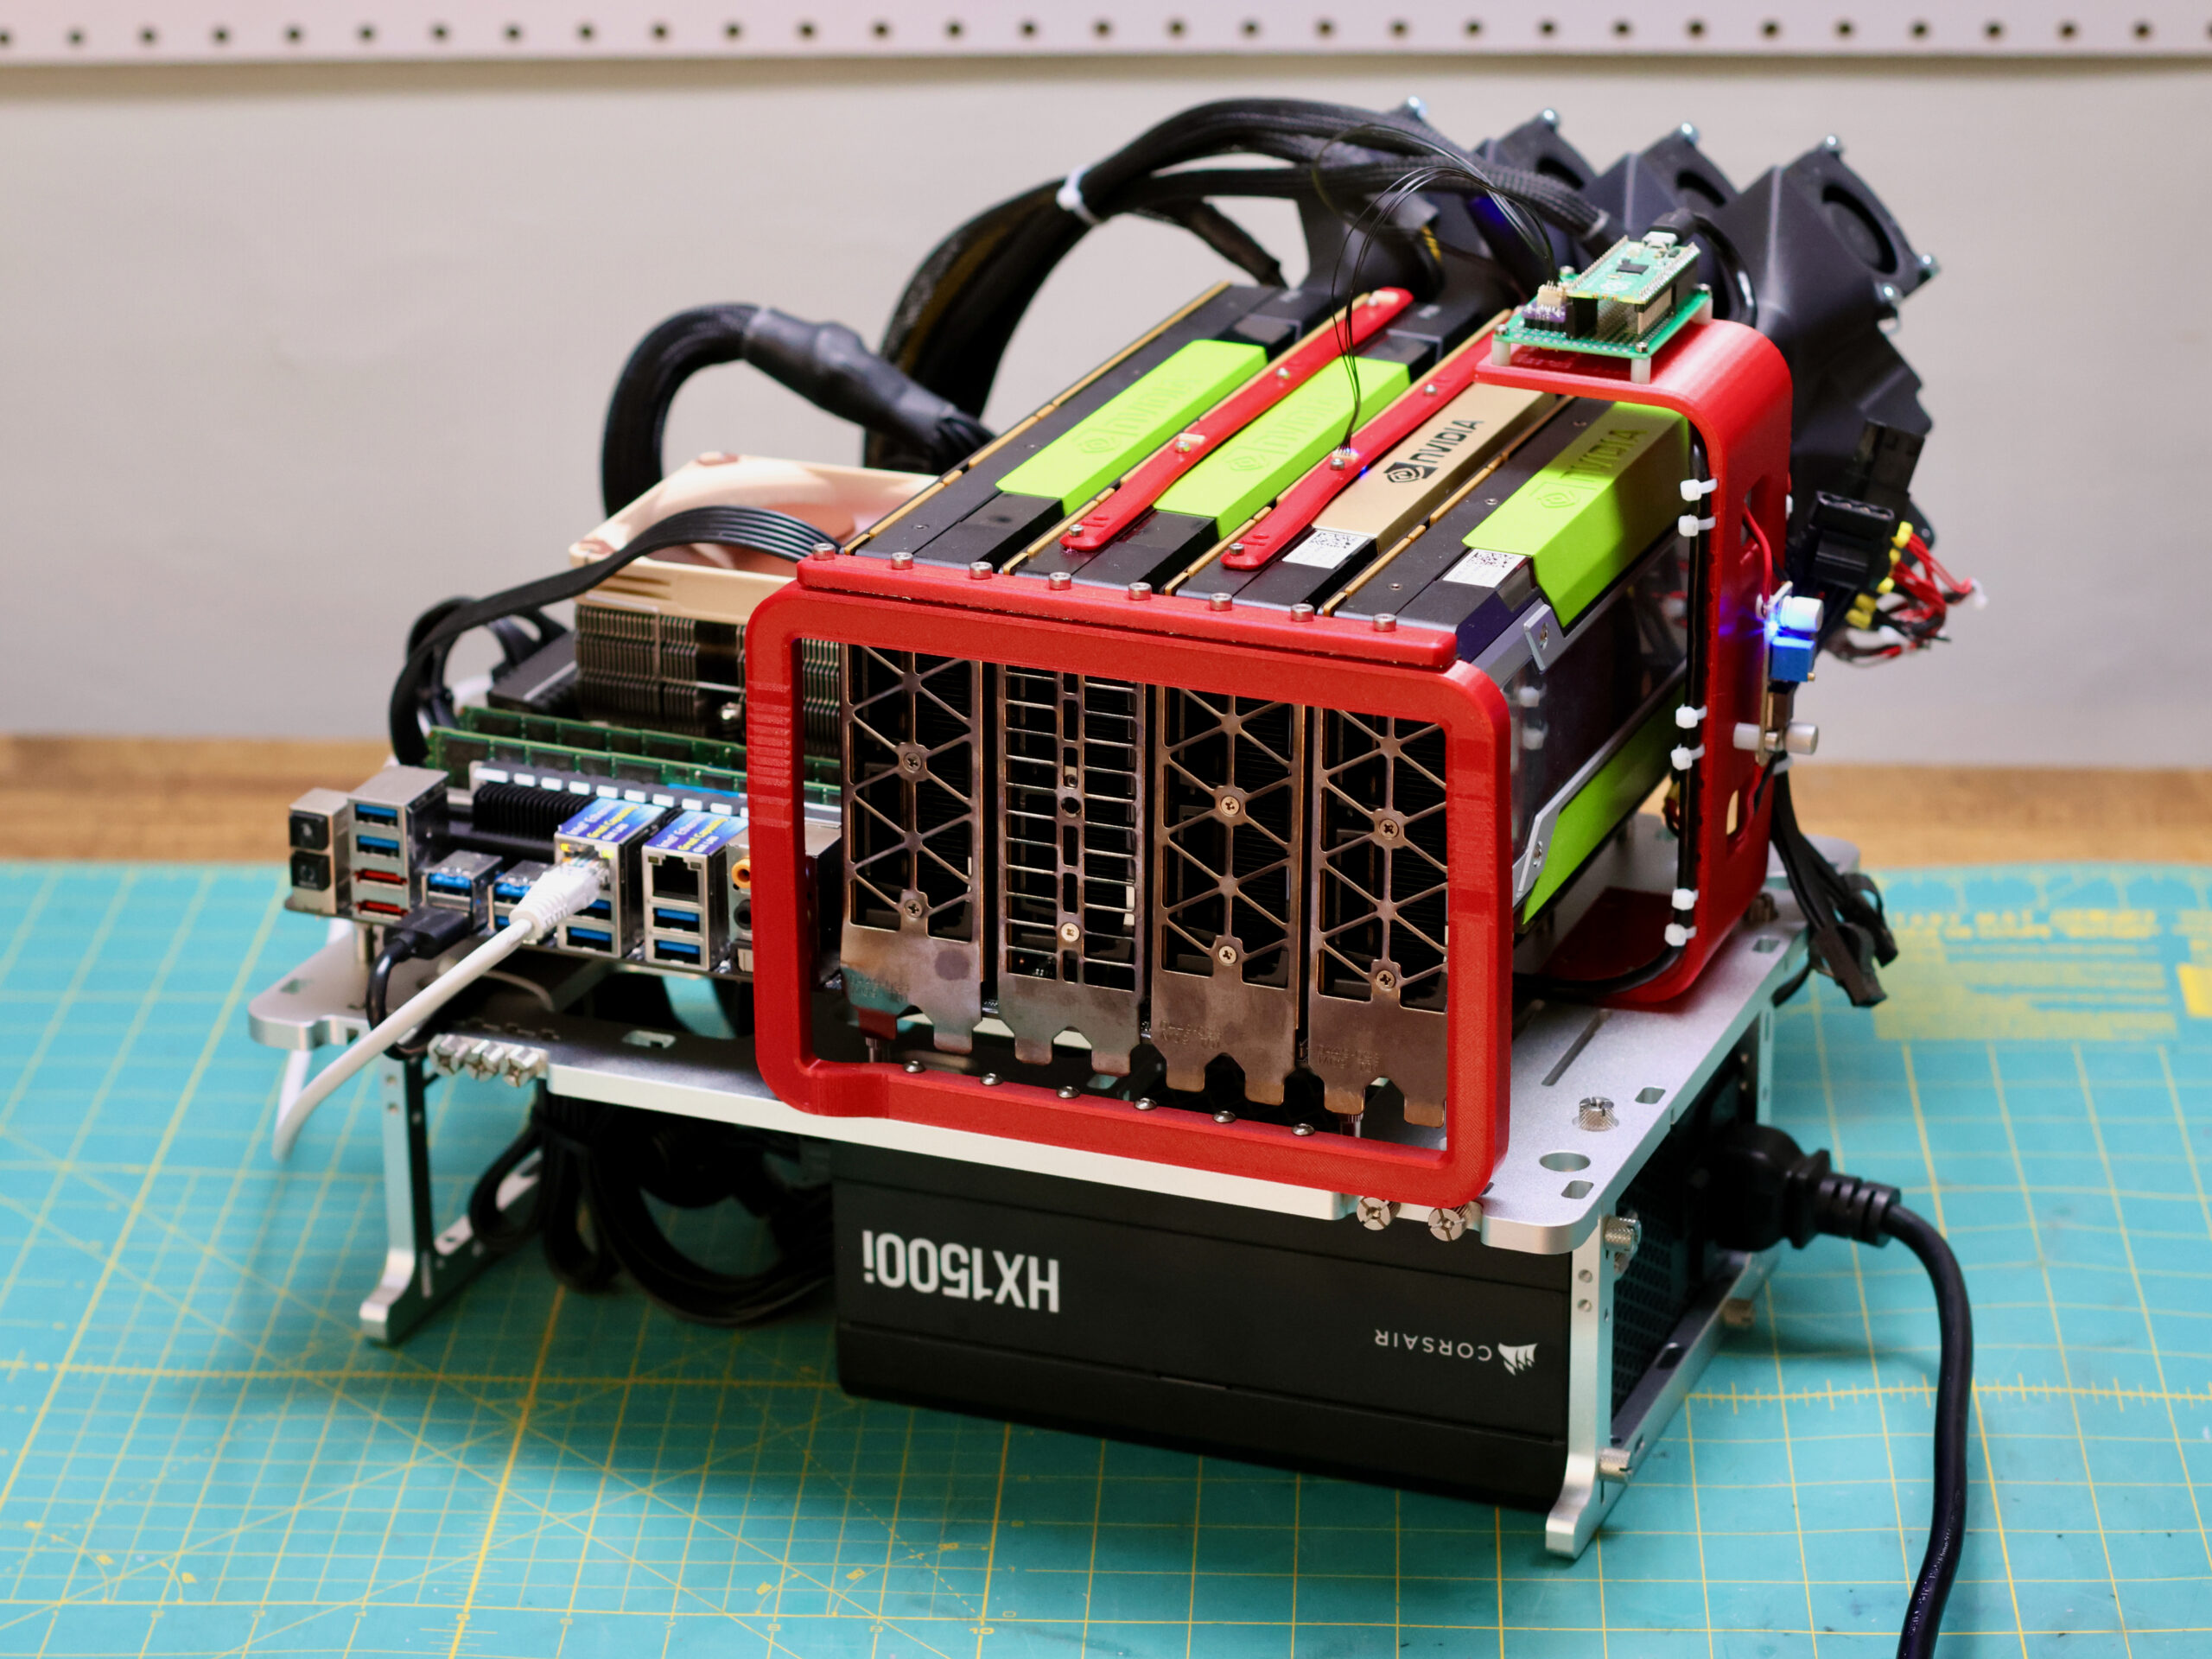
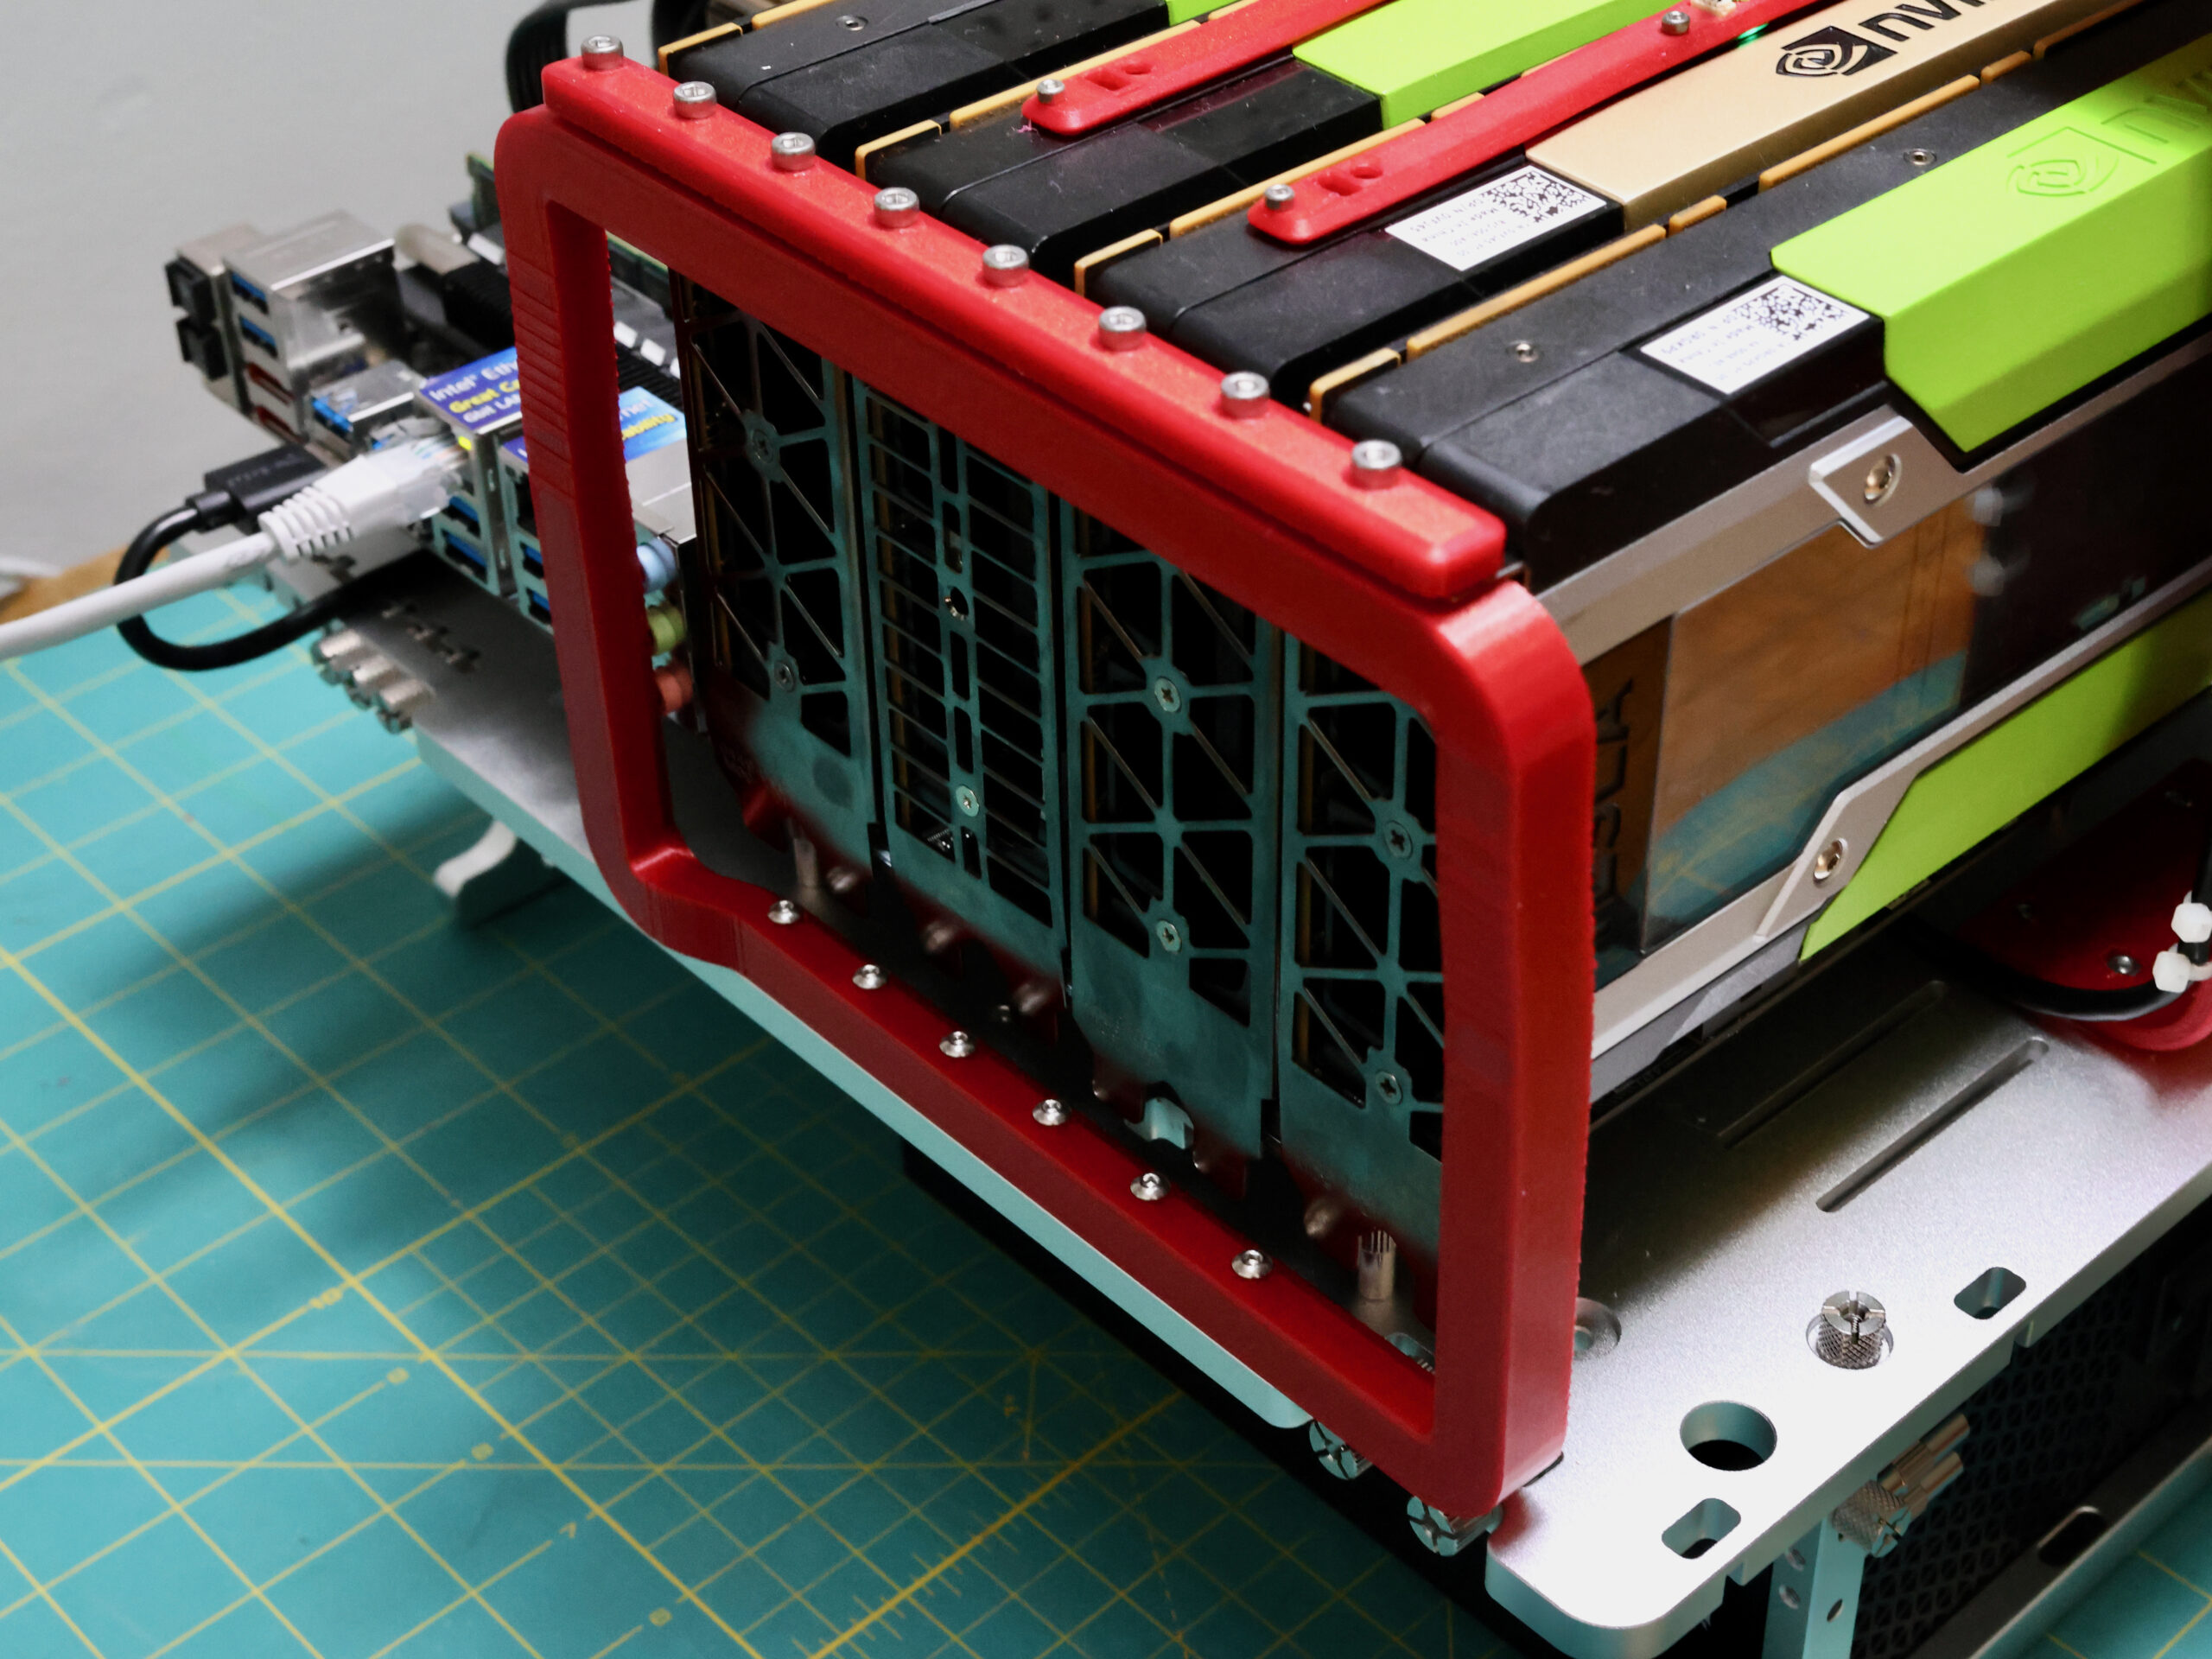
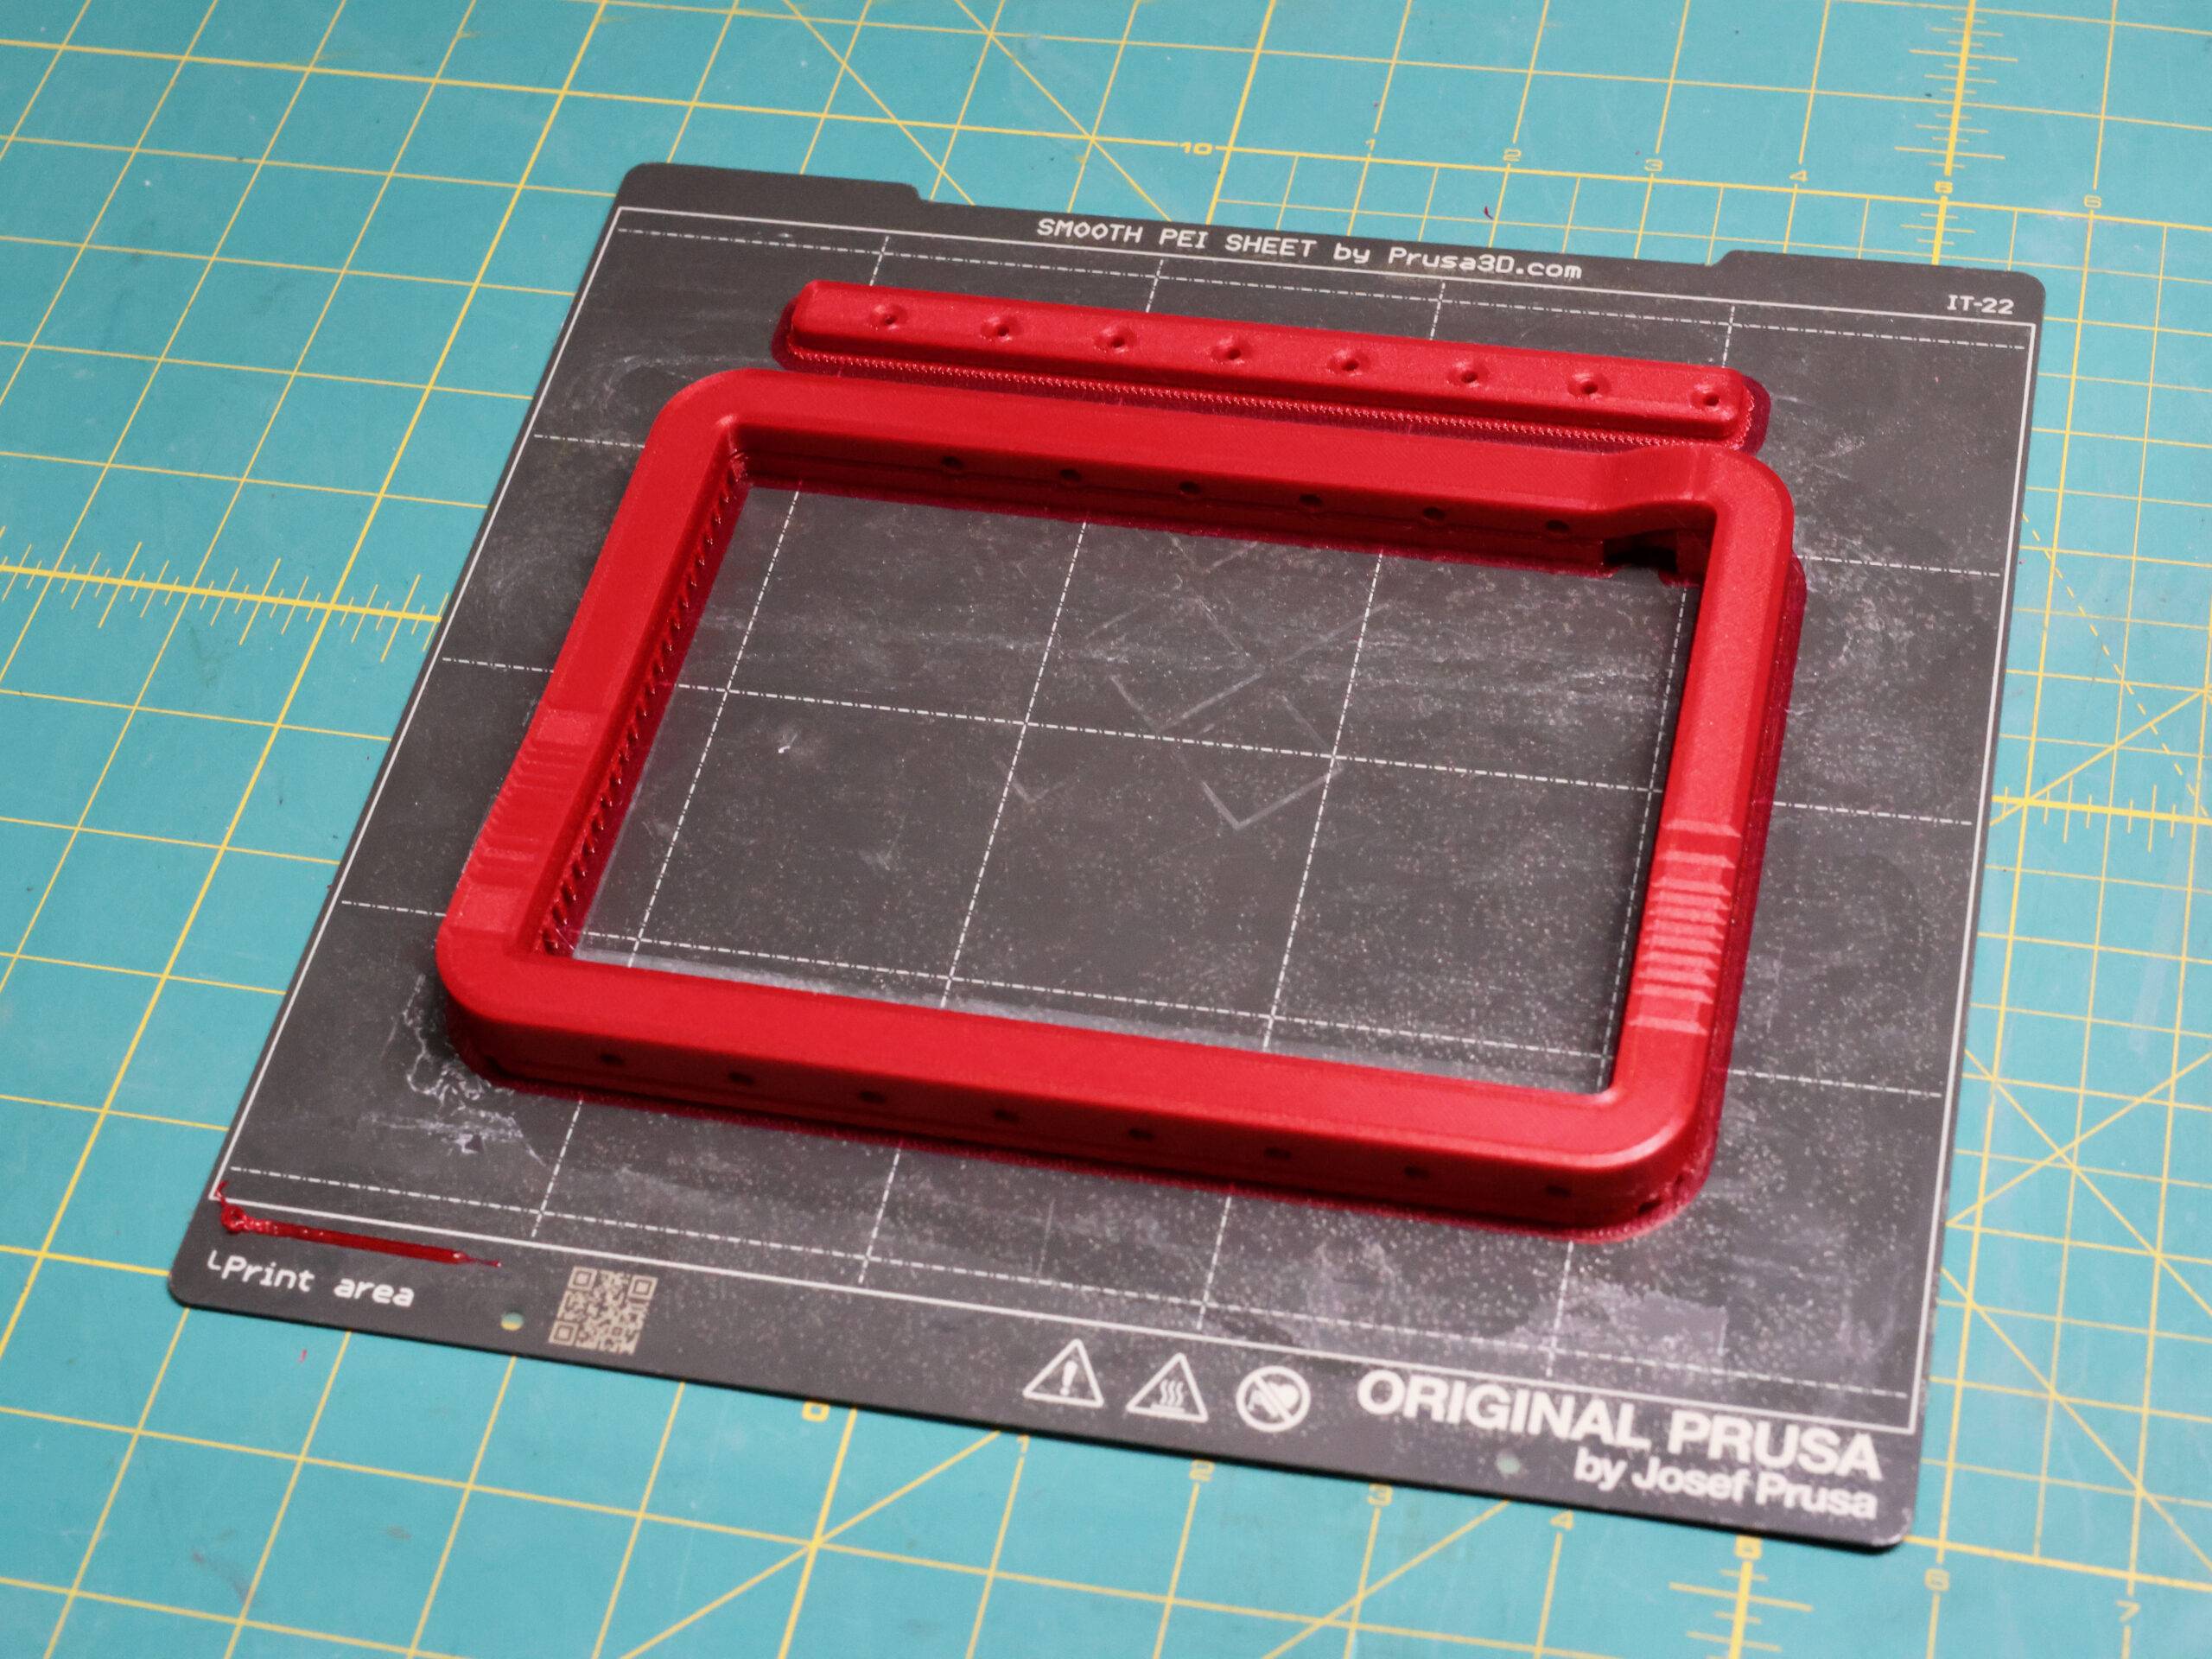
The actual “project” here is the 3D printed PCIe bracket mount. Printed in PETG, this piece provides a significantly more rigid mounting surface to hold the GPUs in place. The OpenBenchTable ships with 4 long standoffs, plenty for the normal user but in my case about half as many as I actually needed. The power cables on the GPU are stiff, and want to yank the cards towards eachother. The result is the PCIe rod forms a long moment arm and the GPUs can easily wiggle around, potentially shorting out on their neighbor. The printed piece keeps neighboring cards separated and rigidly held in place.

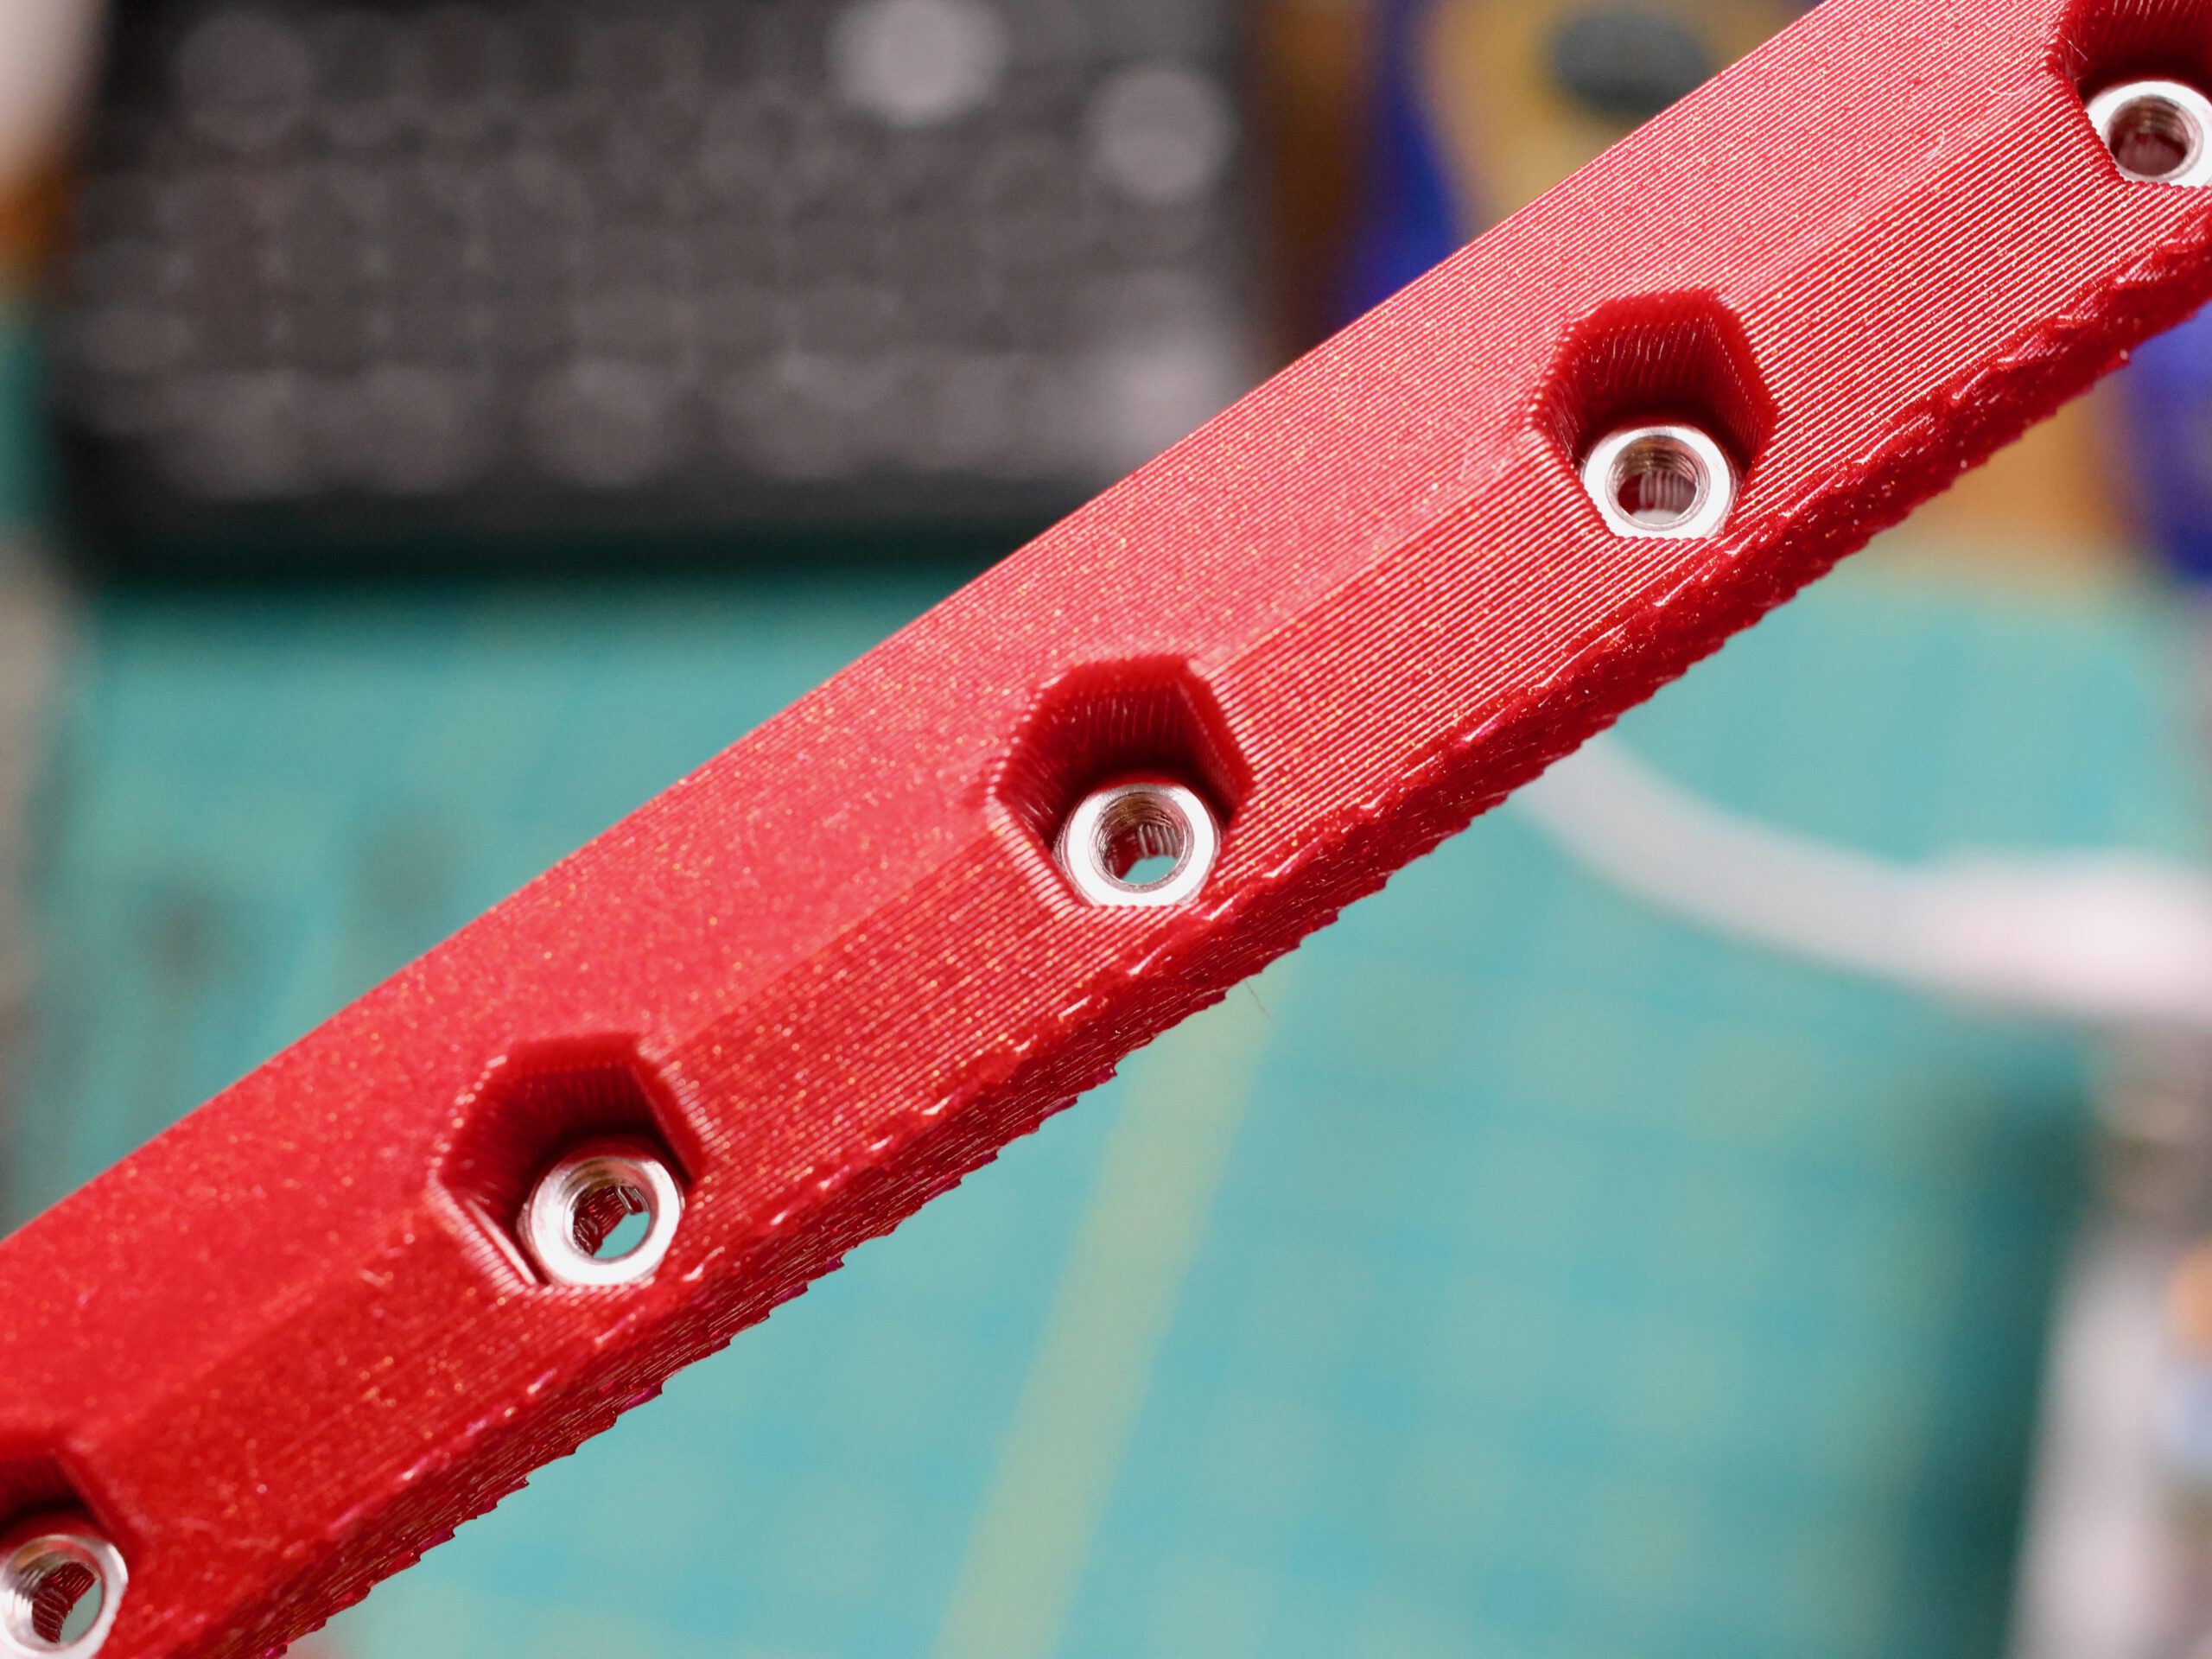

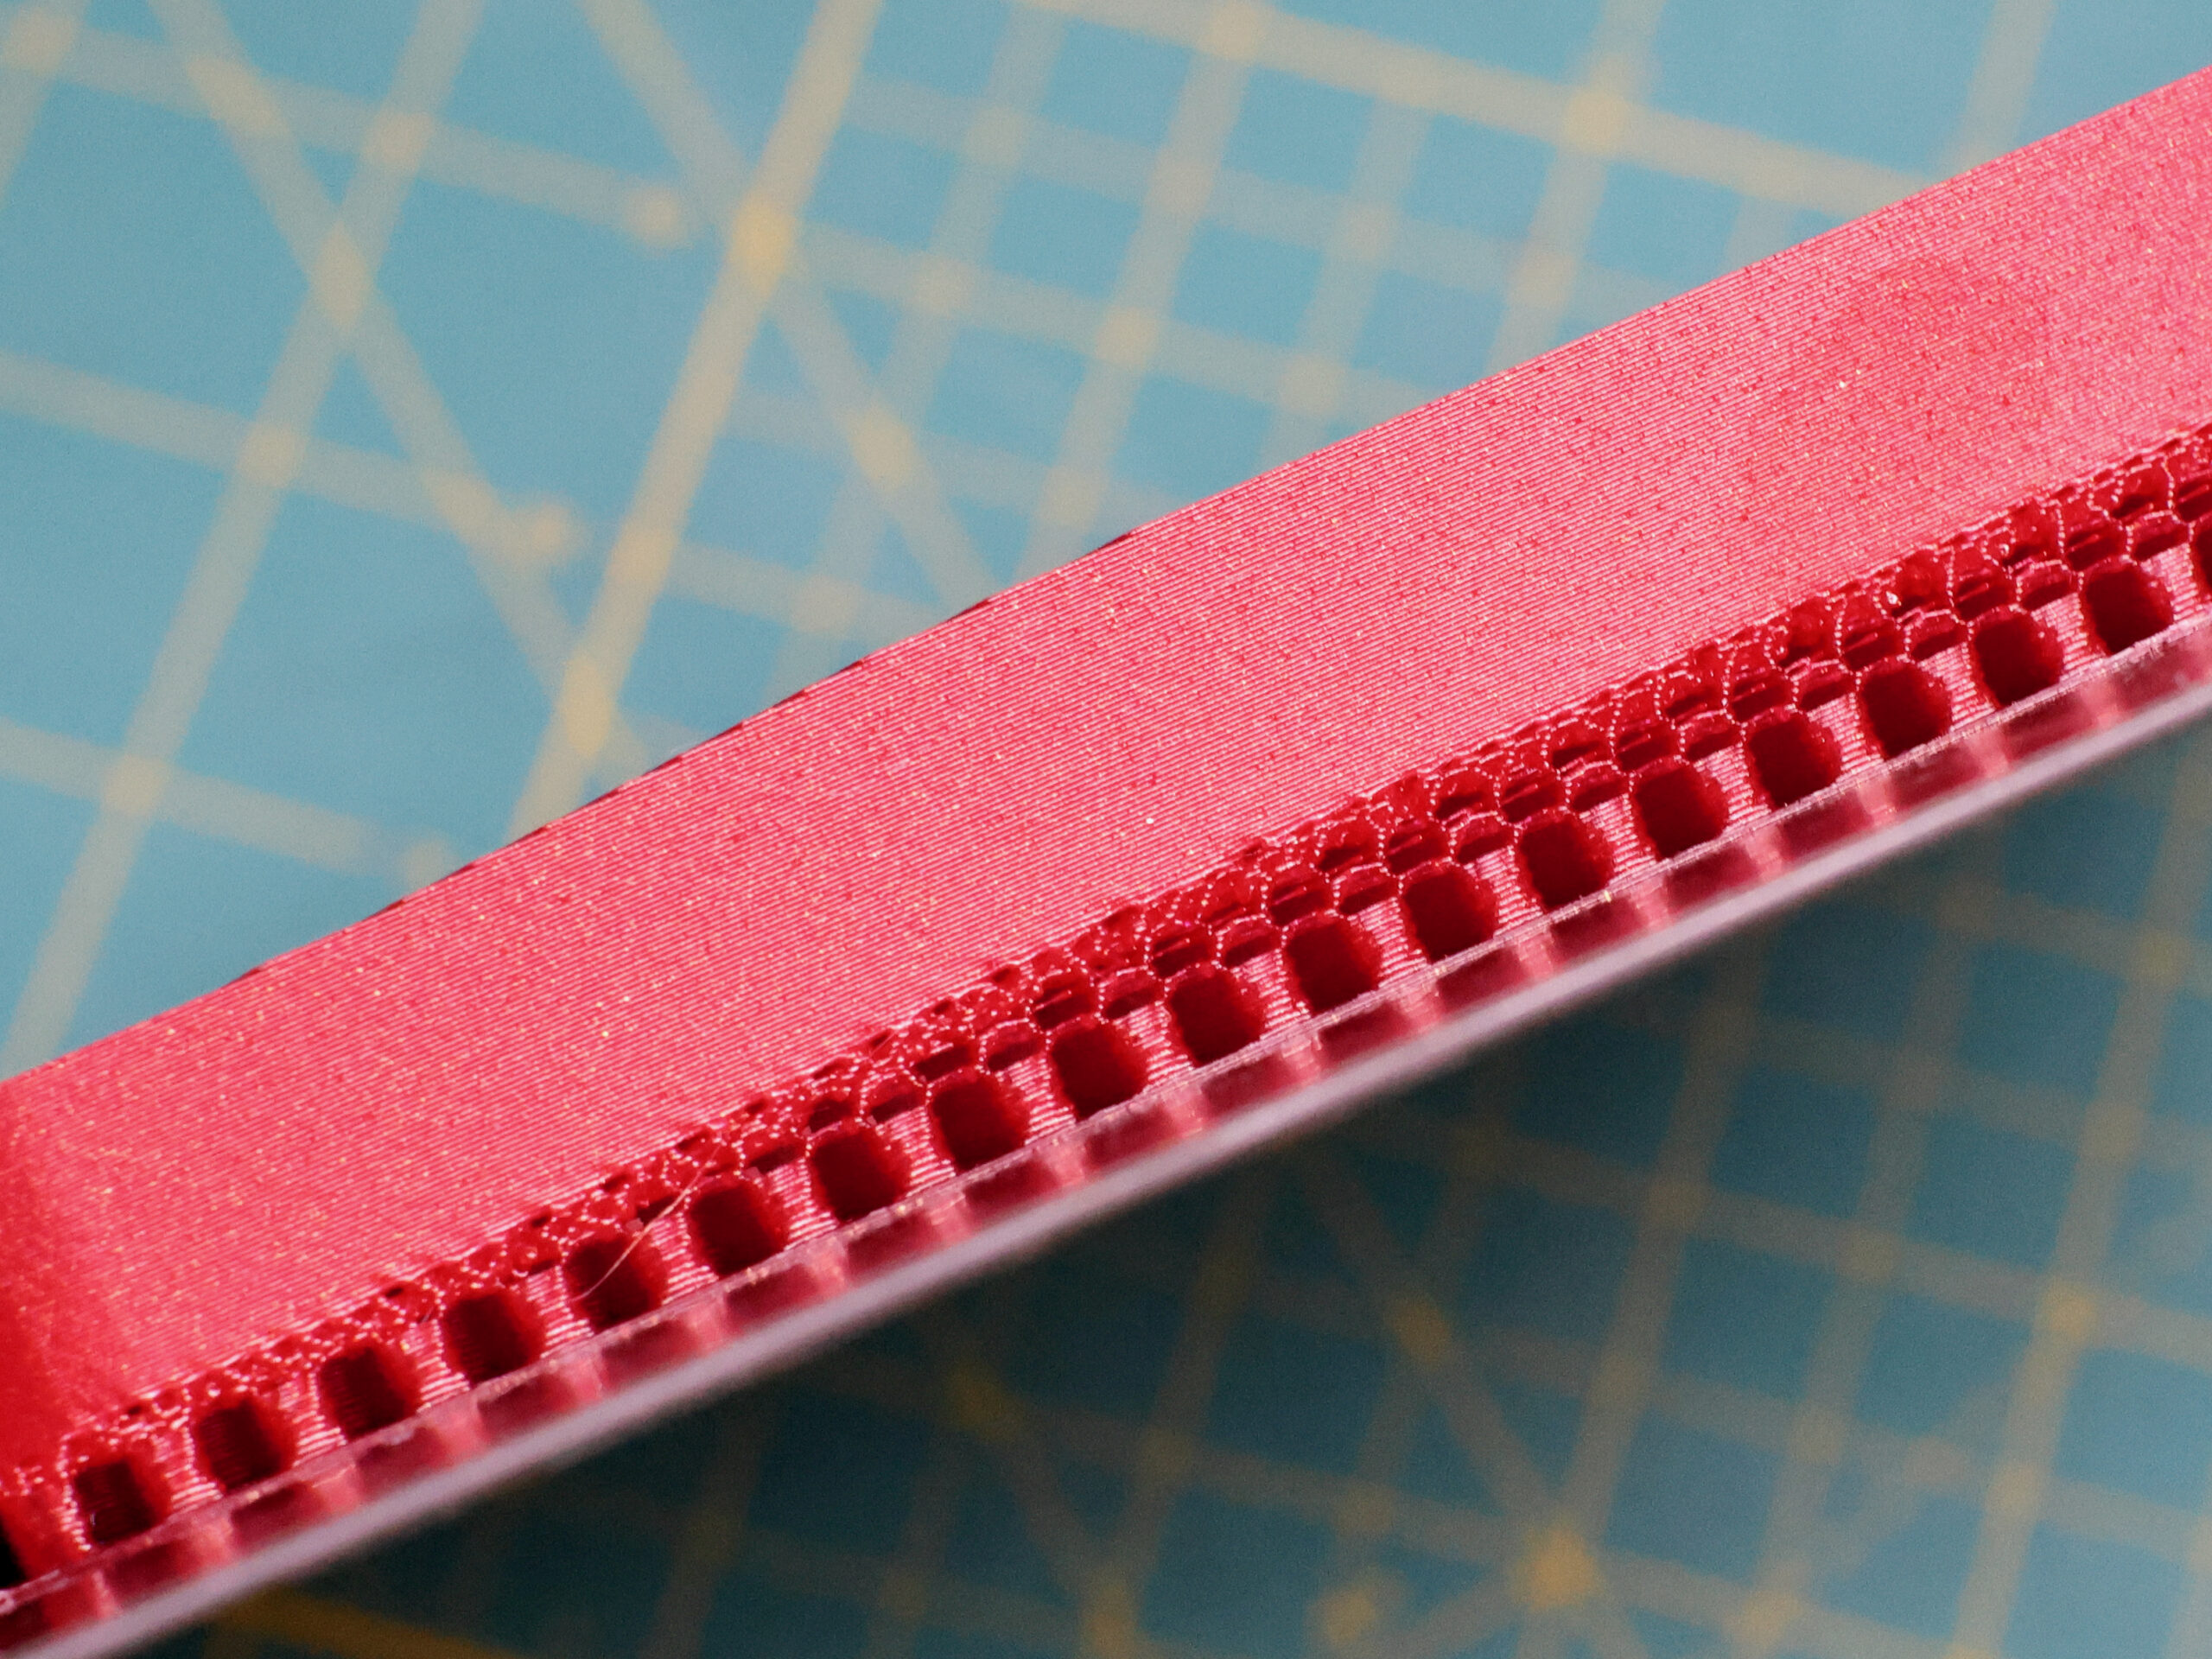
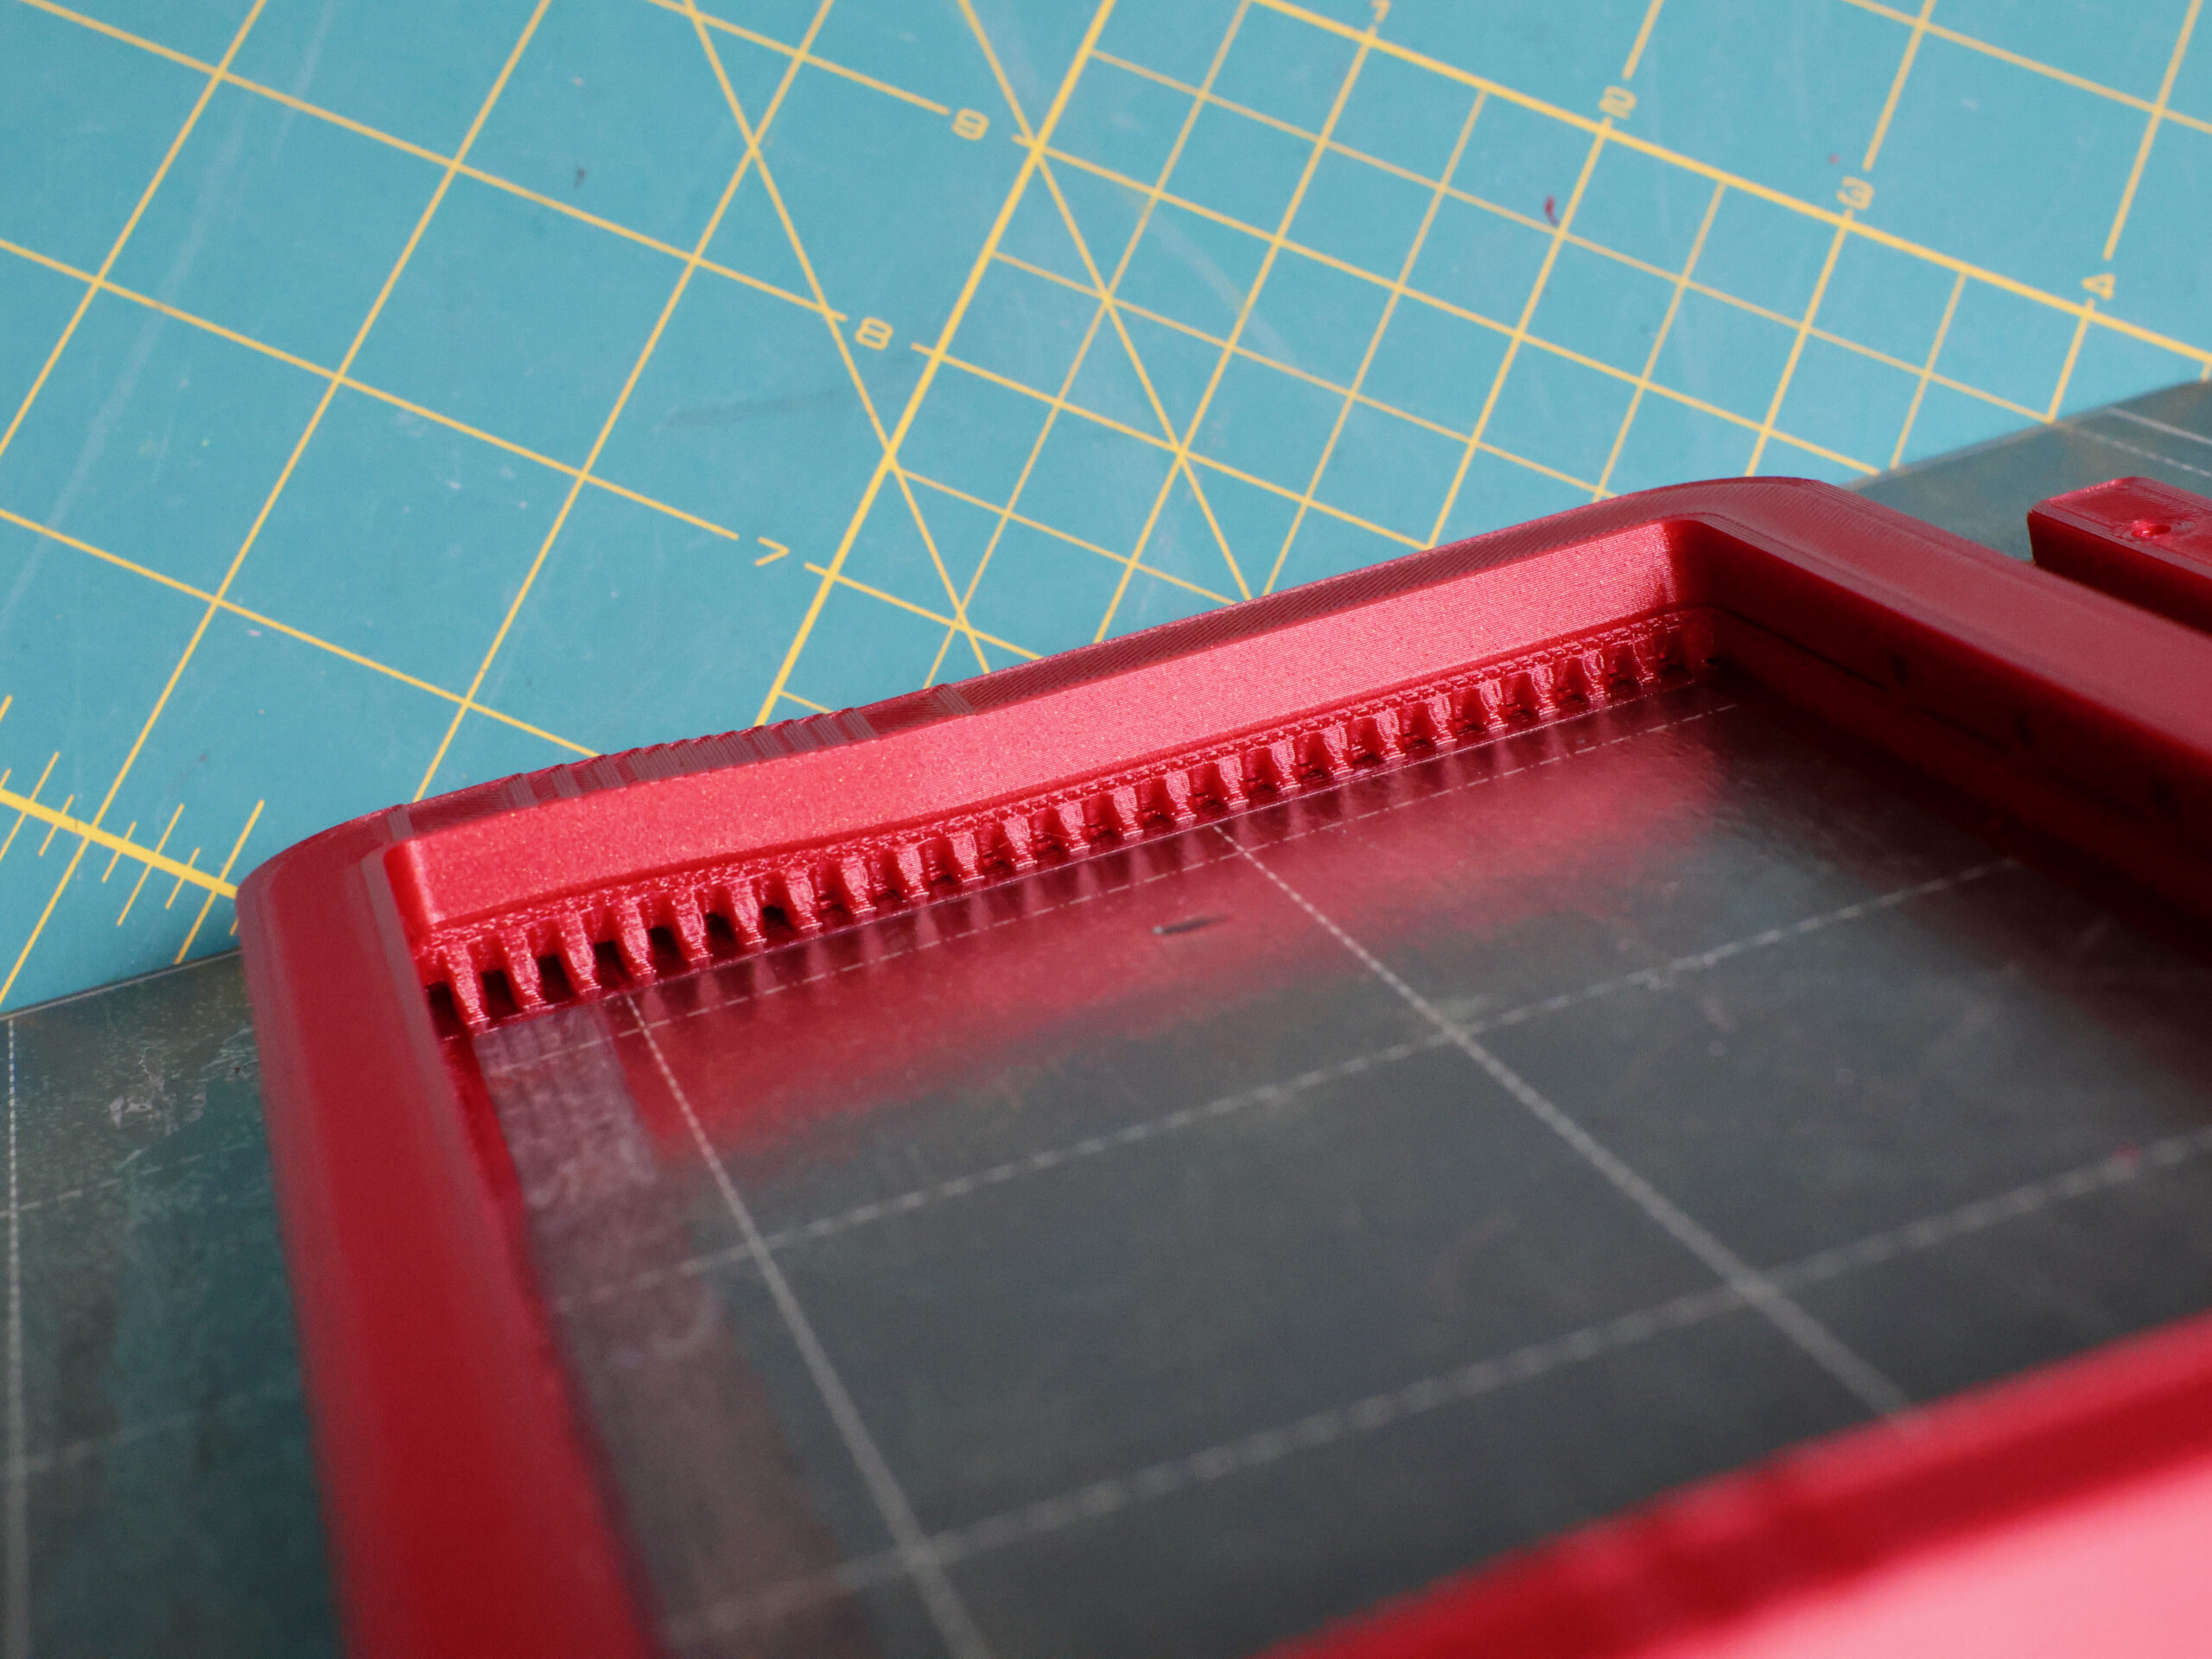
Like in pretty much all of my printed assemblies recently, I opt for nut pockets rather than threaded inserts here to keep things clean. When it’s quiet at night, I can hear my collection of hundreds of threaded inserts crying out from their parts bin on my shelf, pleading for attention. Eventually they’ll get used, but the nut pocket technique hasn’t let me down so far.
Honestly though, having now manufactured and assembled this piece, printed threads would probably do the job here.
I’ve published this part on printables. It’s great that the STEP file for OBT v2 is available to build off of. I’m extremely happy to spend more on any hardware product that comes with design files.
The BOM is really simple for this part:
- 18mm M3 bolts for fixing the bracket to the OBT
- 12mm M3 bolts and M3 nuts for fixing the GPU to the bracket.
Pico + Coolers
You’ll notice a Raspberry Pi Pico mounted above the GPUs connecting to sensors on the outer surface of the center two cards. Maybe you’re also wondering about the 12 fans nested behind the cards as well.
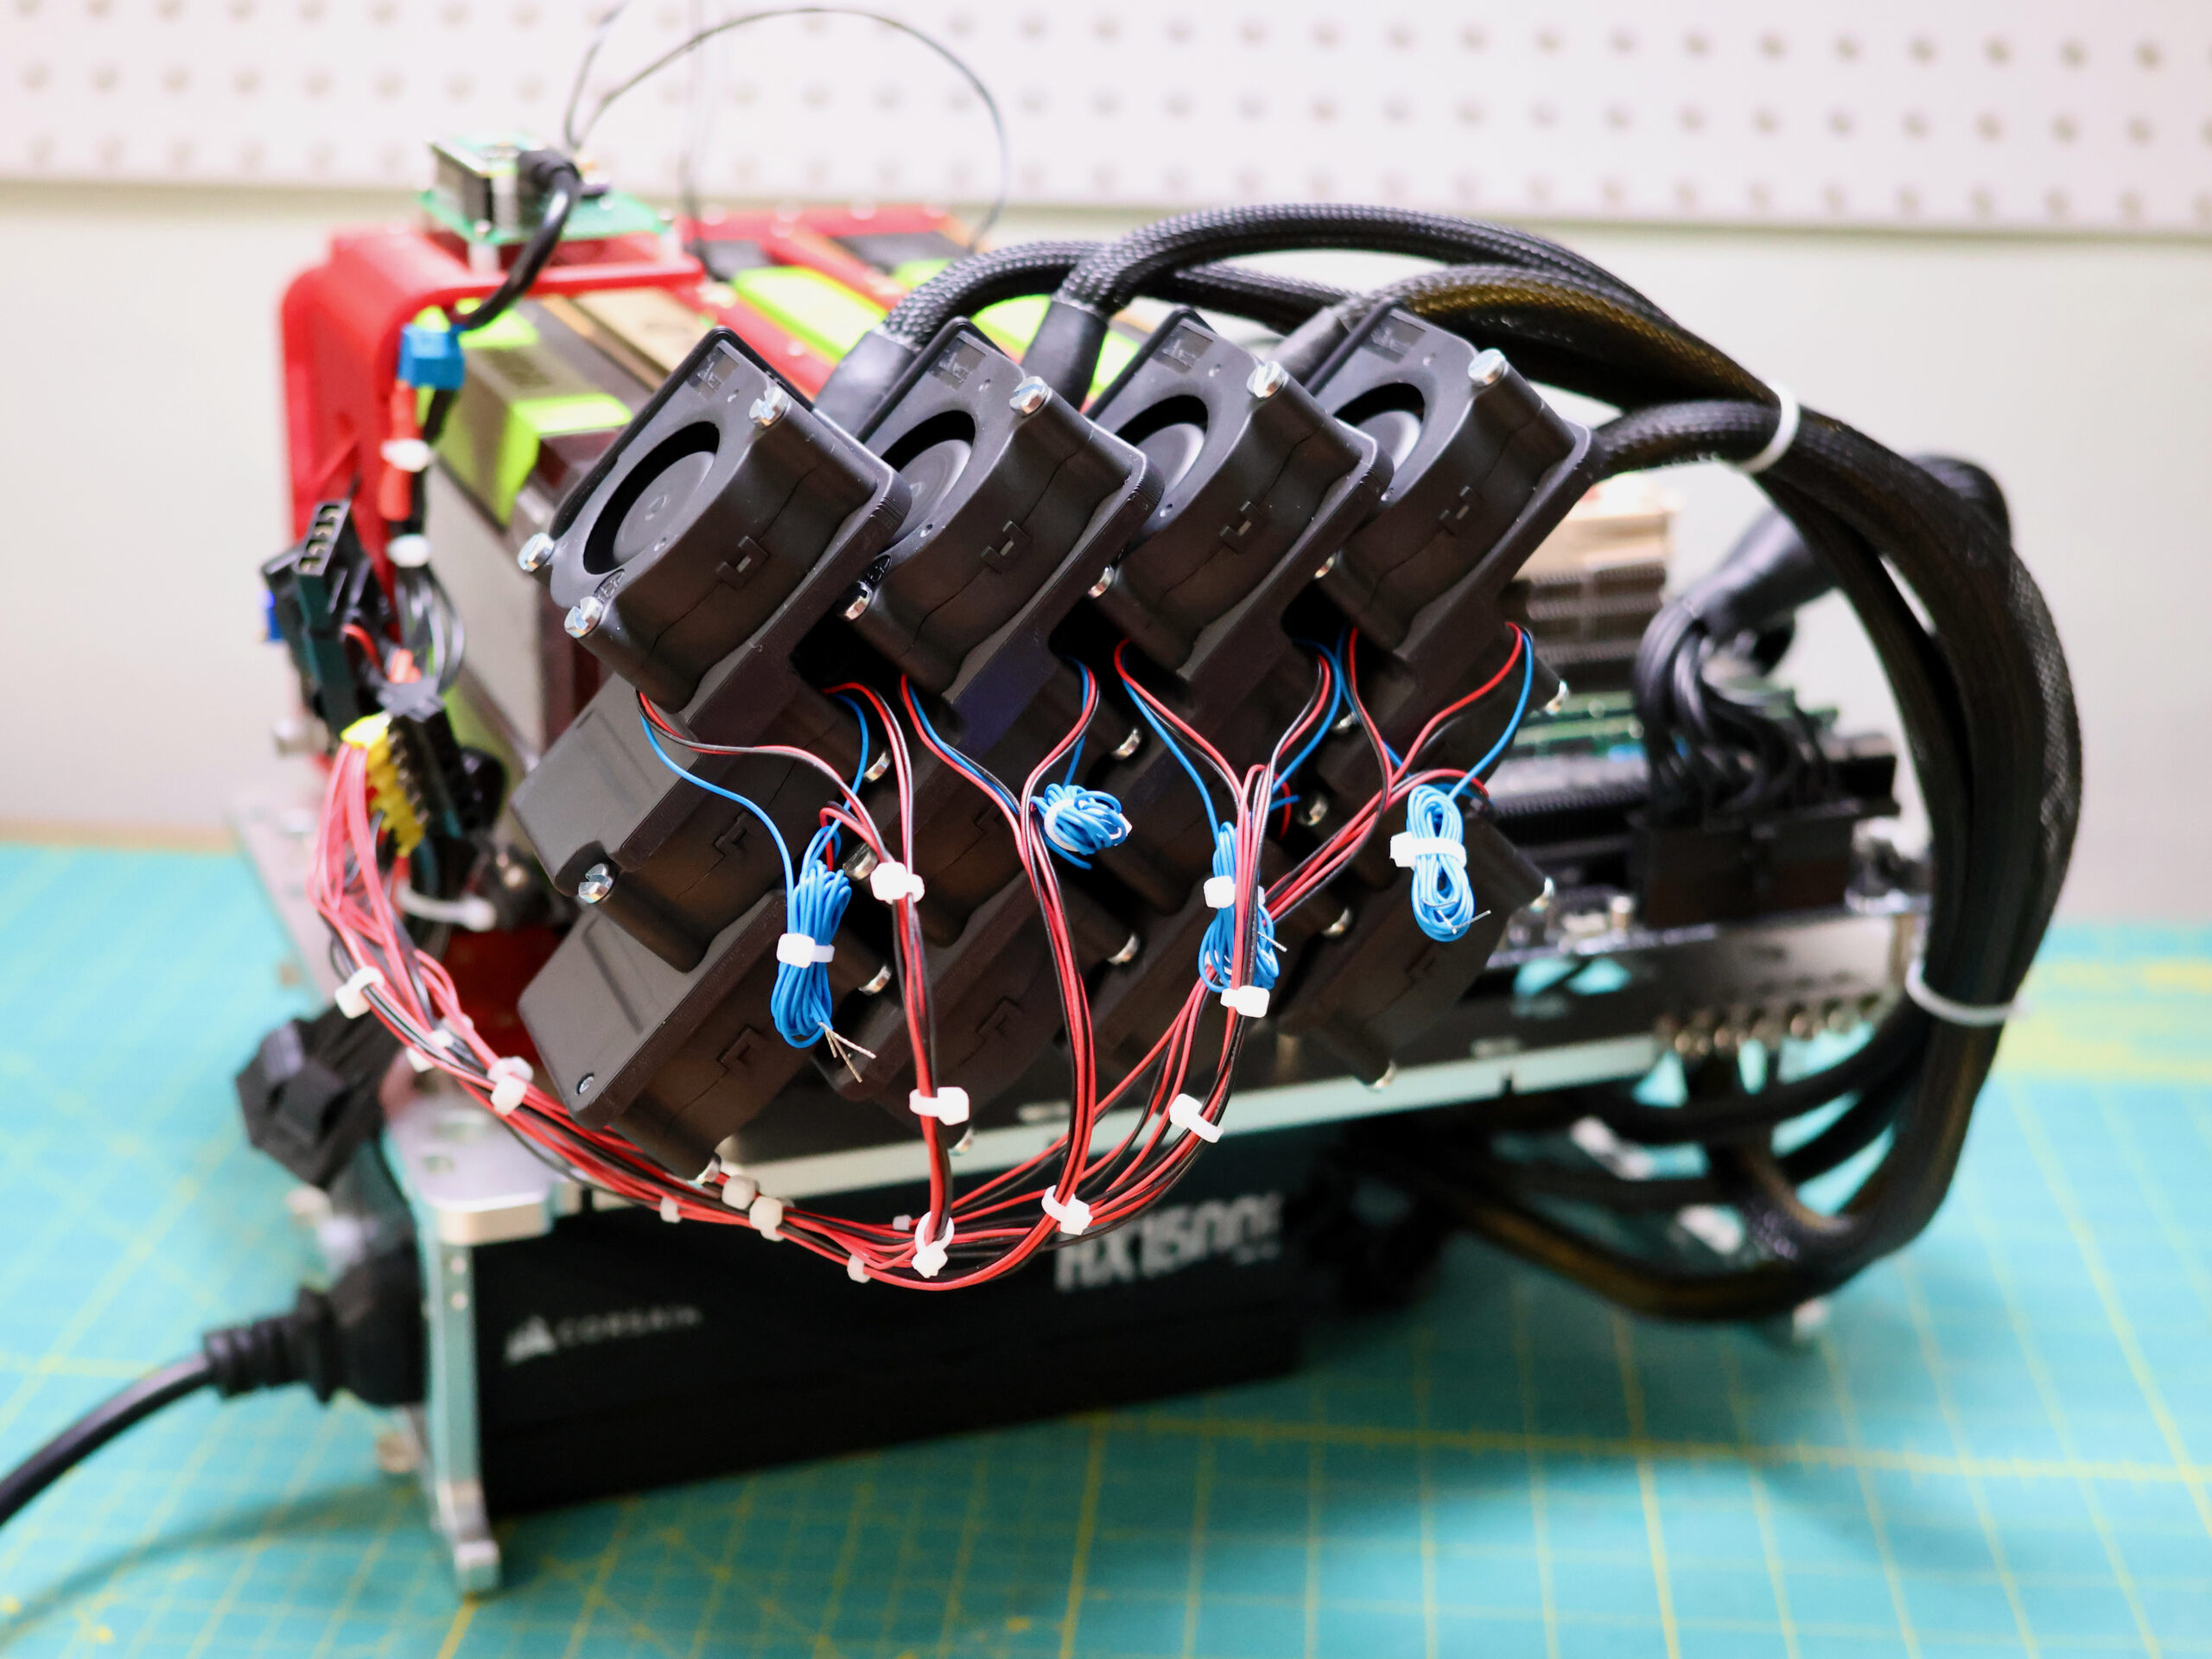
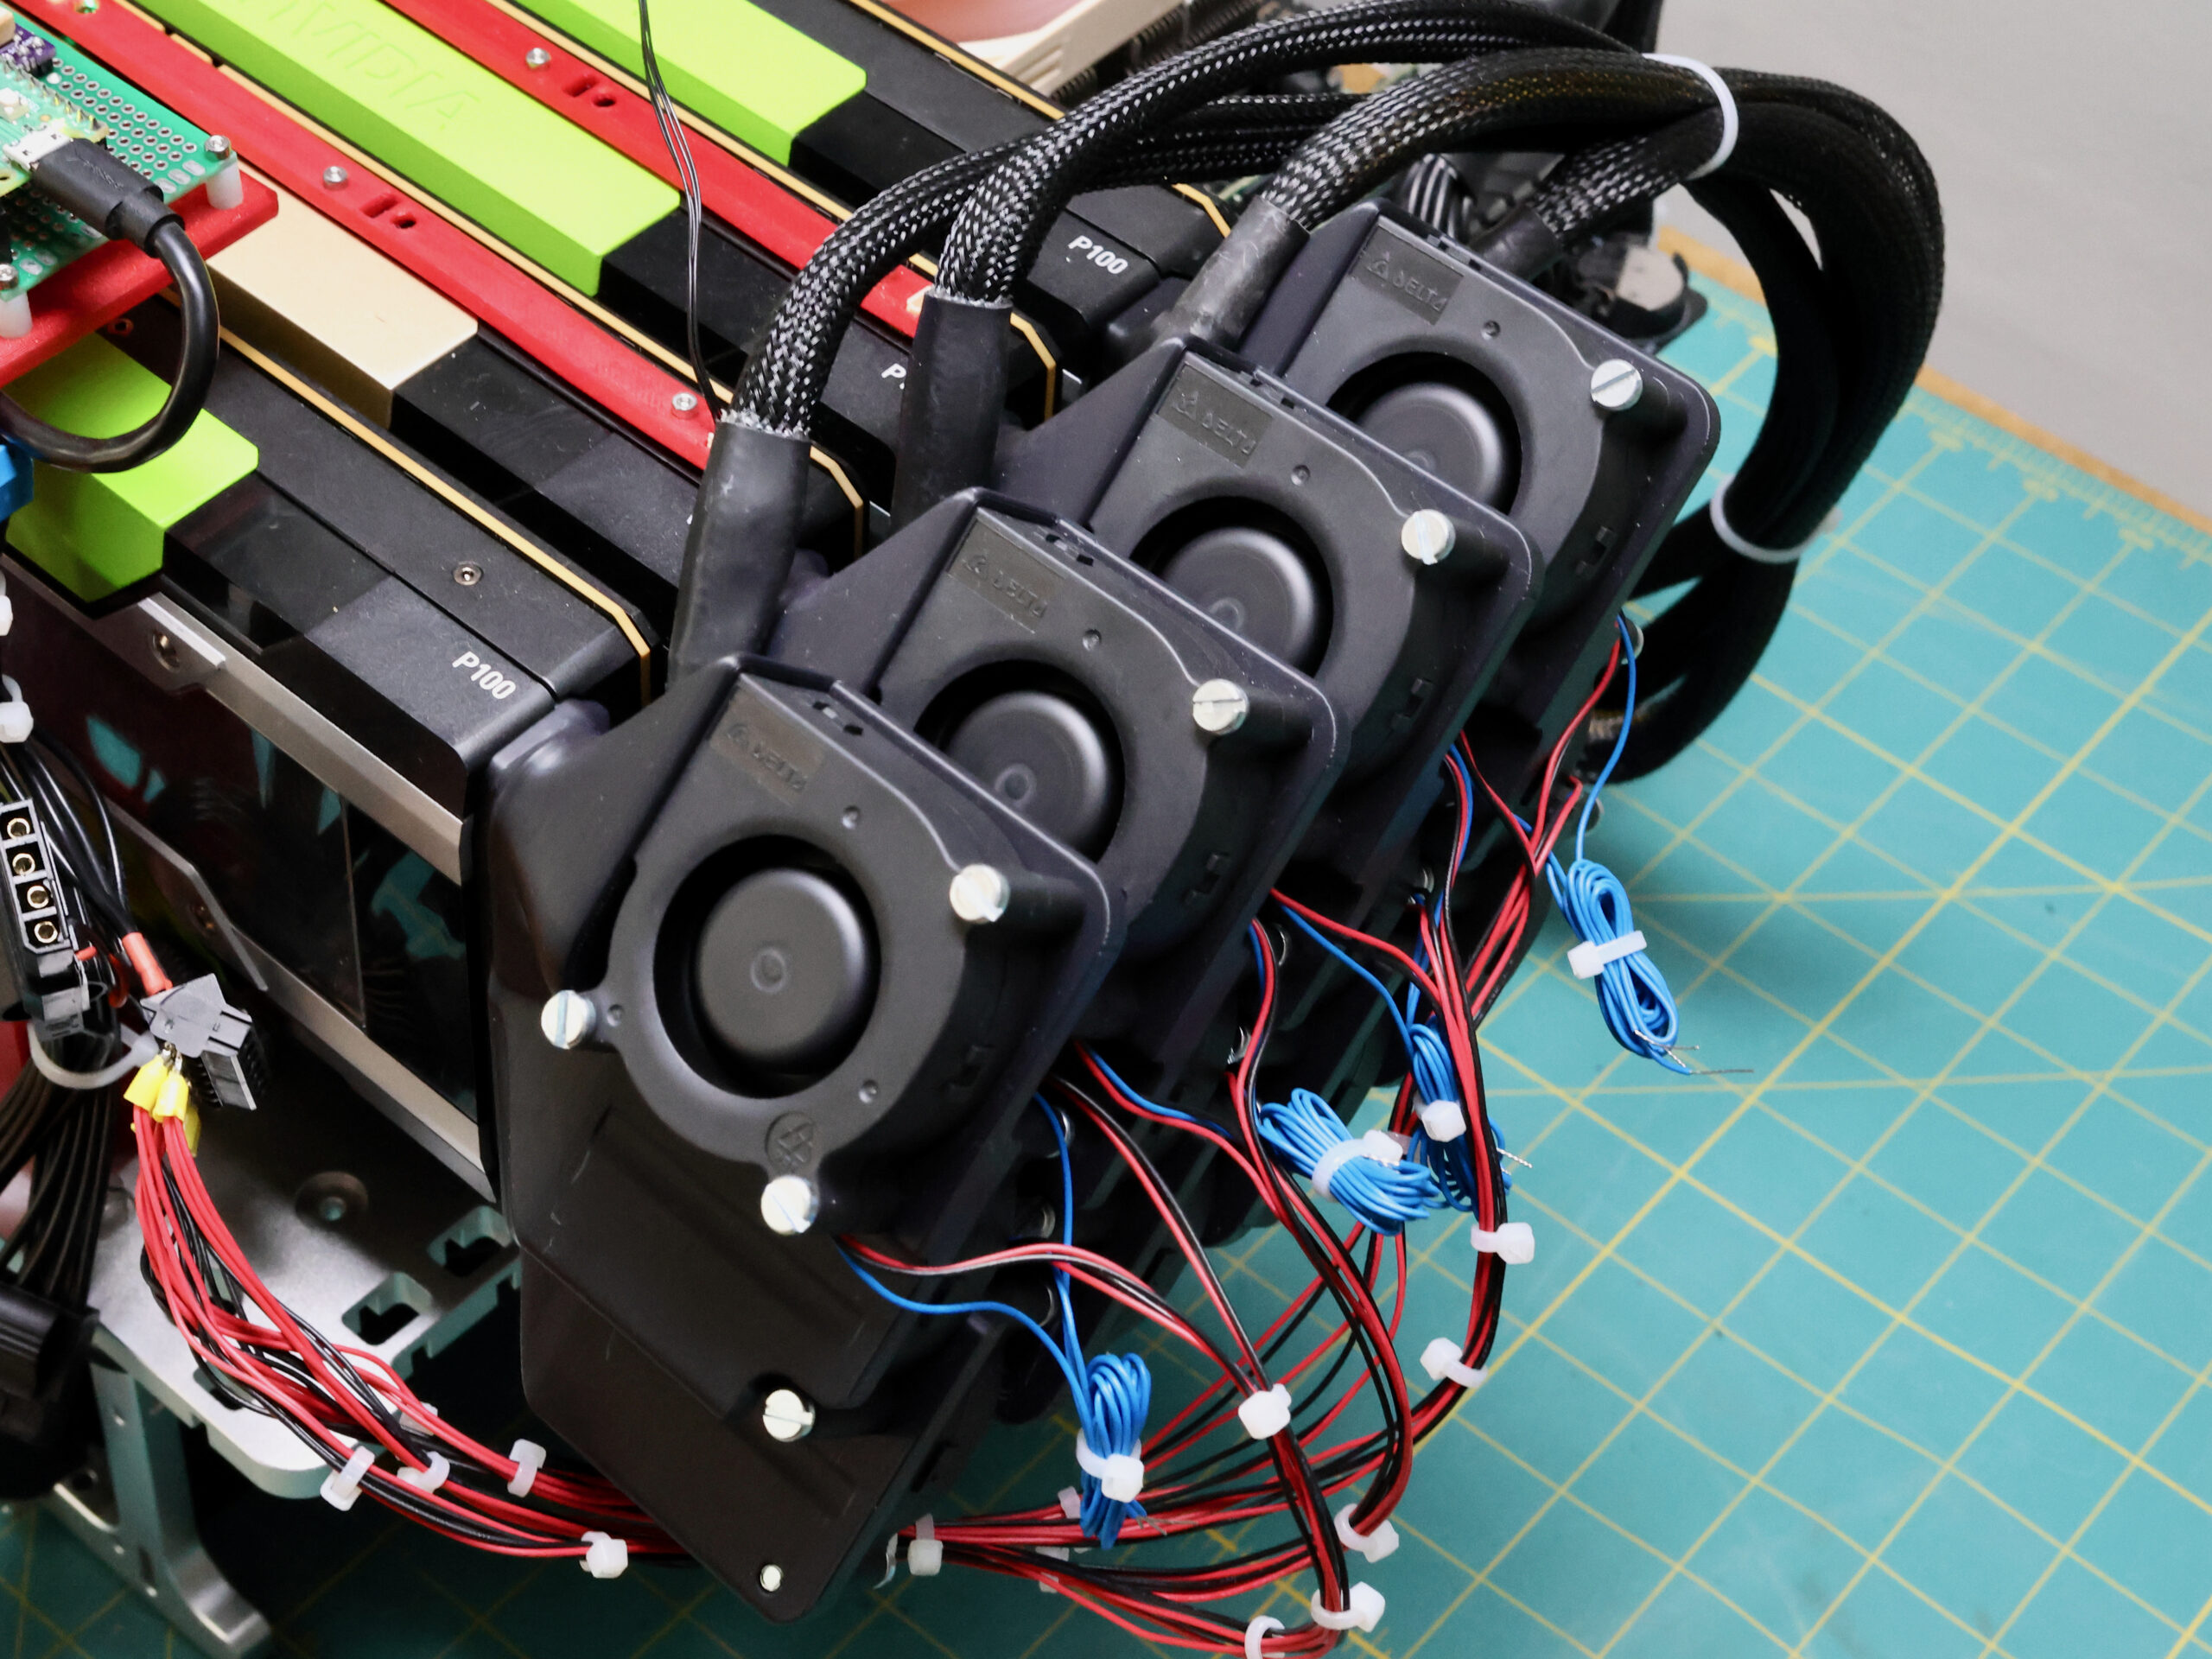
This whole system is related to another project, a follow up to my tesla cooler project from 2021. The interest from readers and my personal interest in that project has accelerated over the years initial publication, and I’ve been working to release a more powerful follow up that addresses the shortcomings with the design from that post.
If that is something you’re interested in, if quietly air-cooling many accelerator GPUs is a problem you have, leave a comment, send me an email (dev@esologic.com) or follow the blog because there is going to be a lot more on this in the coming months and I need beta testers.
hi
This is a great resource. Thank you for sharing.