Raspberry Pi Wire Shelf Mount + Wallet & Keys Hold + Spool Hook

Here’s a video:

For a while I’ve been logging my favorite prints here but some of them are two small to warrant a post. So introducing: #goodprints! At first I’m going to shoot for monthly installments, but as I print more, I’ll post more.

This time we’ve got 3 prints in the above video. Here are the details:

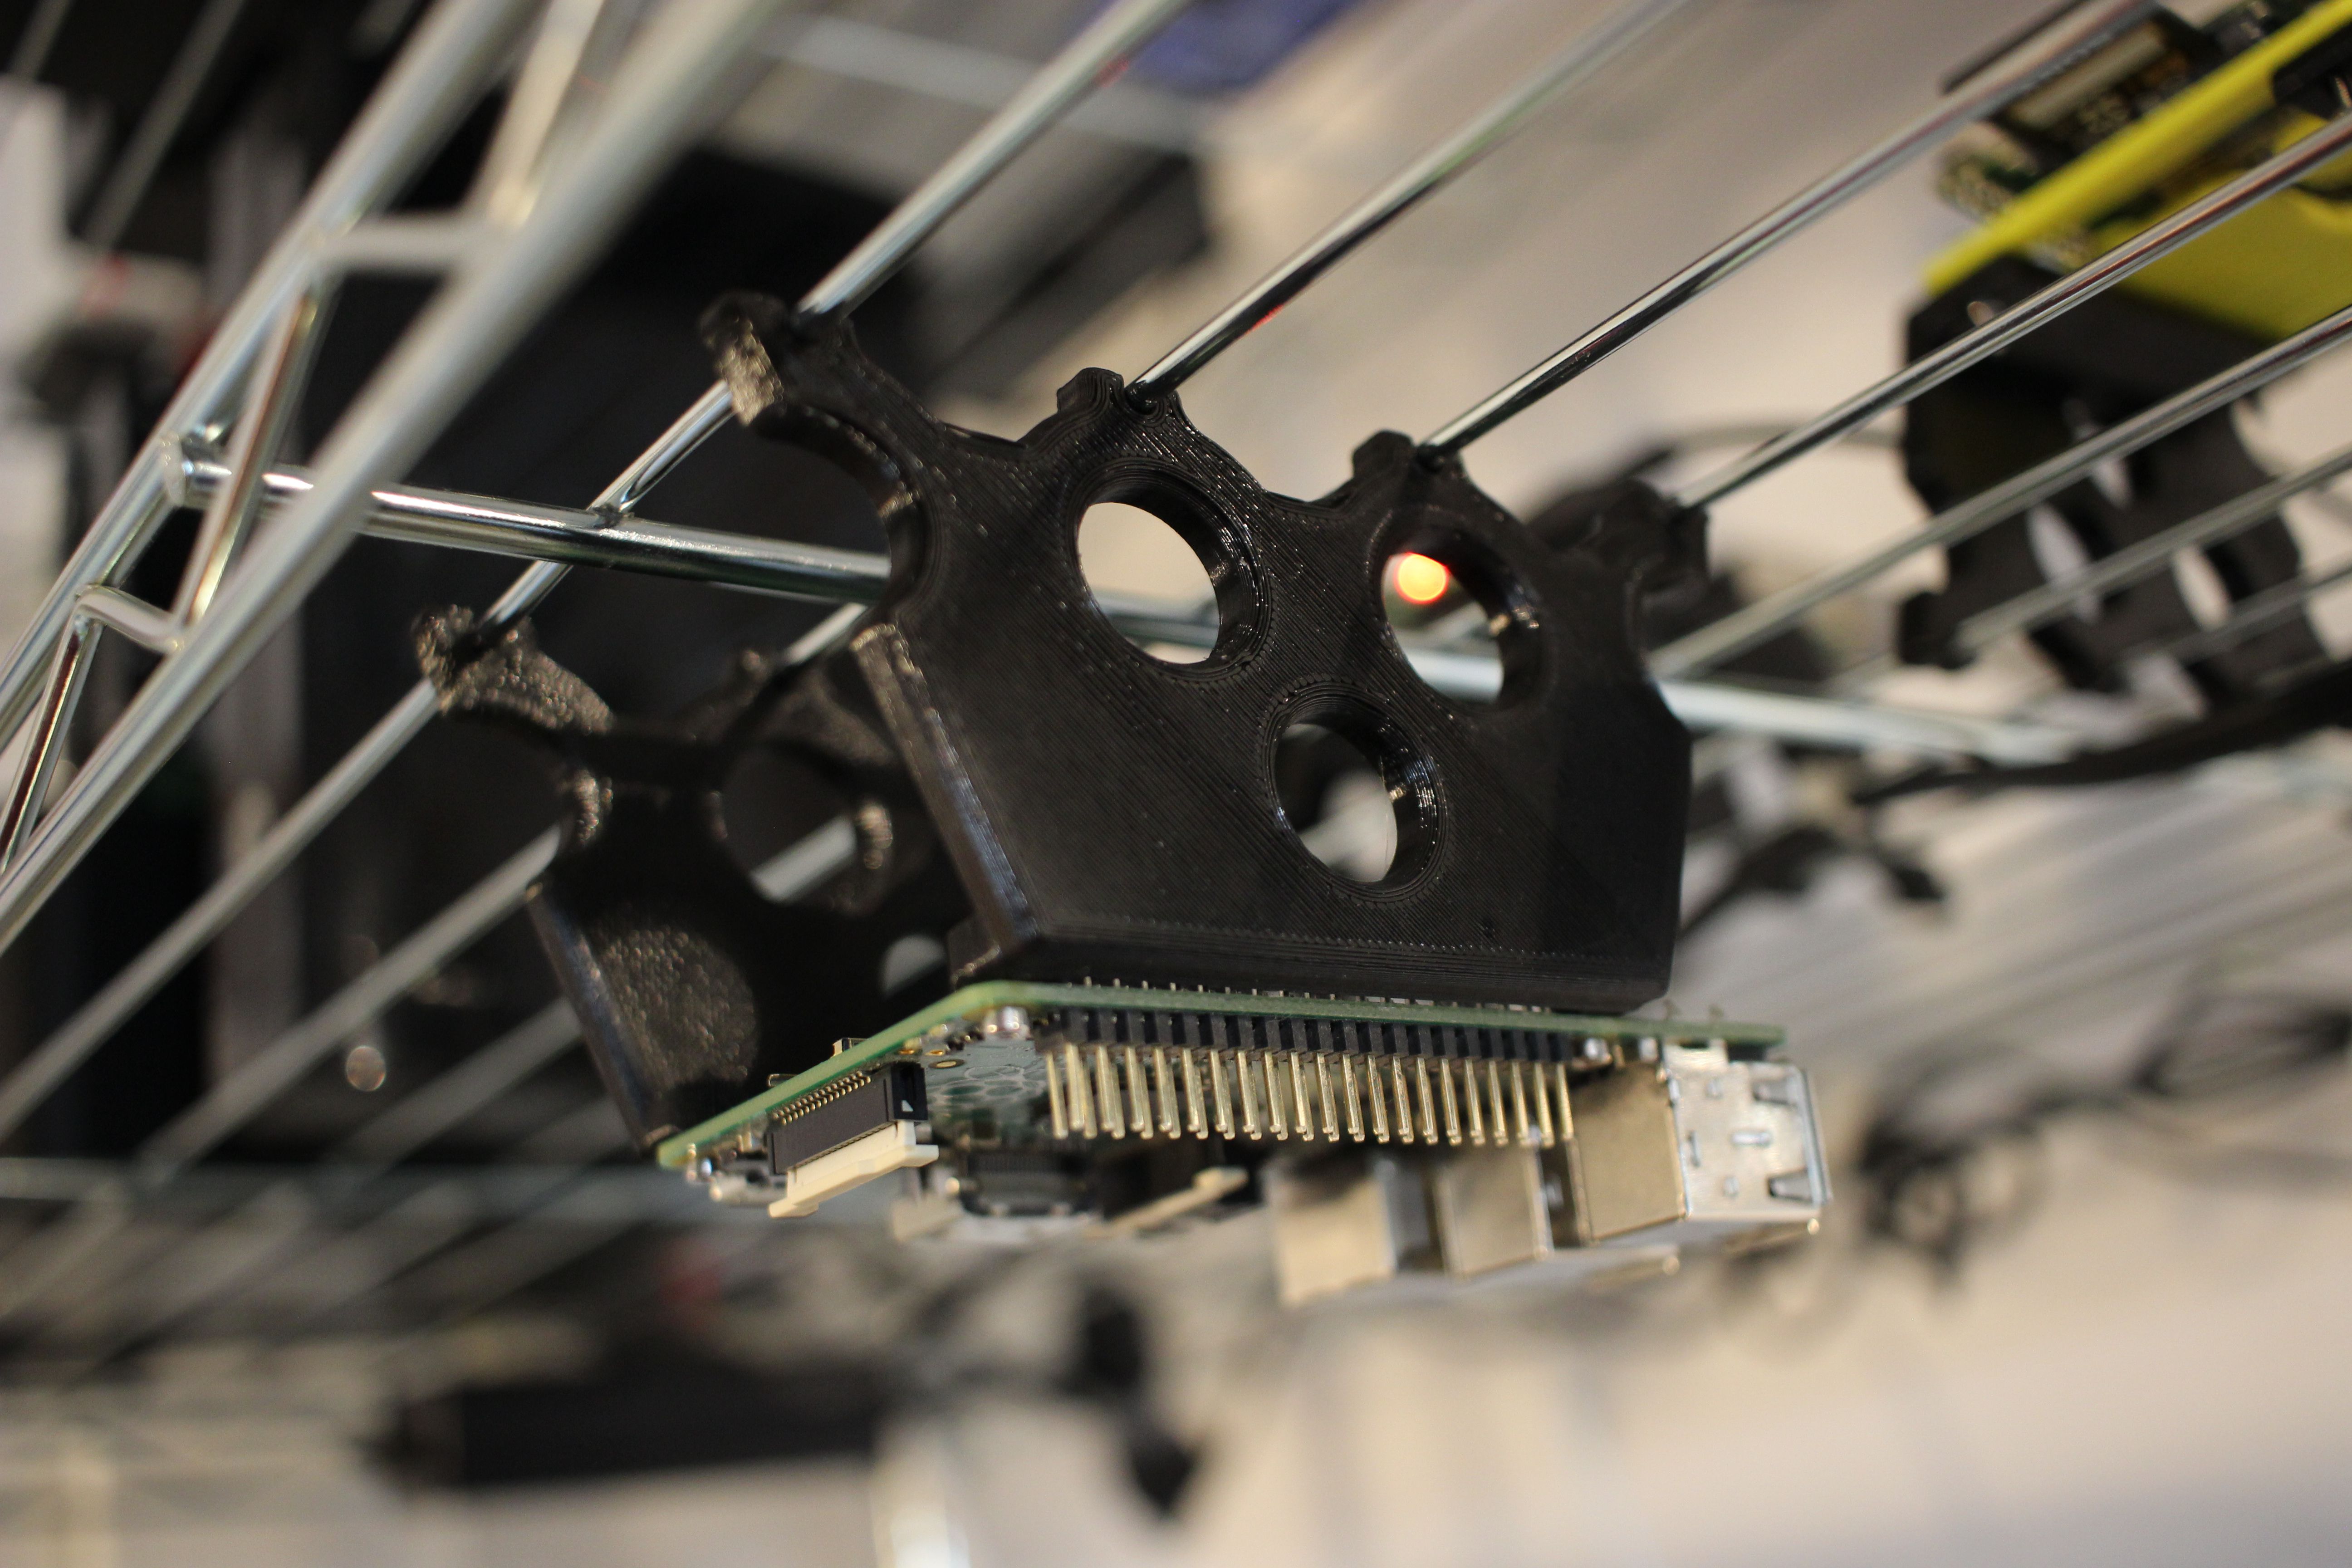
Raspberry Pi Wire Shelf Mount – Everyone knows that wire shelves are the best. Now you can securely mount a Raspberry Pi to one. Thingiverse Link

Here is the drawing for mating with the shelf:

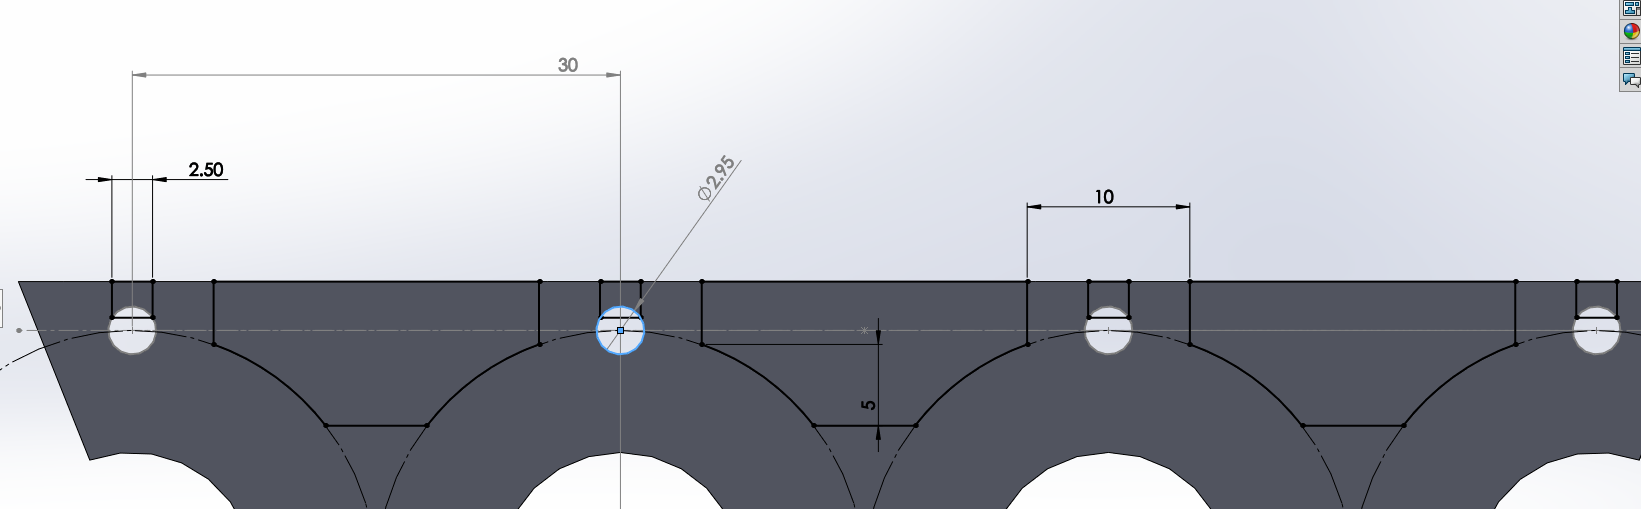
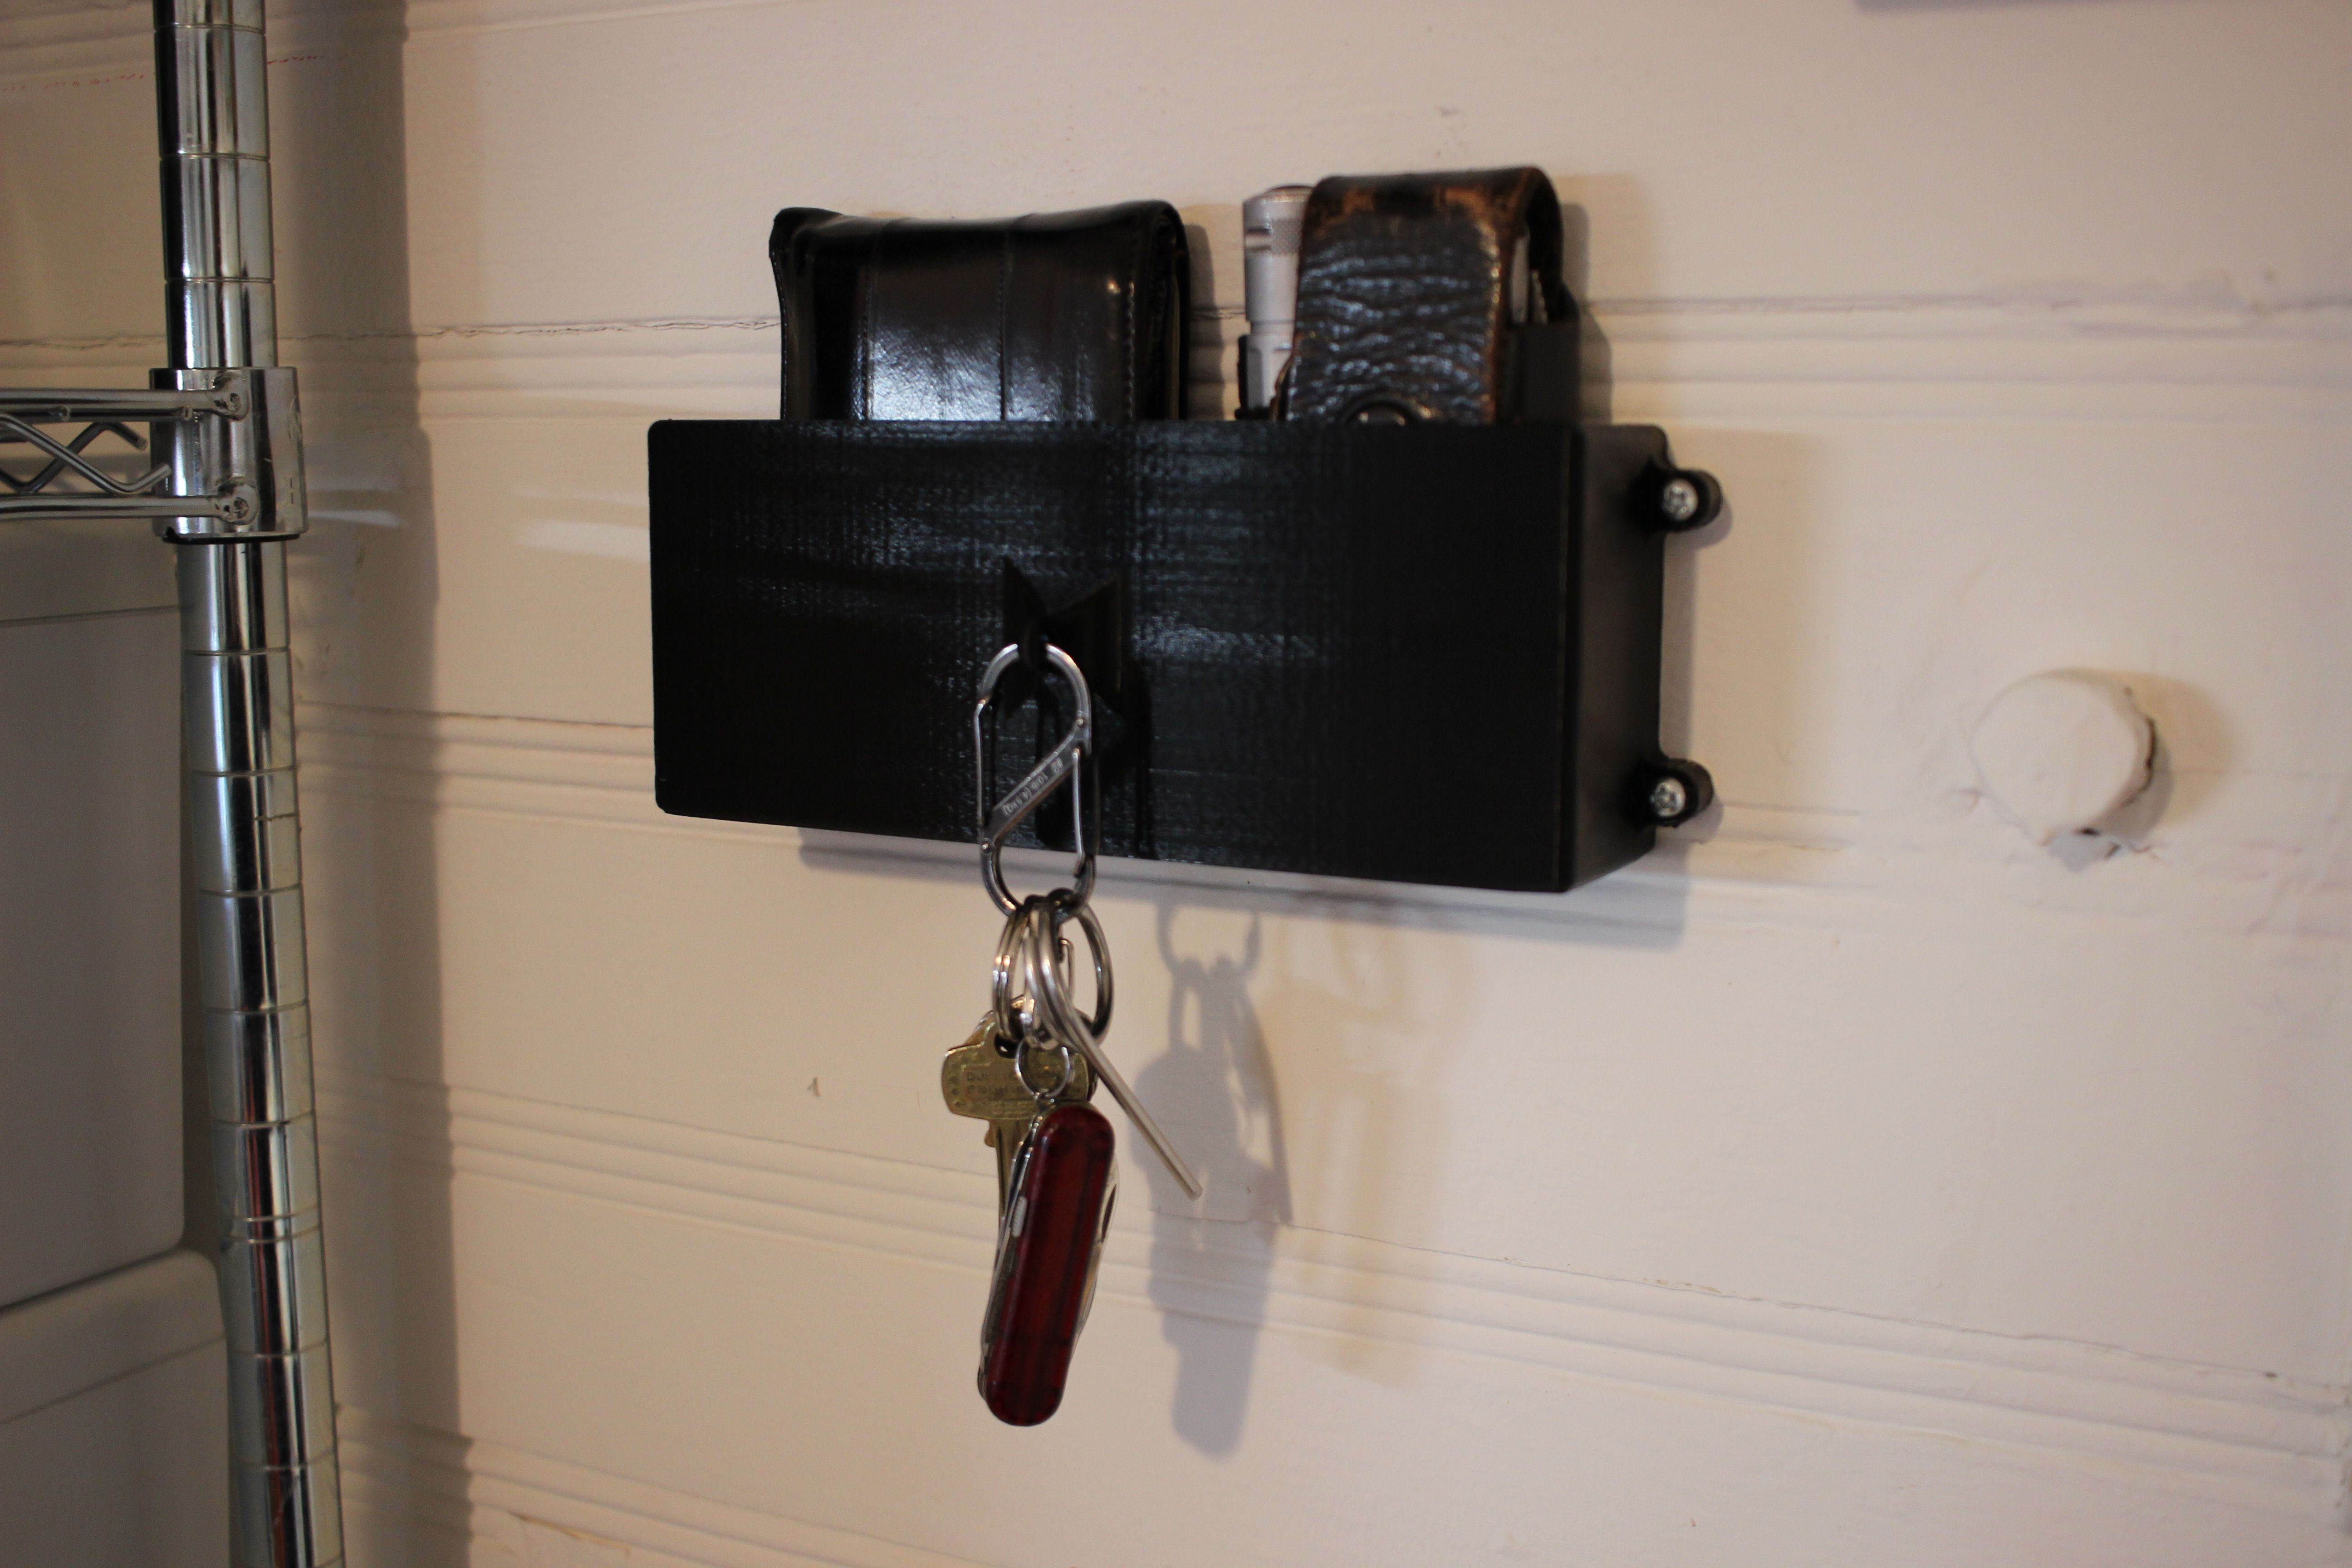
Wallet, Keys & Leatherman Wall Mount – I’m constantly loosing these things in my lab, now they’re not going anywhere. Thingiverse Link


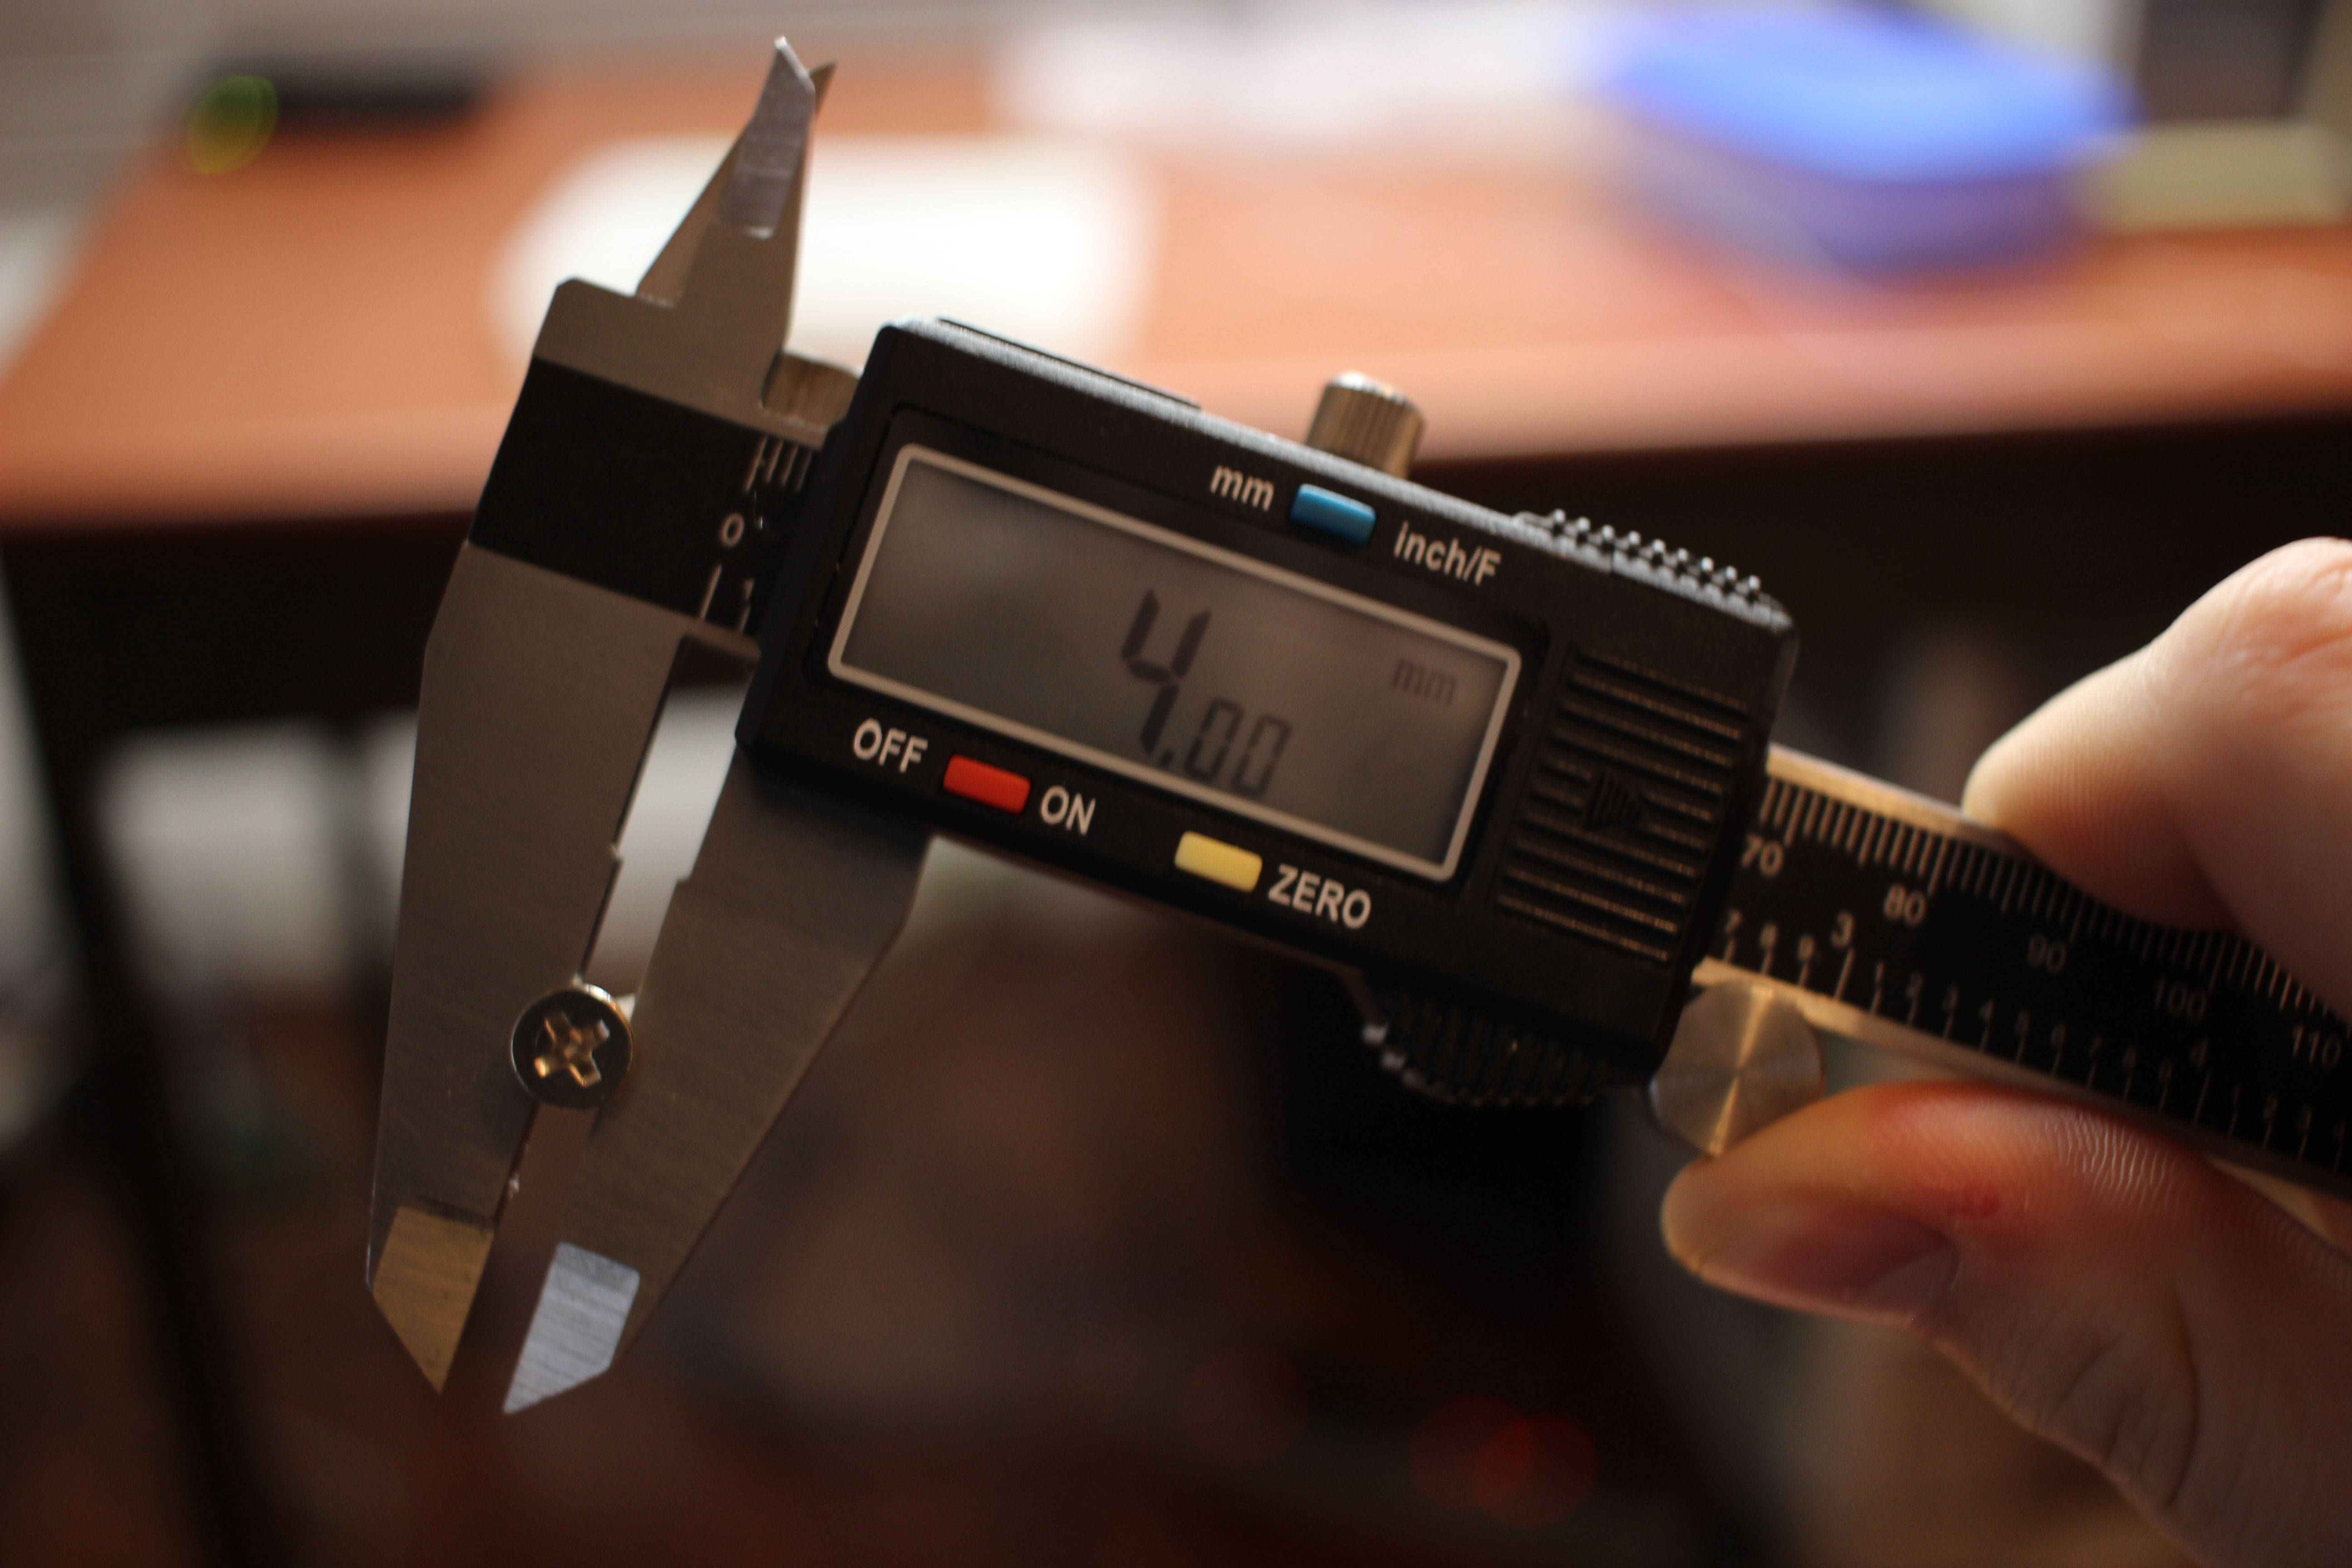
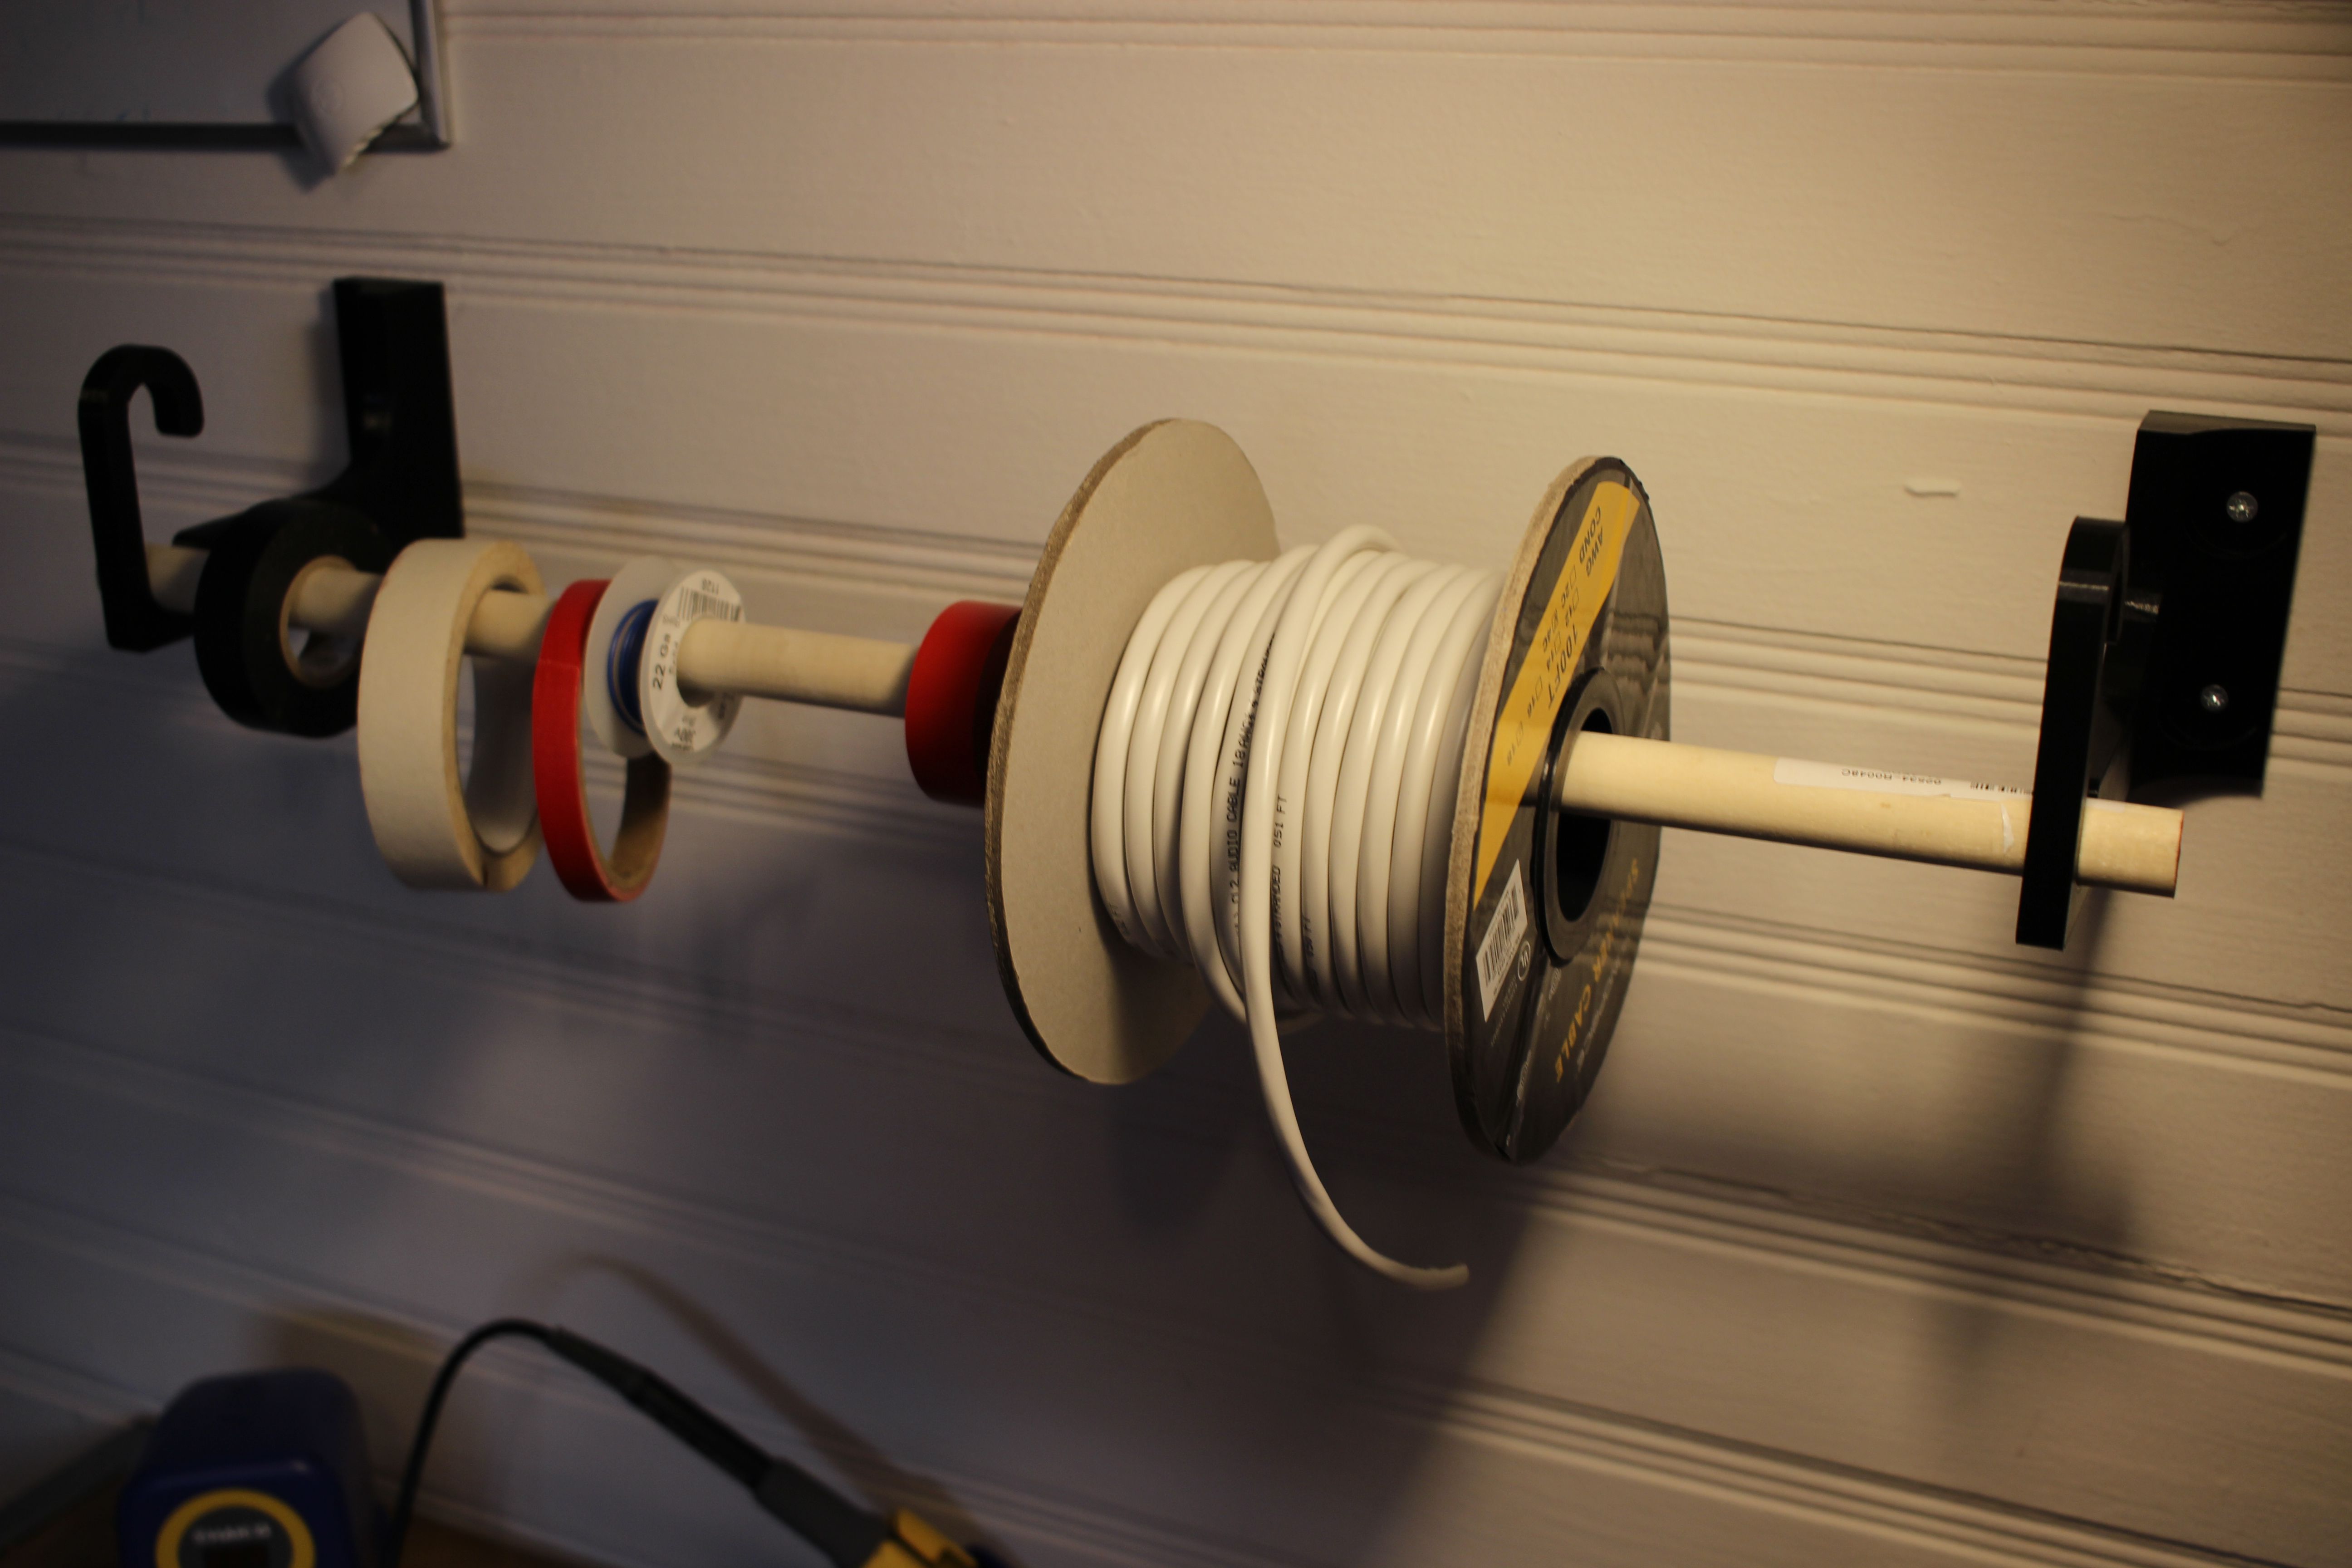
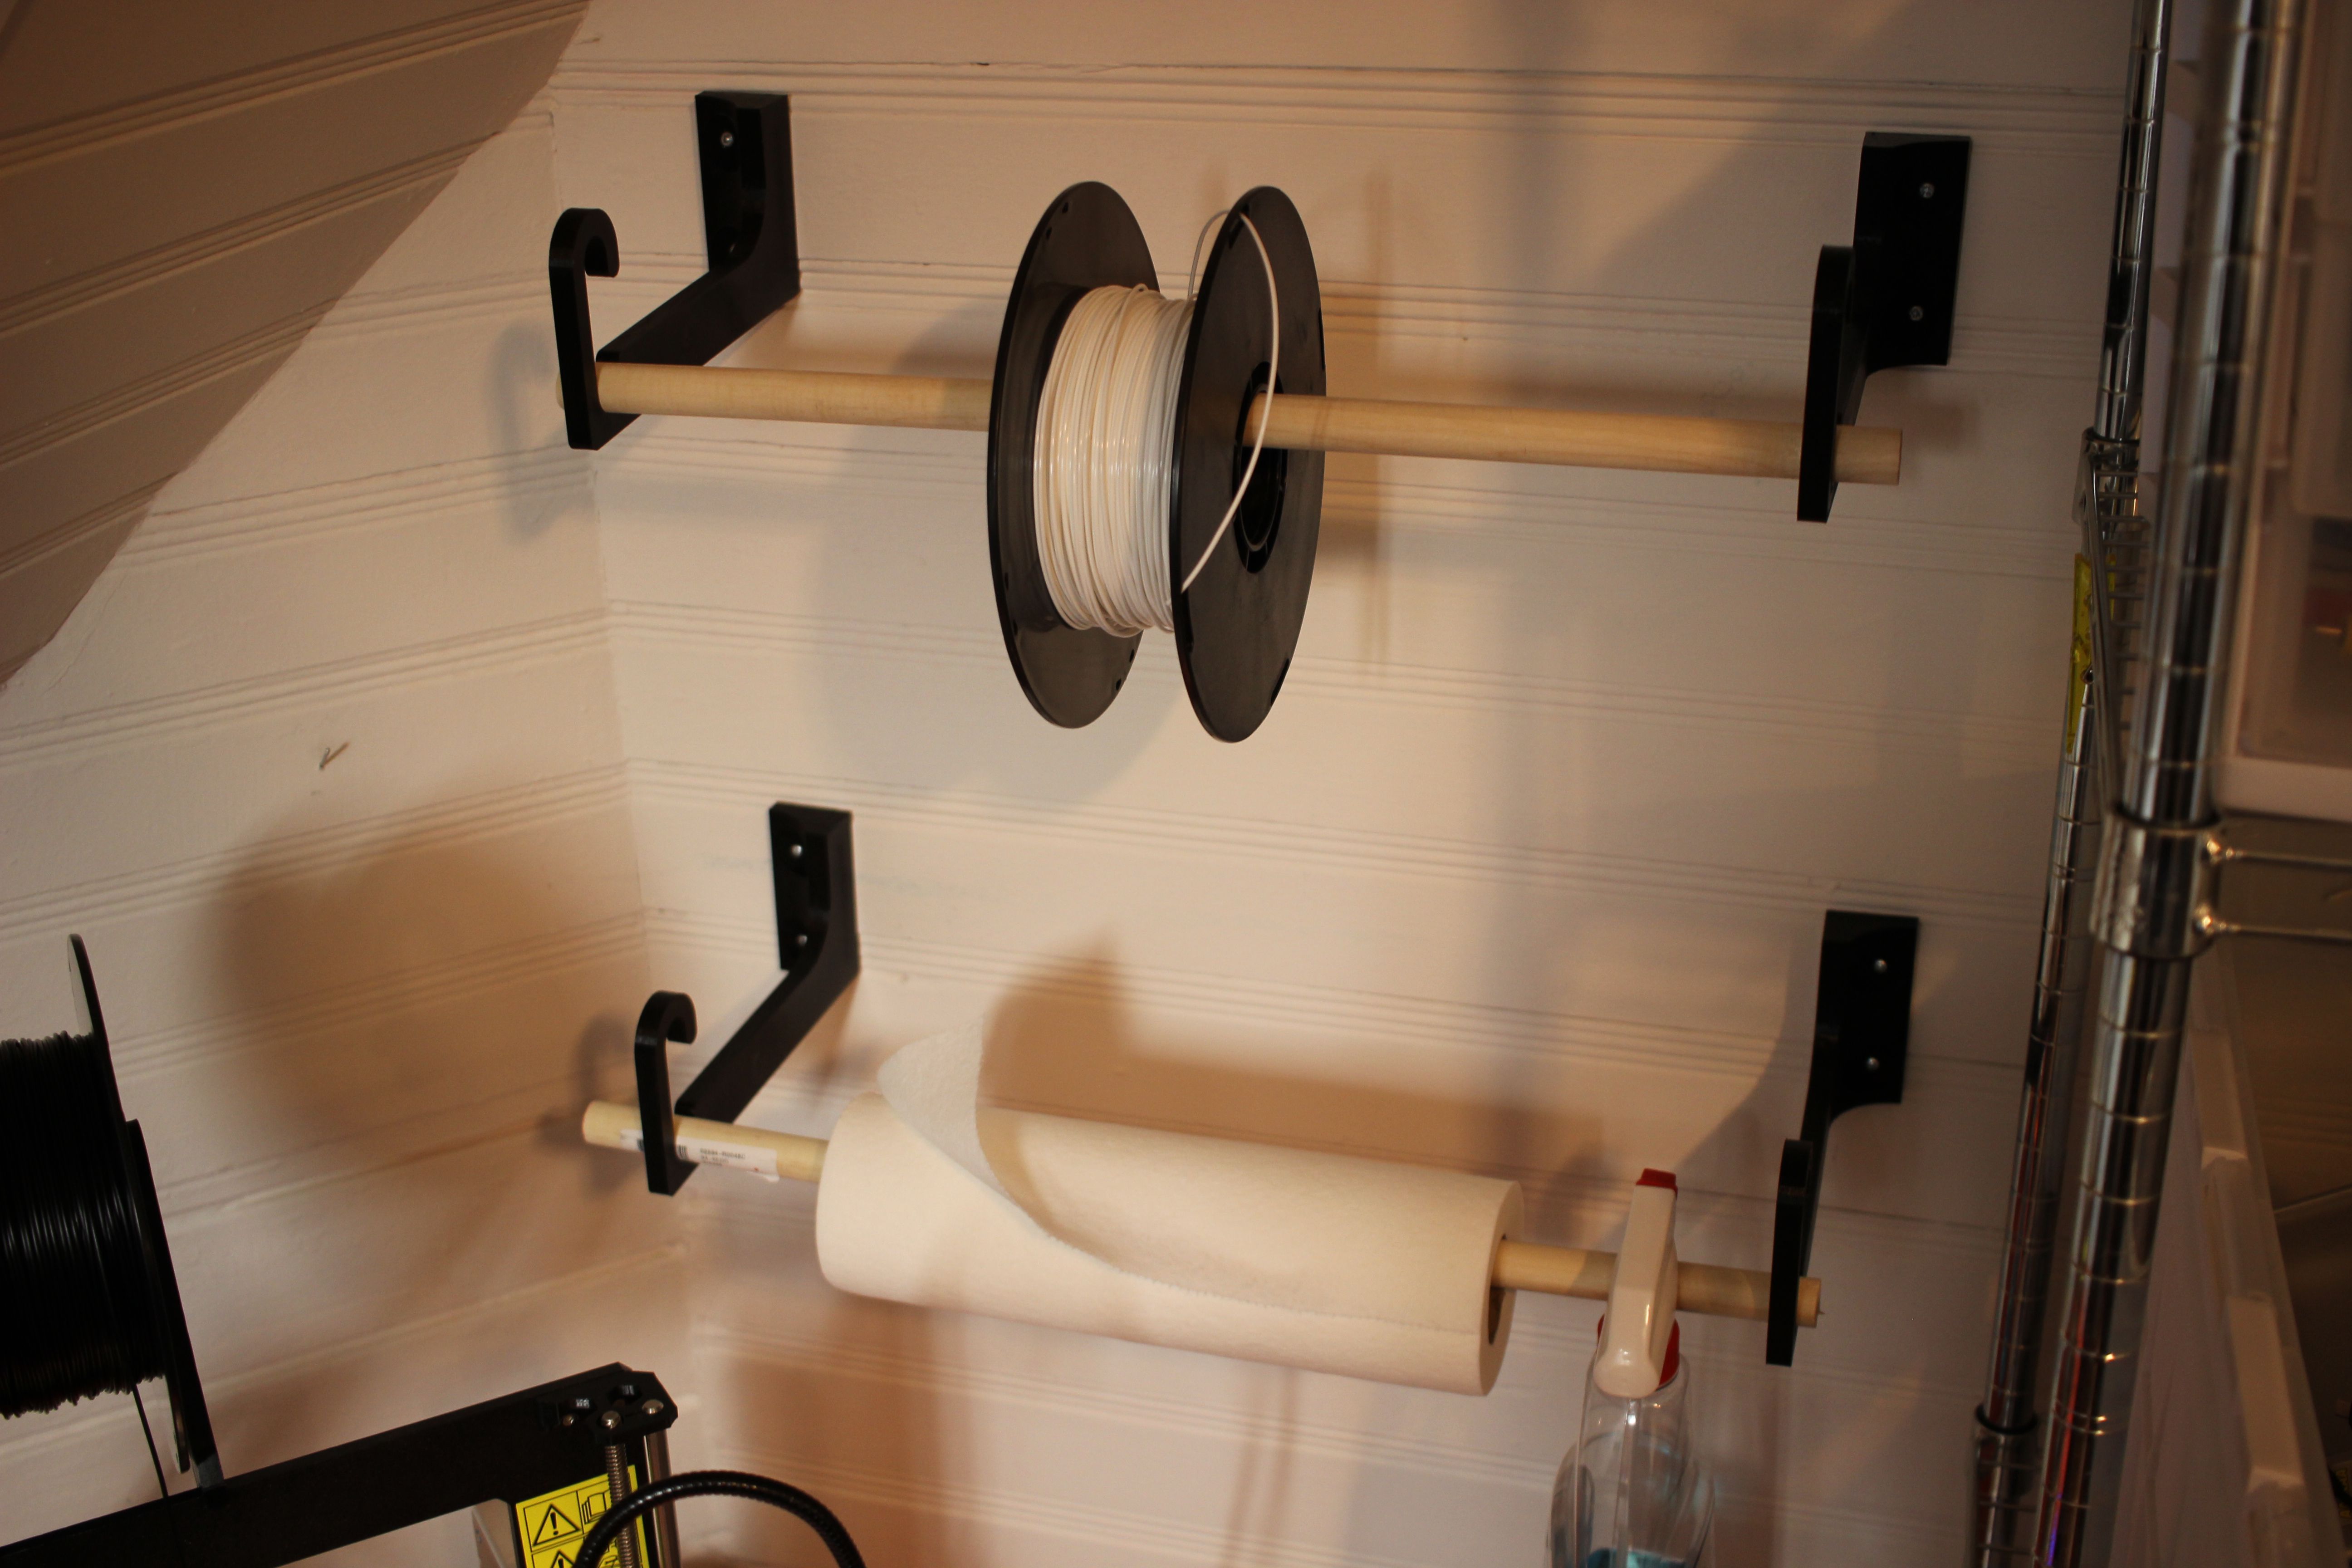
Wall Hook – This is for mounting stuff like filament spools, wire, and tape to the wall. It accepts 3/4 inch dowels. There are two version, one 85mm long and one 150mm long (designed to fit hatchbox 1kg filament spools). Thingiverse Link

Forcing a screen resolution of an Ubuntu guest OS in VirtualBox

I figured that doing this would be trivial but turns out it took a little work:

I’m trying to emulate an official 7″ Raspberry Pi Touch Display in a VM, so for this post the target resolution is 800 x 480. If you want to change it to another resolution swap in yours for the rest of this guide.

First, make sure Auto-resize Guest Display is deselected in Virtualbox:

Run the following command in your terminal:

The output should look something the the following, starting with Modeline

Copy the text after Modeline so in this case it would be

And paste it after the following command:

NOTE! You may want to change the 800x480_60.00 to something without an underscore in it, it was causing problems on my system. I changed it to pidisplay. The resulting command for this example is:

You should be able to run the above command without error. Next, run:

You’ll be greeted with output similar to this. Note the name of the display device, in this case VGA-1.

With that output name, enter the following two commands:

After running that second command, the window should jump to it’s new resolution! You’re done!

THERMAL RUNAWAY Errors on Prusa i3 MK2 3D Printer

This time we’re trying to work through a hardware bug!

Without warning, my printer would stop it’s current print and display “THERMAL RUNAWAY” on the display screen:

This would happen once every couple of prints or so.

According Prusa’s Docs a common cause of this is problems with the thermistor connection. They show a graph that has very erratic readings from the sensor:

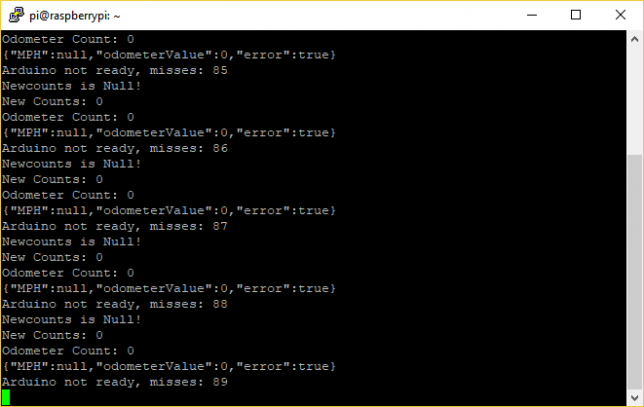
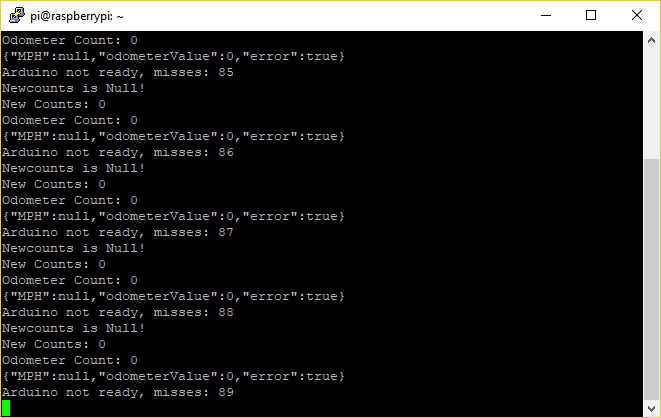
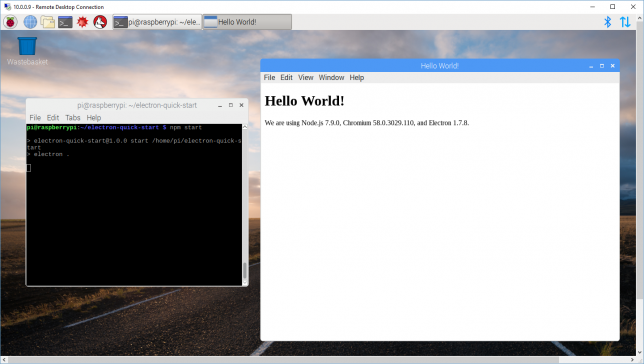
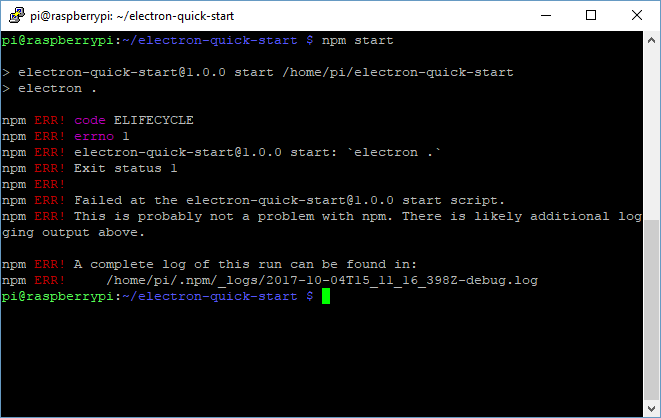
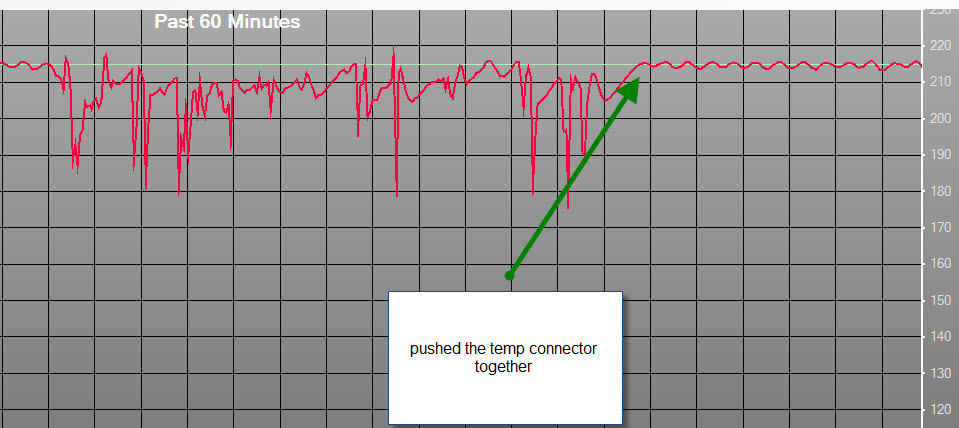
 This seemed like a good place to start so I re-seated the connector and used octoprint to generate my own graph:

No erratic readings, the temp would drop off and then start heating back up.

The problem ended up being the connection between the terminal lug and the wire on the heater in the hotend. To fix this, I cut off the crimp lug and stripped away some insulation. I put this into the screw terminal block. I’ve done a couple of prints and had no issues after making this modification.

Automatically run Electron application at reboot on Raspberry Pi

Here is a quick  way to have an application built on electron run at boot on a Raspberry Pi. This worked for me running Raspian Stretch with Desktop.

Edit /home/pi/.config/lxsession/LXDE-pi/autostart with nano:

Add the following line:

The file should now look somewhat like this:

Save and exit nano and reboot. Your app should open after the desktop environment loads. Yay!

If you want to be able to get access to the terminal output of your application, install screen with:

And then swap:

For:

In the above code snippets.

After the pi boots, you can run screen -list to see what screens are available to attach to then attach to yours with screen -r yourscreen. Here’s an example:

Press enter, and then see your terminal output.
For more info on how to use screen, check out this link:

https://www.gnu.org/software/screen/manual/screen.html

CHAMP: Compliant Hook Arboreal Mobility Platform (Senior Thesis Project)

For my senior thesis project at WPI, myself and two colleagues (Rachael Putnam – RBE/ME and Mead Landis – RBE/ME) designed a tree climbing robot. I was in charge of designing and implementing the electronics and controls software. I was the most intense project I have ever worked on, both in terms of difficulty and potential impact. Here is our poster for project presentation day:

Here’s a video of the prototype climbing:

We did a blog during the project, here is the best post I wrote:

The report is massive, check it out here: https://digital.wpi.edu/concern/student_works/s4655j16f?locale=en


Find distance between two zipcodes, dump the result in an excel file

I recently wrote a piece of software for a friend working on a project, you can find it on github here. The following is from the README.md:


zipcode-distance-excel

This is a command line utility to automatically calculate the distance between two zipcodes and then put the results in an excel (.xlsx) file. It works for US postal codes only.

It was developed to help a colleague and is very application-specific.

Prerequisites

Downloading is easy git, which is already on most systems, on ubuntu use:

For everyone else:

Installing

A step by step series of examples that tell you have to get a development env running

Say what the step will be

Usage

in a directory with the .xlsx file that you want to modify, run:

The program skips the first row in the spreadsheet to avoid headers.

Example Usage

Before:

Before

Terminal output:

After:

After

Authors

  • Devon Braysite
  • Miranda Lawellsite

License

This project is licensed under the MIT License

Electron cannot be started from an SSH session

Update: If you run export DISPLAY=:0 in the terminal prior to npm start, the application runs just fine on the remote device. Thank you Alex!

https://twitter.com/alexbragdon/status/915601277752573954


In working on an project for work, I have figured out the hard way that Electron has to be started from a terminal session on your target device (ie the computer it is to be viewed on). I am developing an embedded system based on the Raspberry Pi that does not take user input but displays information on a screen.

Upon downloading the electron-quick-start example, everything installs correctly without error and can be done remotely via SSH. Upon running with npm start, the following error is thrown.

I spent most of the evening trying to debug npm ERR! code ELIFECYCLE to no avail. On a lark, I connected a keyboard to the device and ran npm start and it ran without error. Sigh.

The remote development alternative for doing this is to use Remote Desktop Connection a client comes bundled in with windows. The software can be installed on the remote system (the Raspberry Pi) using apt-get install xrdp. Upon connecting, opening up a shell in the RDP client, and running npm start, the example application works just fine.

Soft-latching toggle switch with active reset circuit

This circuit aims to replace a traditional toggle switch for switching large amounts of current. Instead of the bulky and expensive traditional toggle switch, this circuit allows for a cheap pushbutton, and a few transistors and resistors to be used and have the same effect.

For my application, I wanted a way to have the circuit draw very little curren
t when in the off state, be able to be powered on with a pushbutton, and then turned off through software on the Arduino.
Here is the circuit diagram:

Here’s a video of the circuit in operation:

The code running on the Arduino is very simple:

Comparing blank string definition in Python3

In python3 using

or

Produces the same result for the programmer. Which one is faster? Using the python module timeit, it’s really easy to find out!

Using string="" is WAY faster.

Here’s the source code for my tests:

StripPi – Software Demo, Roadkill Electronics

I’m constantly loosing the remote for my RGB LED strip lights, and I have a few days for spring break, time to get hacking. Here’s a demo and explanation video:

I don’t mention it in the video, but the cool part of this project is how the different processes communicate with each other. Rather than interacting with the different processes through pipes, or something like stdin, I’ve decided to use a TCP websocket server:

StripPi High Level Diagram

Processes on the device send RGB values to the Strip Server via a TCP packet. This very very easy to implement, and almost all of the hard work is taken care of via the socketserver  module included in python3. This also allows for interactions with that main process (the StripPi Server process) to take place off of the Raspberry Pi as well. I plan on writing an Alexa integration for this project moving forward, and this should make that a lot easier.

The analog to digital conversion is handled by an MCP3008, exactly the same way as I did it here.

Thanks for reading, more soon.