
I have no idea what this could be!
I have no idea what this could be!
Hi! In order to do PiPlanter 2 at the scale I want, as always, I need money. I’m applying to this grant to hopefully take this project to unreal new heights. In order to apply, one of the component is assembling a budget. In order to do that though, I need to “complete” the whole project… in my head. I have to be able to think of exactly how I want to do the project. From PCB design to pump system, I have to plan it all in order to assemble a realistic budget. There is a lot of good work that comes with this, like schematics and the budget itself. I’ll for sure upload all of the documentation.
On a more stimulating note: I’ve planted the tomato plants in the same manor that I did last summer and here are some pictures of the growth so far.
Here is the dirt and planted seeds:
Here are some very small sprouts that have developed in the last two days.
So I have decided to re write the PiPlanter from the ground up. In essence, it will accomplish the same exact thing but I’d like it to be a lot more of a stable platform to expand upon in the future. I’d also like PiPlanter to be professional enough to bring to market. First off there are a few things you’d need install & a few modifications you’d need to make to Raspian. First thing’s first, you’ll need to enable SPI in the kernel so:
sudo vi /etc/modprobe.d/raspi-blacklist.conf
Comment out the spi-bcm2708 line so it looks like this:
#blacklist spi-bcm2708
Then run this to make it more permanent.
sudo modprobe spi-bcm2708
Now for the real meat of it. You’ll need these packages for SPI and the WiringPi library makes things a whole lot easier for us. This program also relies very heavily
sudo apt-get install python-imaging python-imaging-tk python-pip python-dev git
sudo pip install spidev
sudo pip install wiringpi
sudo apt-get install apache2
sudo apt-get install mysql-server
sudo apt-get install php5
sudo apt-get install php5-mysql
sudo pip install tweepy</pre>
<pre style="color: #333333;">sudo pip install apscheduler</pre>
<pre>
Revised python code next post.
Update: 12 October 2016
Thanks to commenter Fishscene for pointing out the following:
livestreamer for twitch is broken. Twitch made a change to require an OAUTH token and disallow annonymous viewing. livestreamer hasn’t been updated in over a year. Project was forked to streamlink and includes twitch fix:
https://github.com/streamlink/streamlink
I’ll leave this for prosperity, it has been linked to several time.
I’m not too proud of this but my laptop couldn’t handle streaming ‘Twitch Plays Pokemon’ and me doing day to day tasks and I can’t stop watching now. I’ve decided to use a spare Raspberry Pi have to keep the stream open 24/7 on a spare monitor I have.
Here’s a video:
Thanks to Livestreamer it is unbelievably easy to view this stream.
The following command will install Livestreamer:
apt-get install python-pip
pip install livestreamer
To make things even simpler, I have also written the following python program that will open the stream to HDMI. You can set the line that runs this program as a cron job to run at boot if you wish.
import os
os.system("livestreamer twitch.tv/twitchplayspokemon best -np  'omxplayer -o hdmi'")
Which you can get on your pi with:
wget https://esologic.com/source/TPP/raspberry_TPP.py
Once it is downloaded you can run it with:
python raspberry_TPP.py
And it will open on your HDMI monitor.
Hi! I am now a researcher for Sabyasachi Sarkar at WPI, the college I go to. You can check out some of the work I’ve done here!
I got this gig because of my work on this website so thanks guys.
Like I said in my first post for this server upgrade, a secondary purpose of this new server was to migrate my wordpress blog to a more stable server setup.
For my particular setup, I’ll be running my blog inside of a virtual machine running ubuntu 12.04 inside of a new server running ubuntu 12.04 as detailed in this post. This migration method does not care what kind of server you are using, so whatever setup you’re currently running should be fine.
The migration itself is remarkably easy thanks to a wordpress plugin called duplicator. Essentially the process is this.
On the old server, update wordpress and install duplicator. Go through the instructions listed in duplicator and save your files in a place where you can get them.
On the new server, install the latest version of wordpress and makes sure it is working 100%. You can use this guide if you need help doing that.
The only thing that stuck for me was the fact that after you finish the wordpress install, you need to run the following command.
chown -R www-data:www-data /var/www
This will give apache user permissions to write to disk.
Other than that, just follow the duplicator instructions.

Citadel makes this pretty sophisticated and money saving procedure really easy. Once I figured out what I was doing, the install took me about 45 minutes to complete, here are the steps I took!
I’m running PHPvirtualbox on ubuntu server 12.04 as detailed in this post.
First thing’s first, get a virtual machine with a debian based OS loaded up.
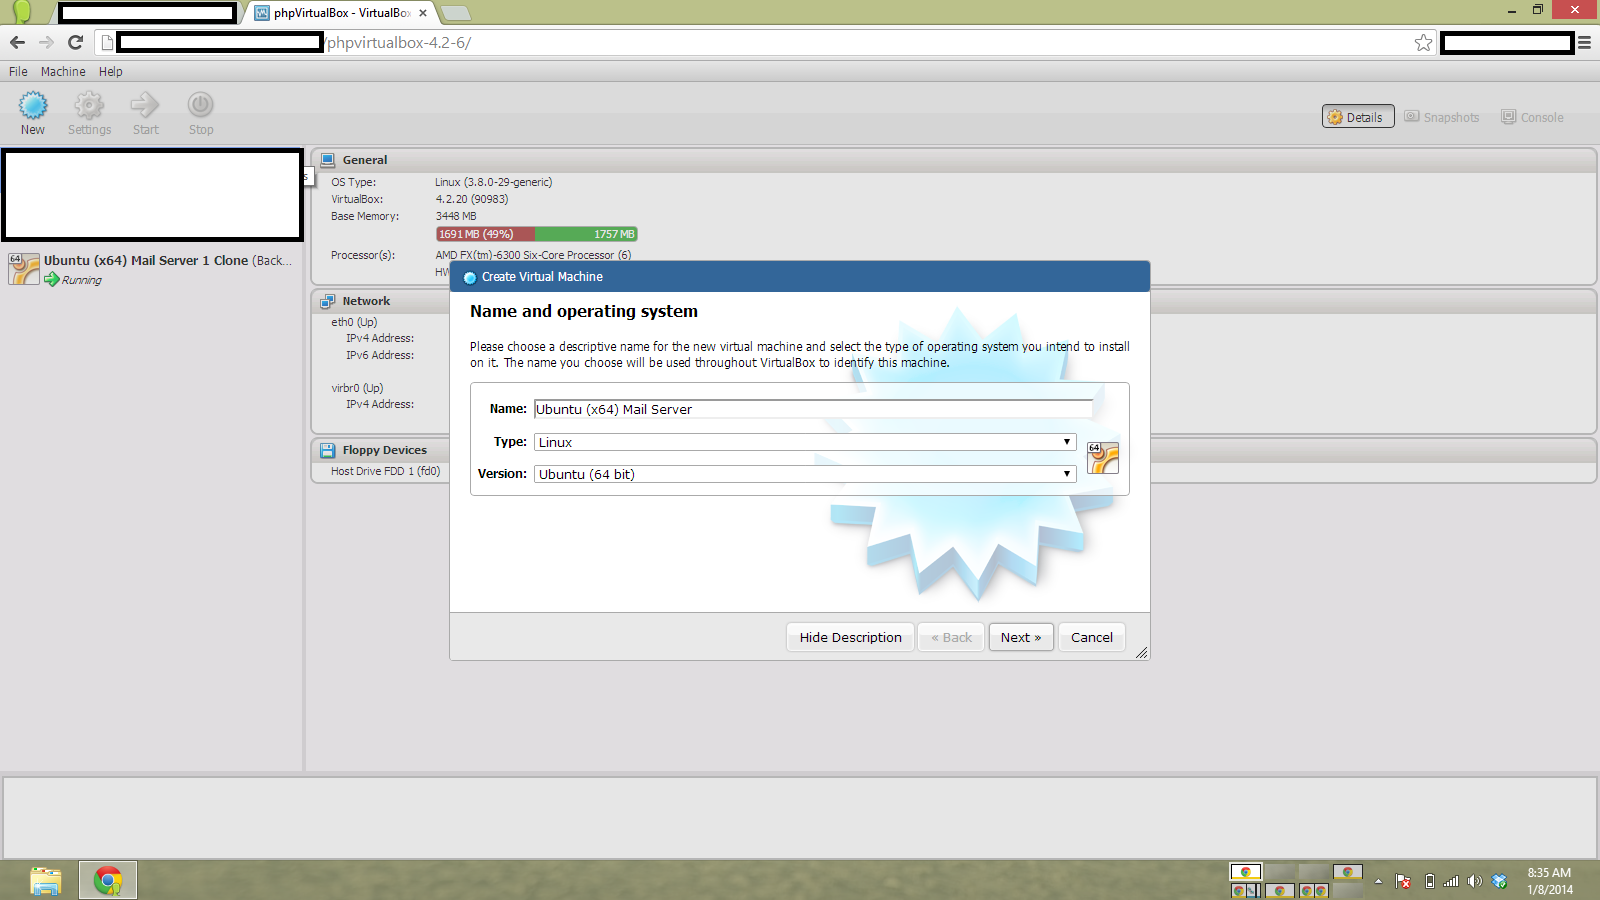
I’m using 12.04 for the VM as well
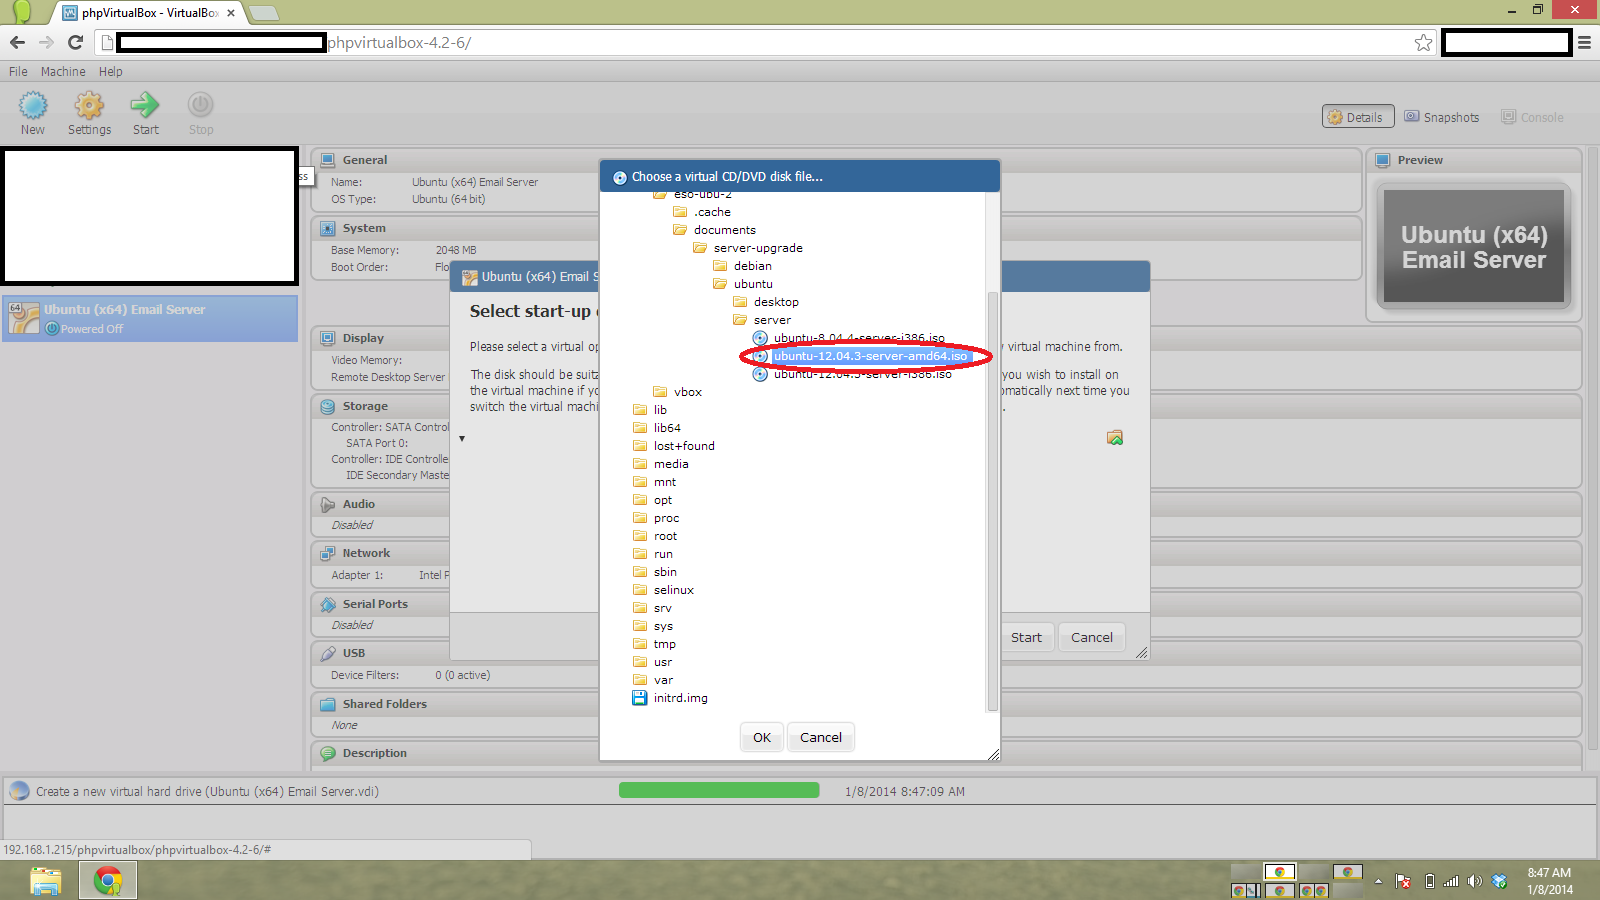
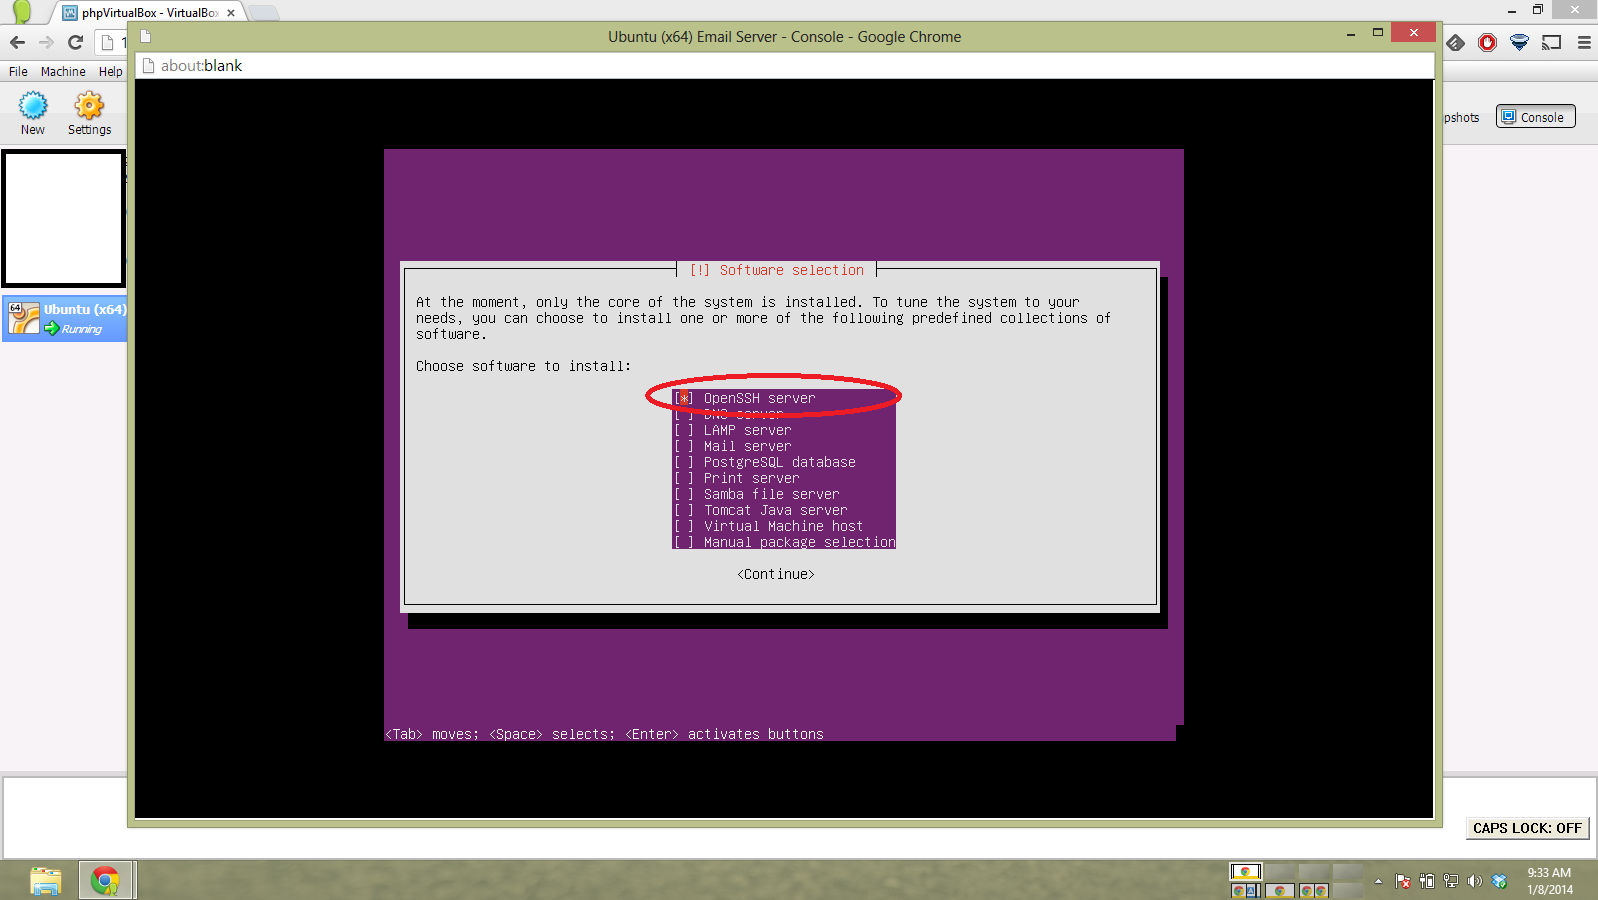
Then go through the OS install, only installing openssh-server as additional software.

First we need to give the server a Fully Qualified Domain Name (FQDN)
You will need to edit the
/etc/hosts
/etc/hostname
files.
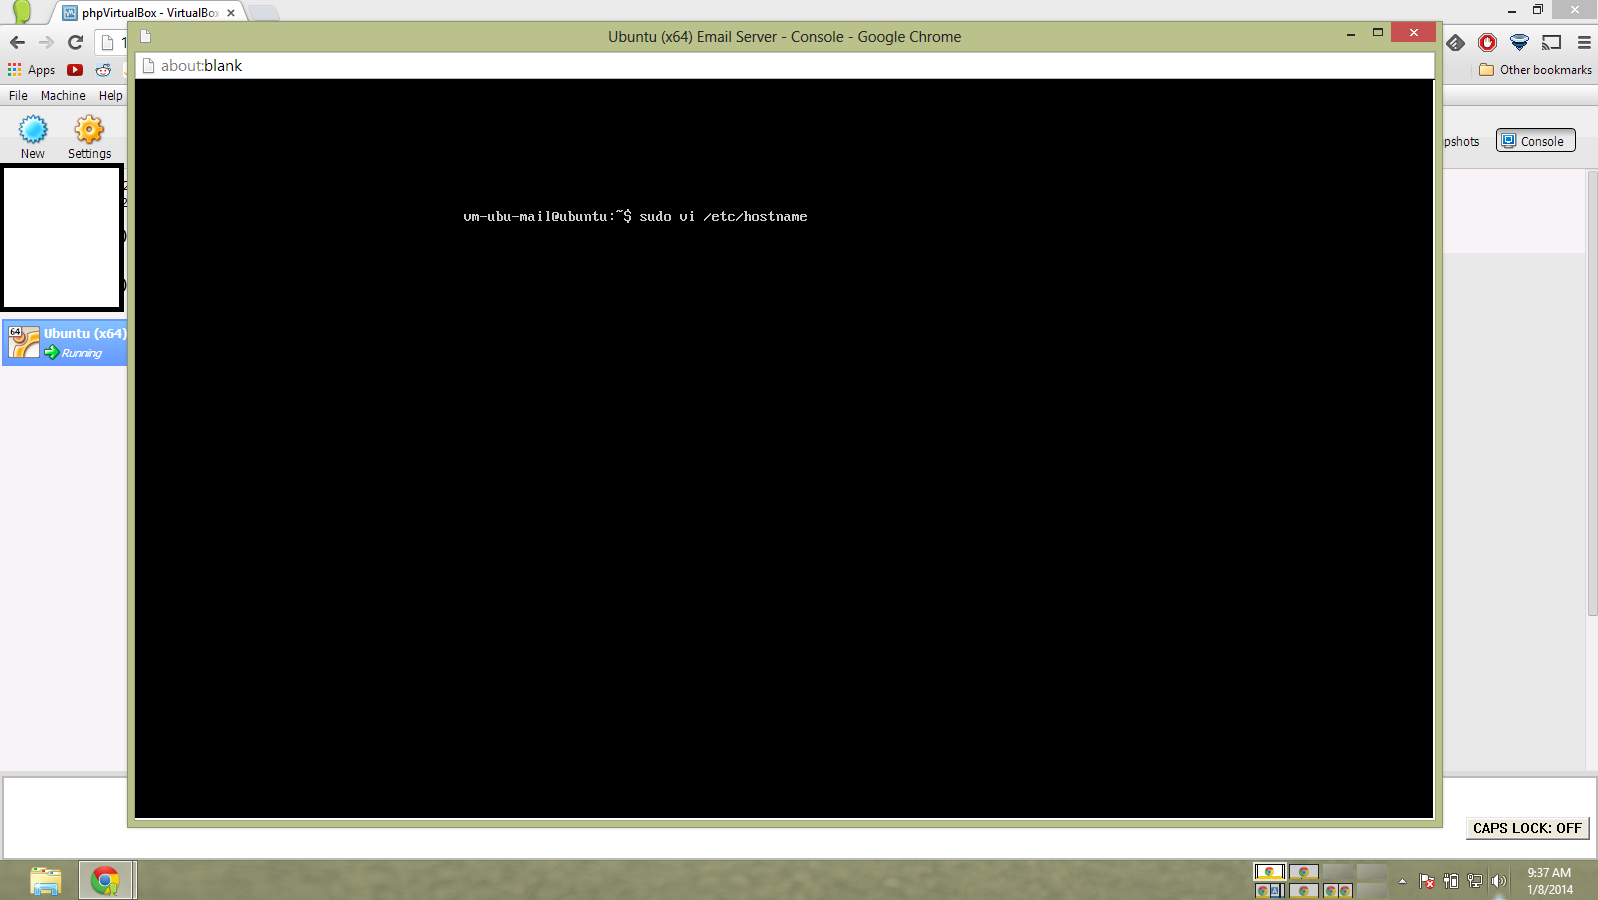
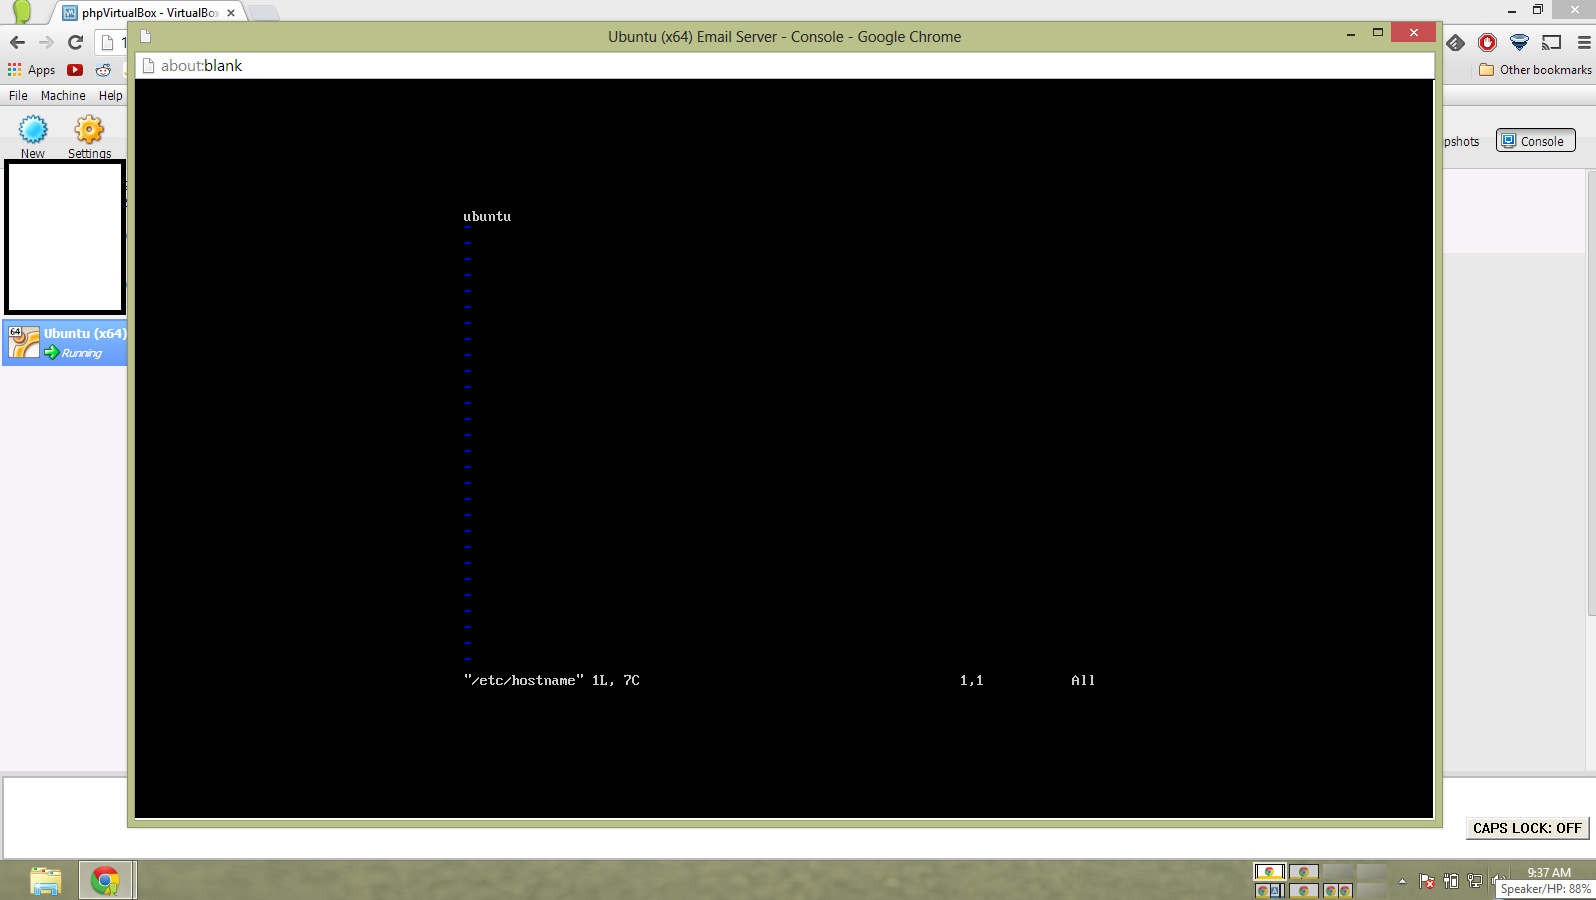
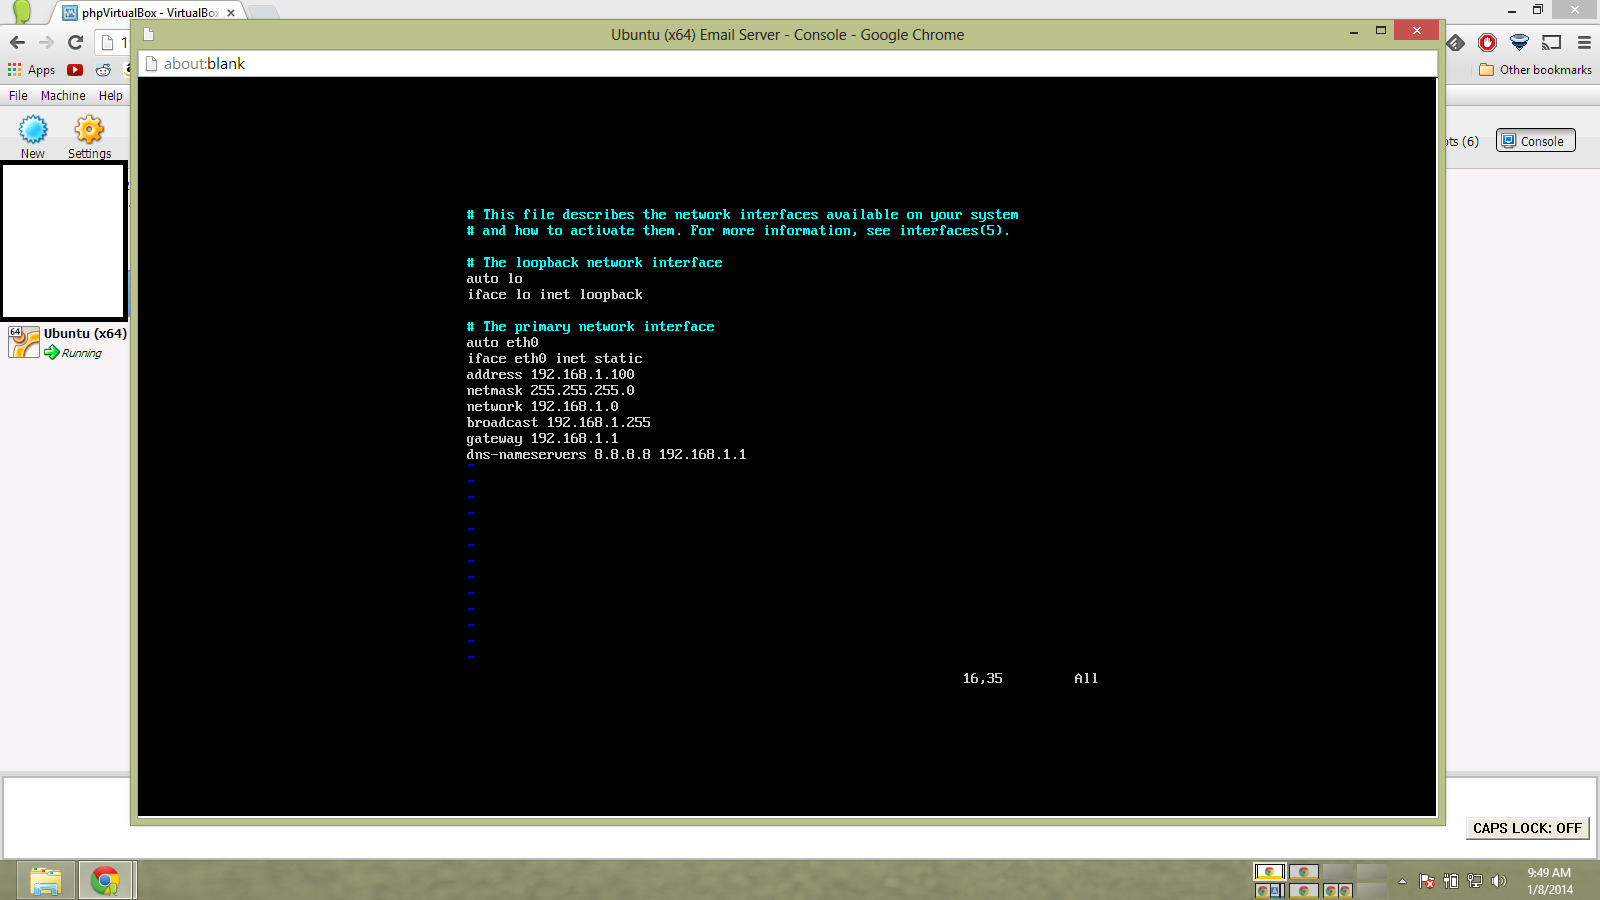
Change whatever name you chose in the install process to ‘mail’ in the /etc/hostname
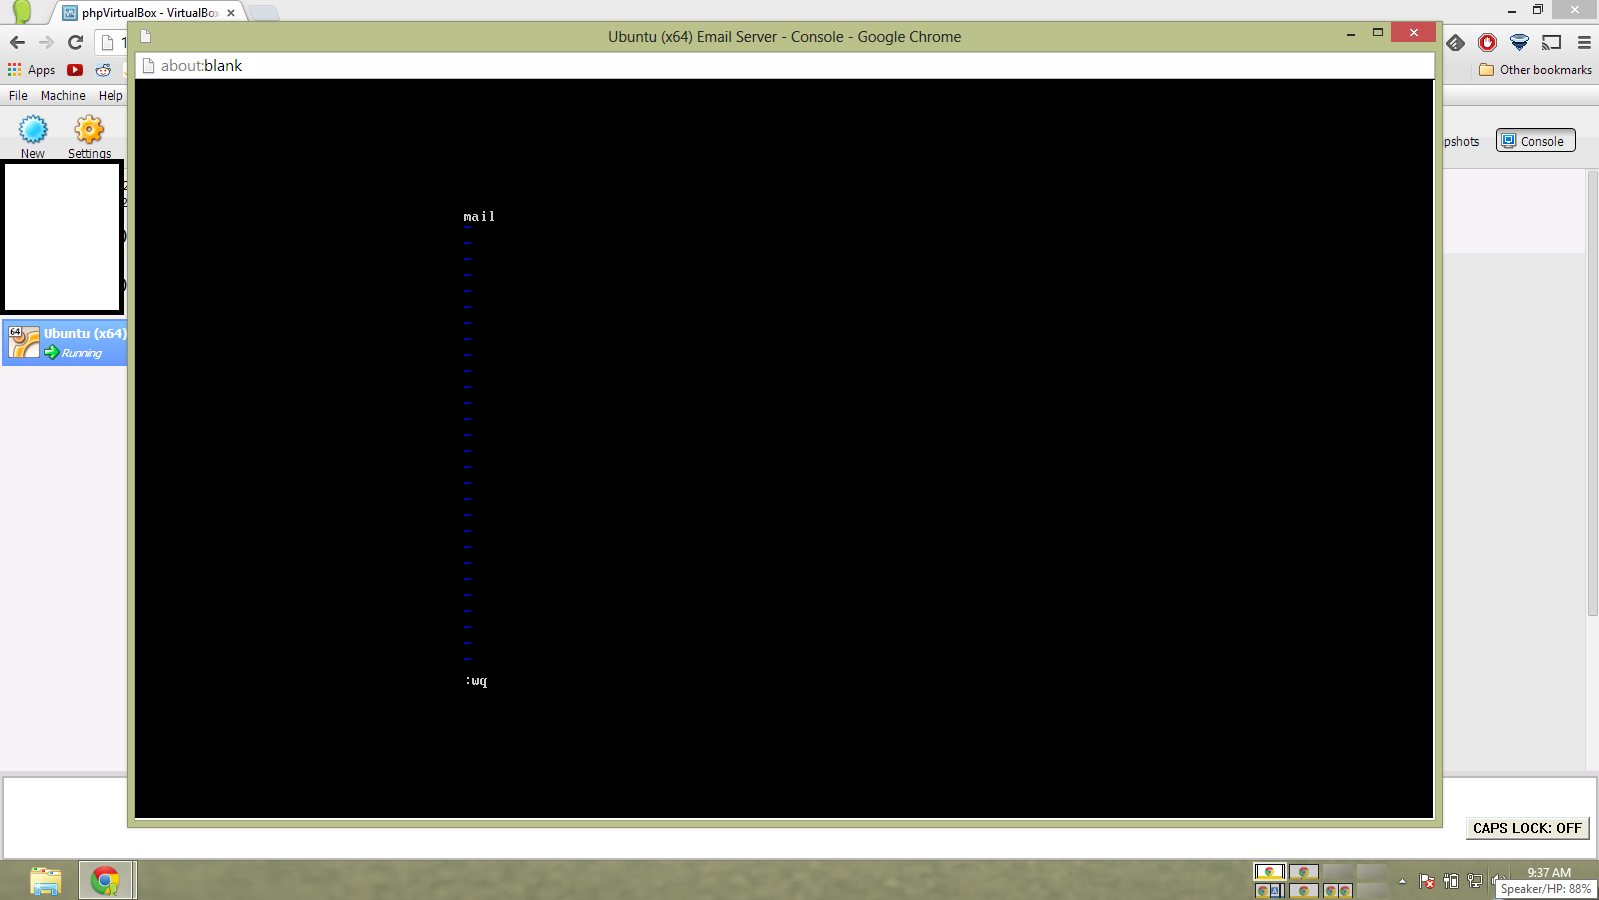
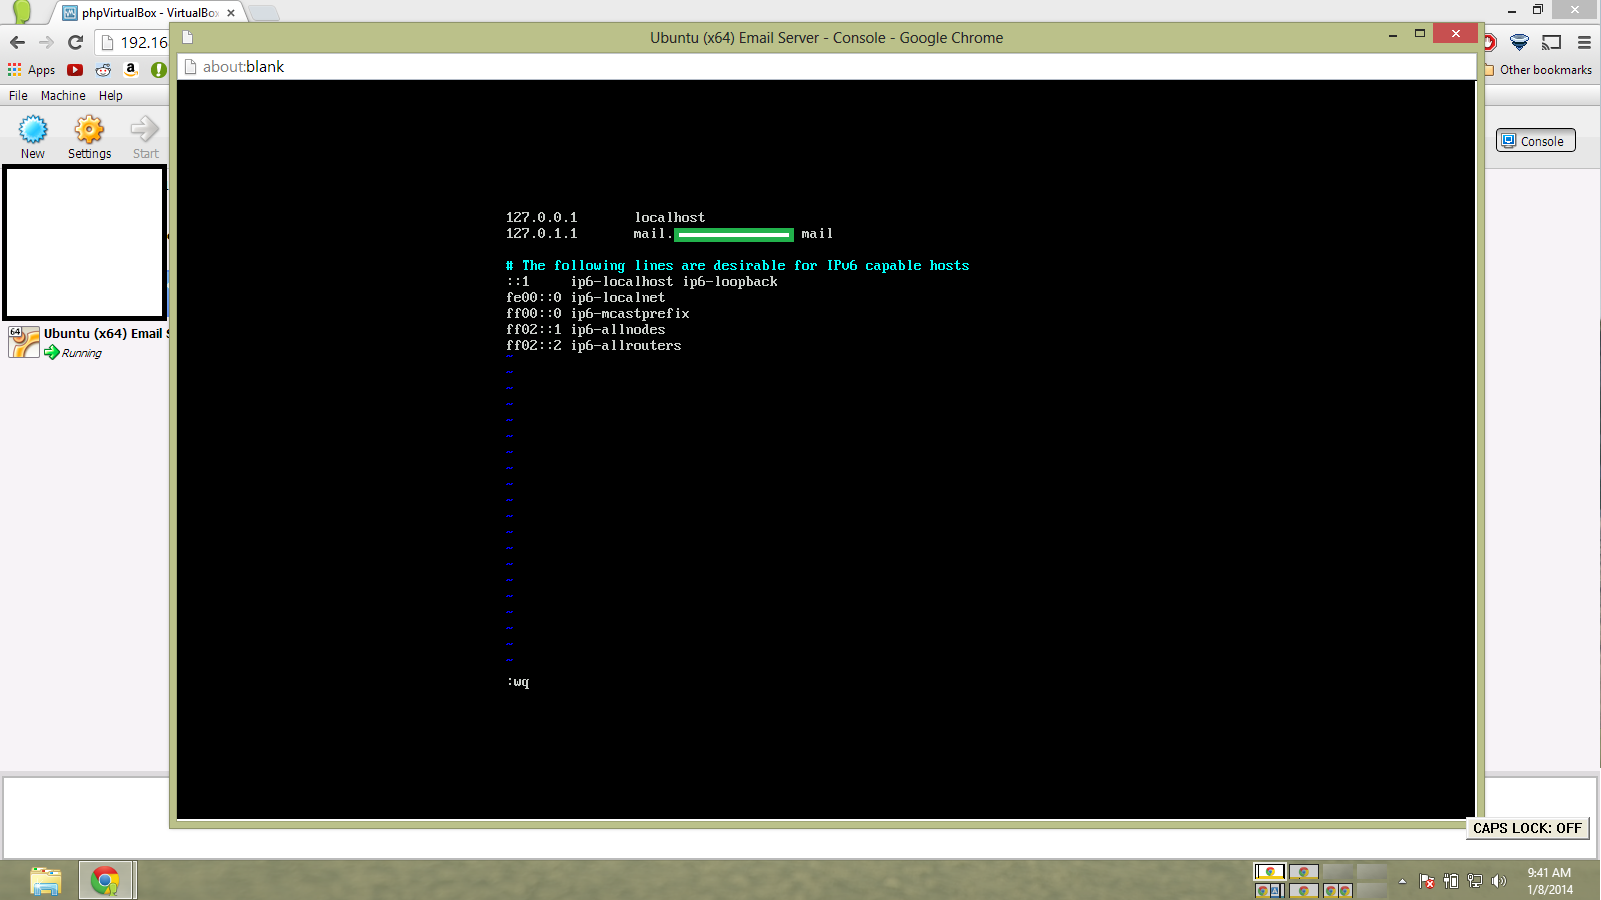
Modify your /etc/hosts as follows. The green box is the domain you will be using.
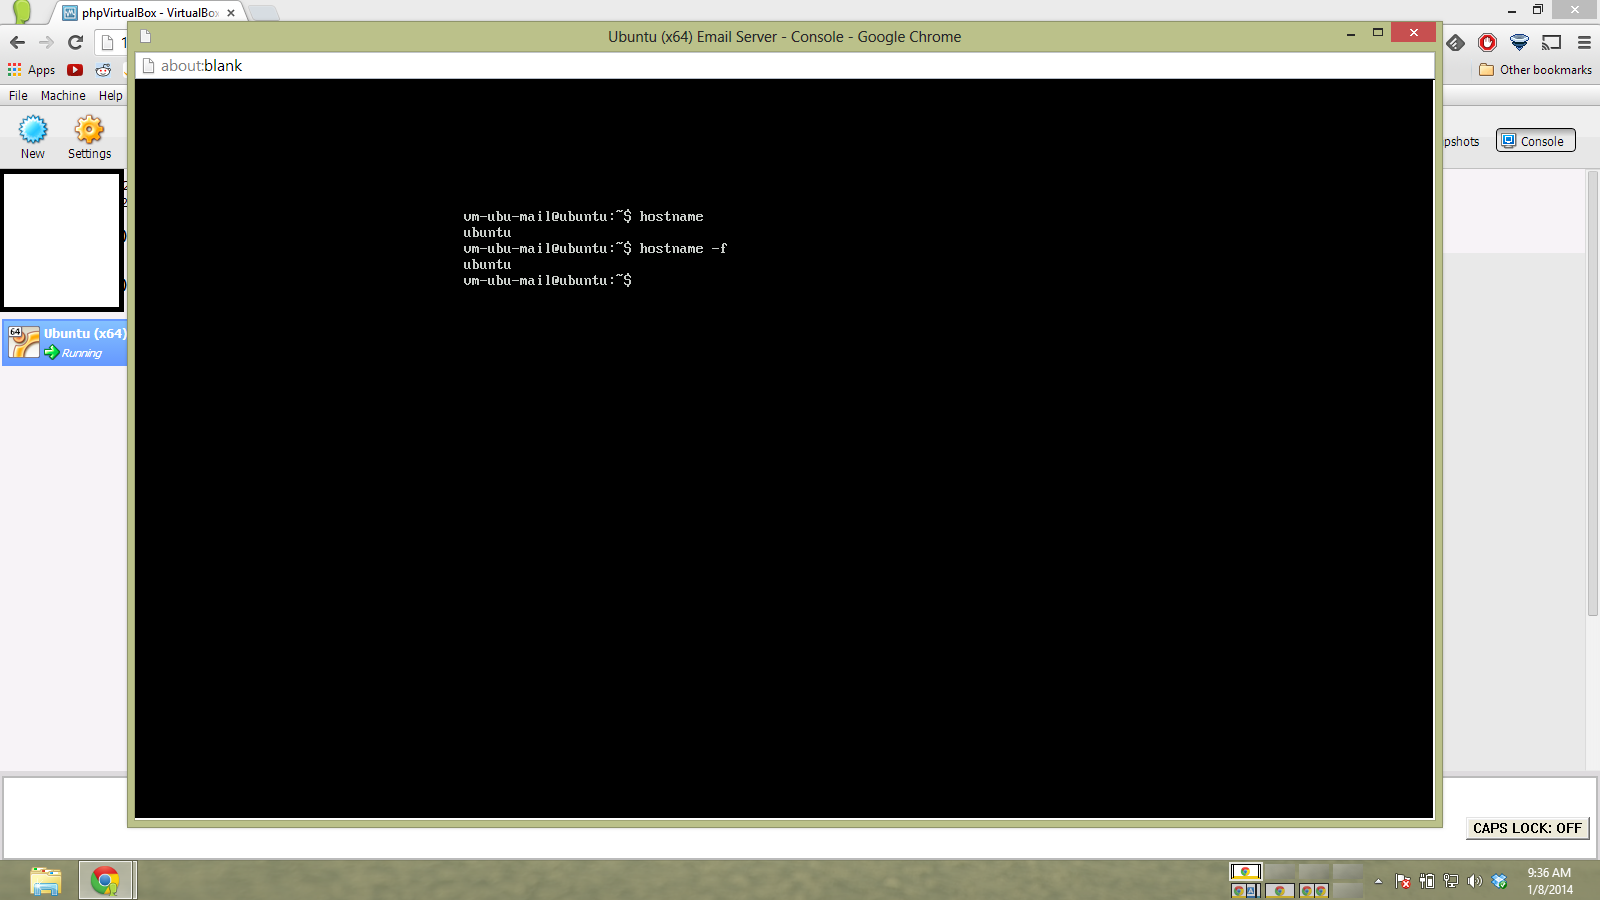
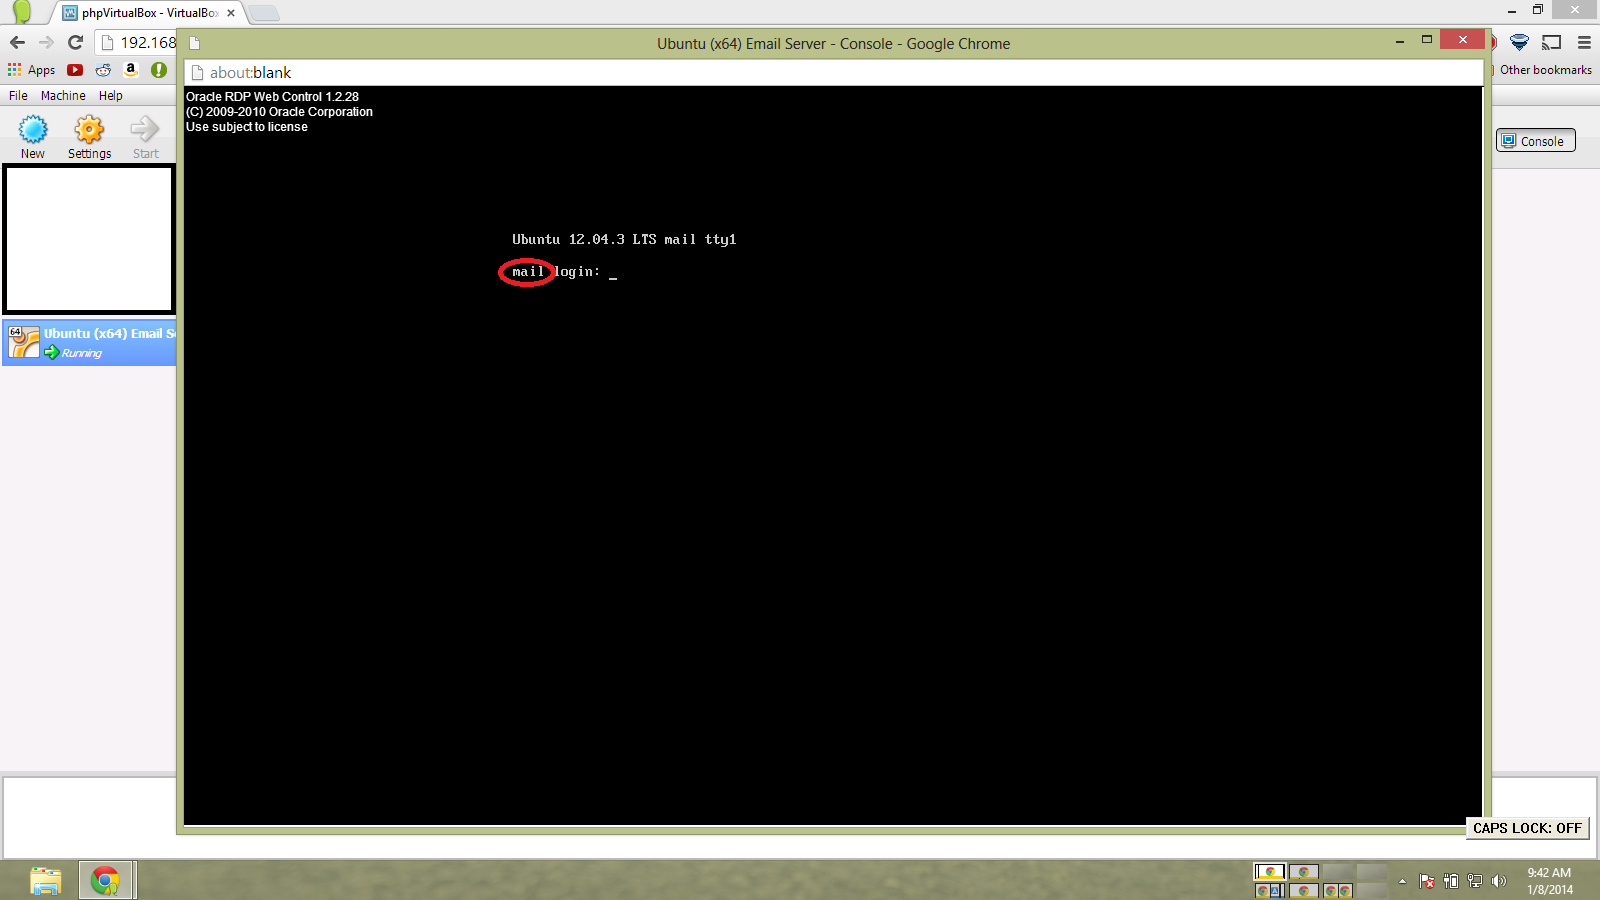
After rebooting, you will be greeted with a your hostname set to mail. You can still log in with your regular username & password.
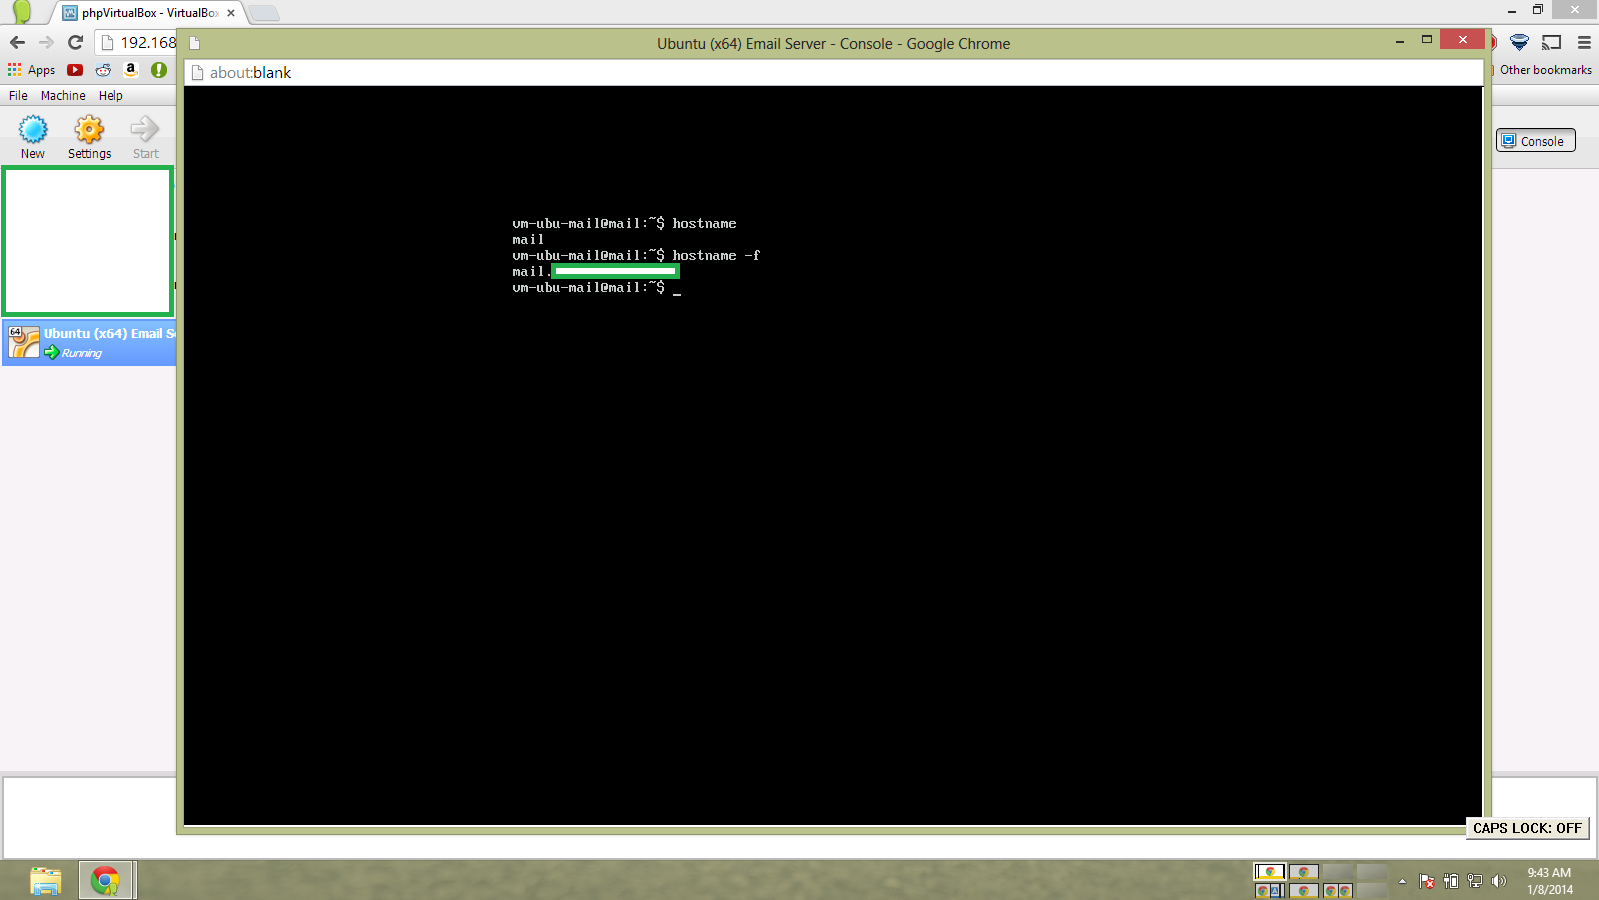
Running
hostname
hostname -f
Should yield very similar results.
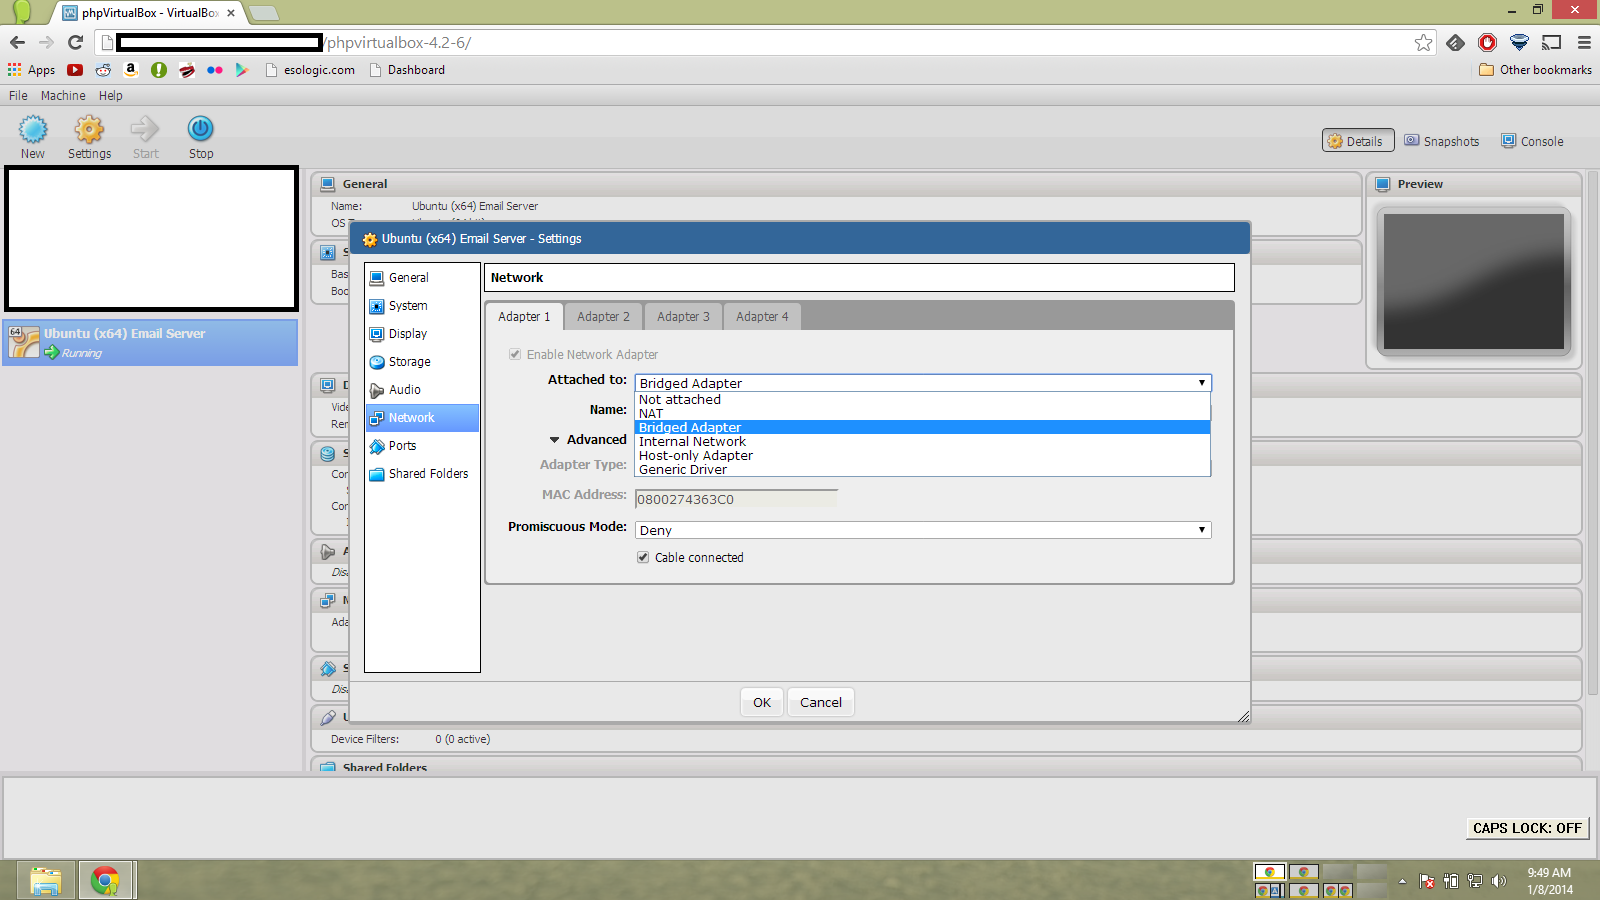
Now we need to establish a static for our virtual machine.

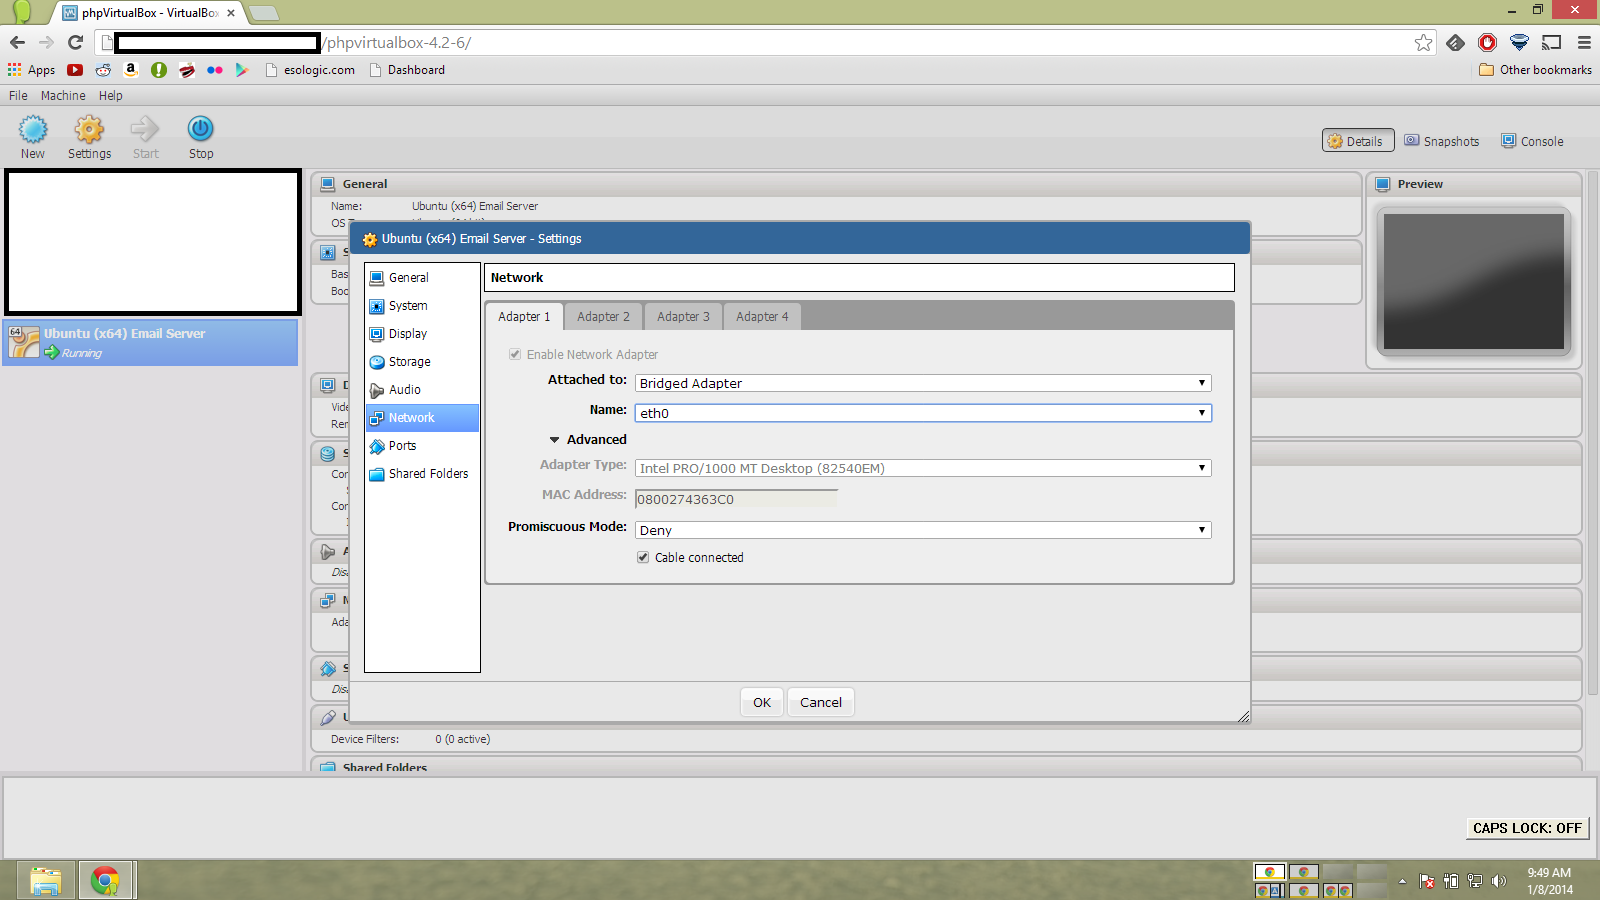
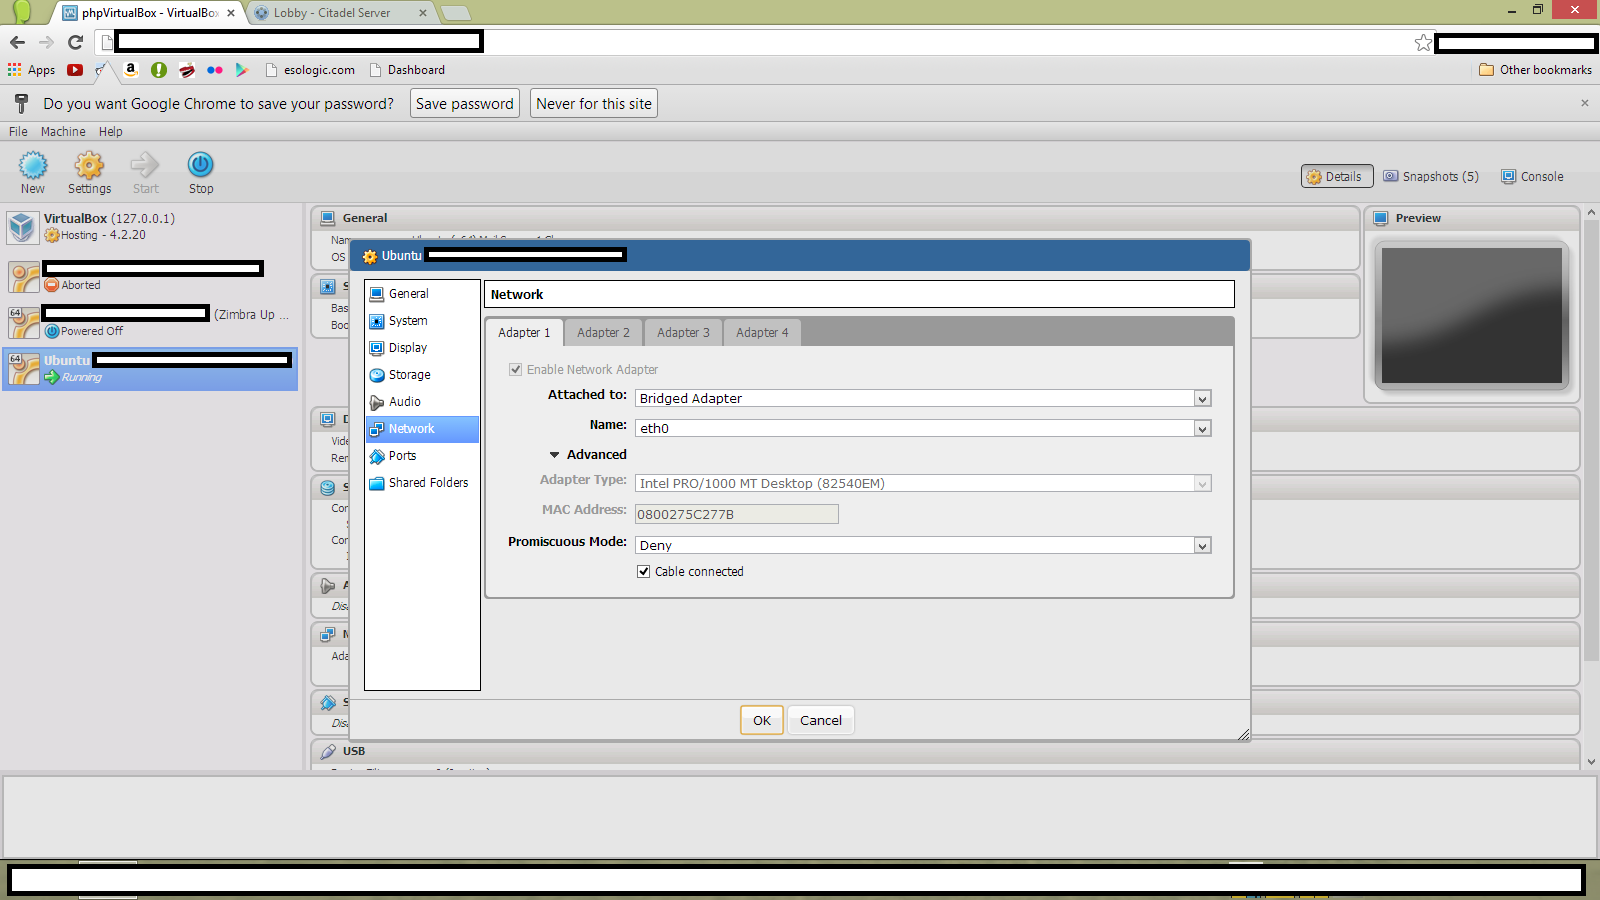
In PHPvirtualbox, set the network mode to ‘Bridged Adapter’
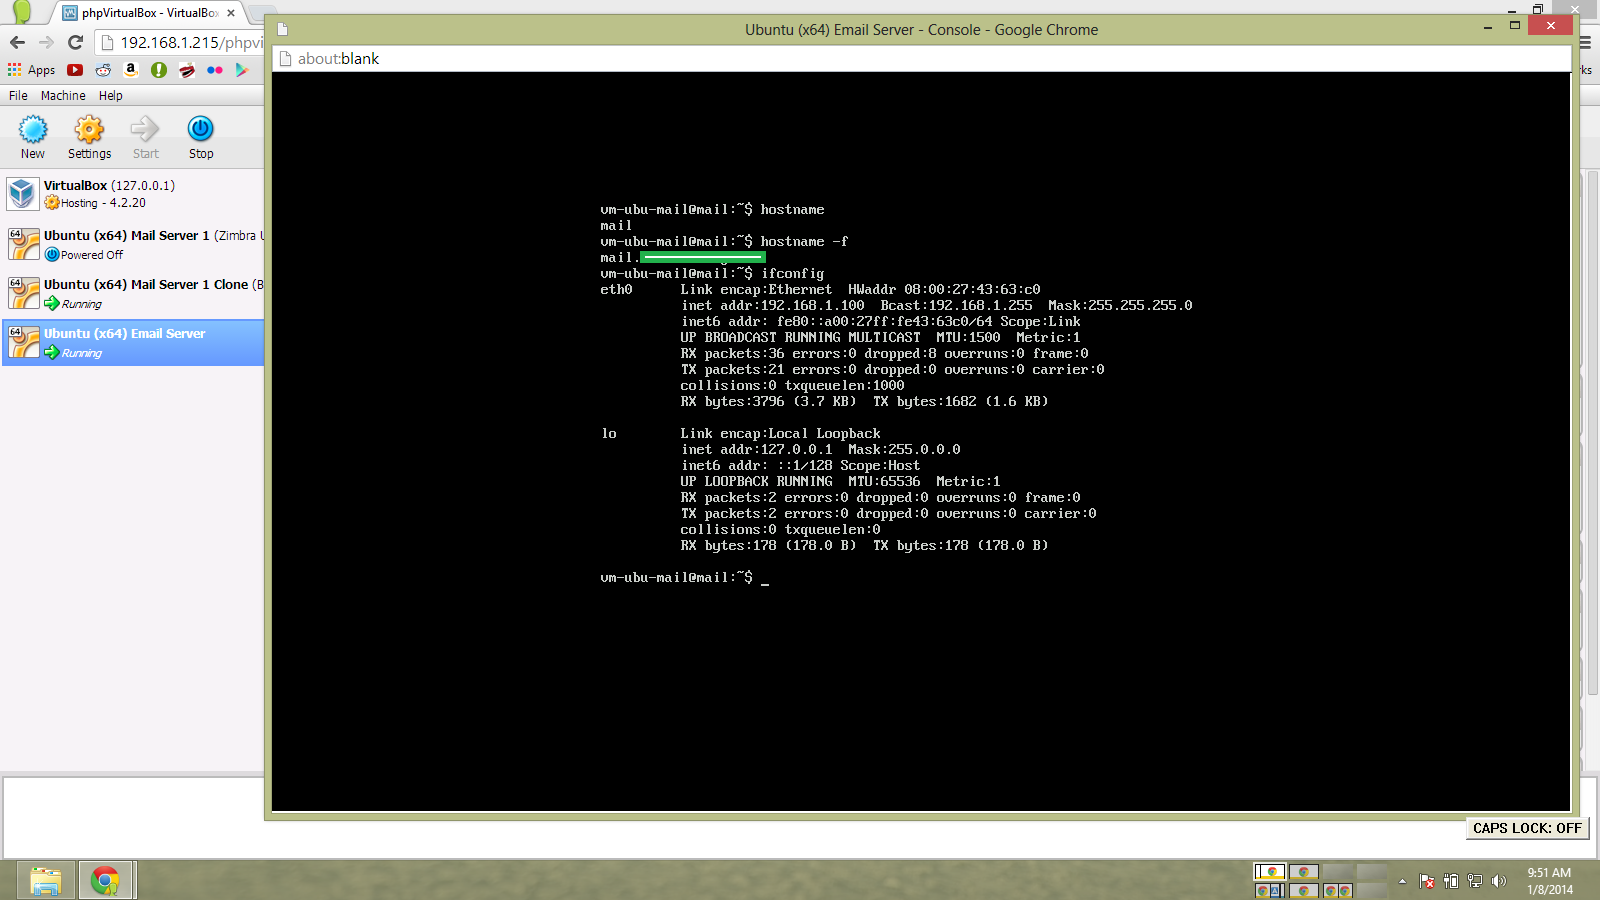
Running the following commands
hostname
hostname -f
ifconfig
And getting these results means our configuration is ready to go!
I am now using the Putty window so I can copy commands in. First log in as root.
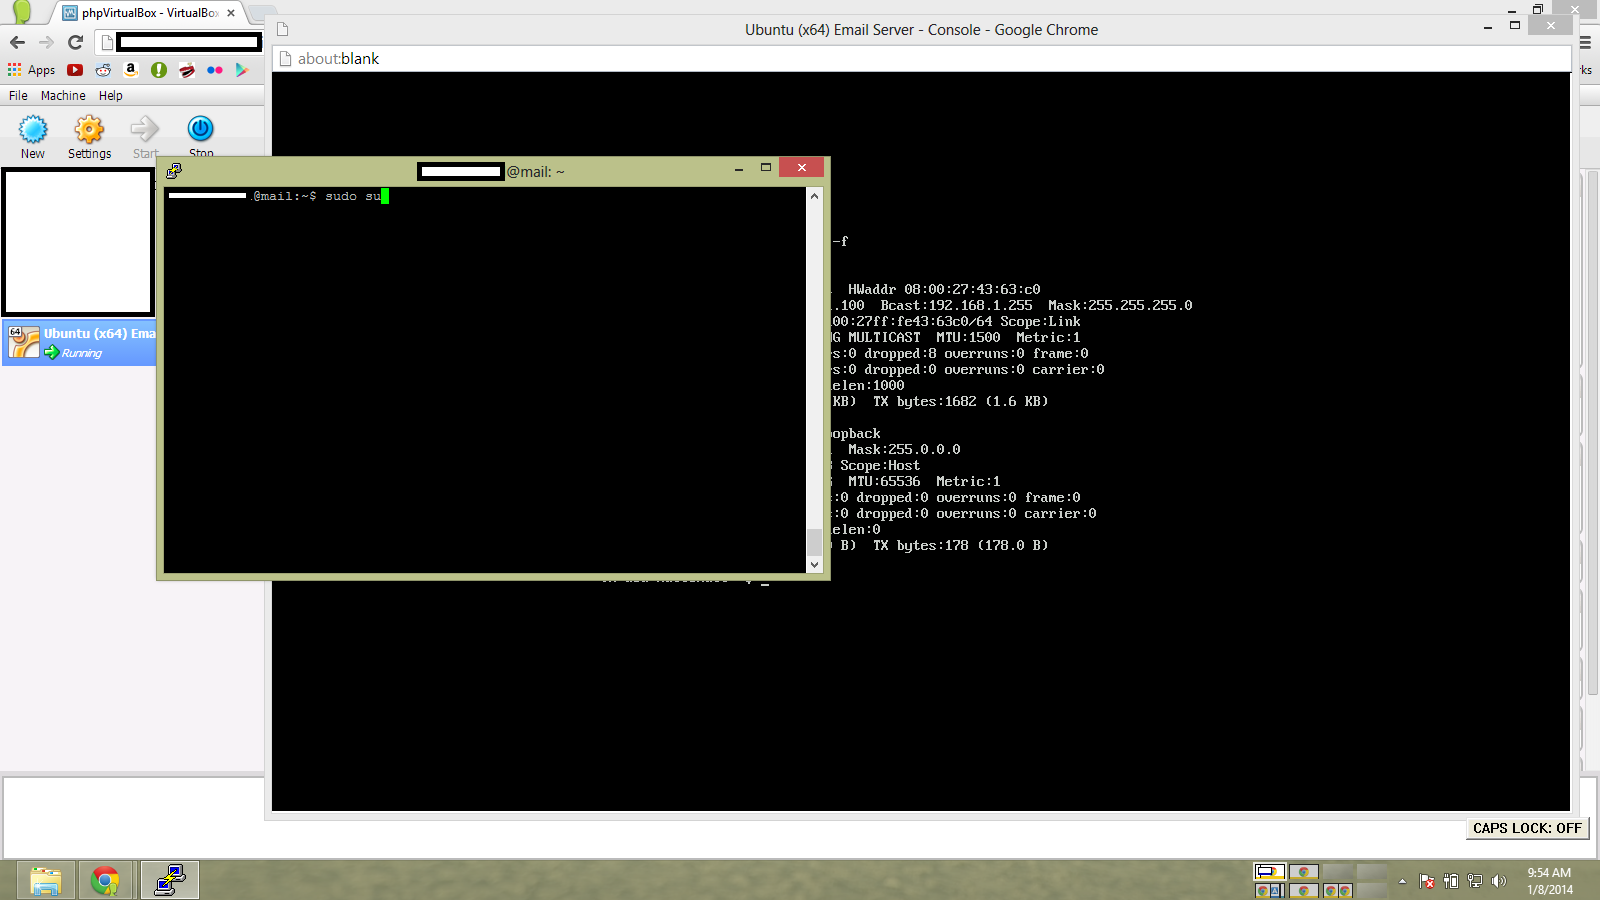
Run
</pre>
apt-get install build-essential curl g++ gettext shared-mime-info libssl-dev
curl http://easyinstall.citadel.org/install | bash
<pre>
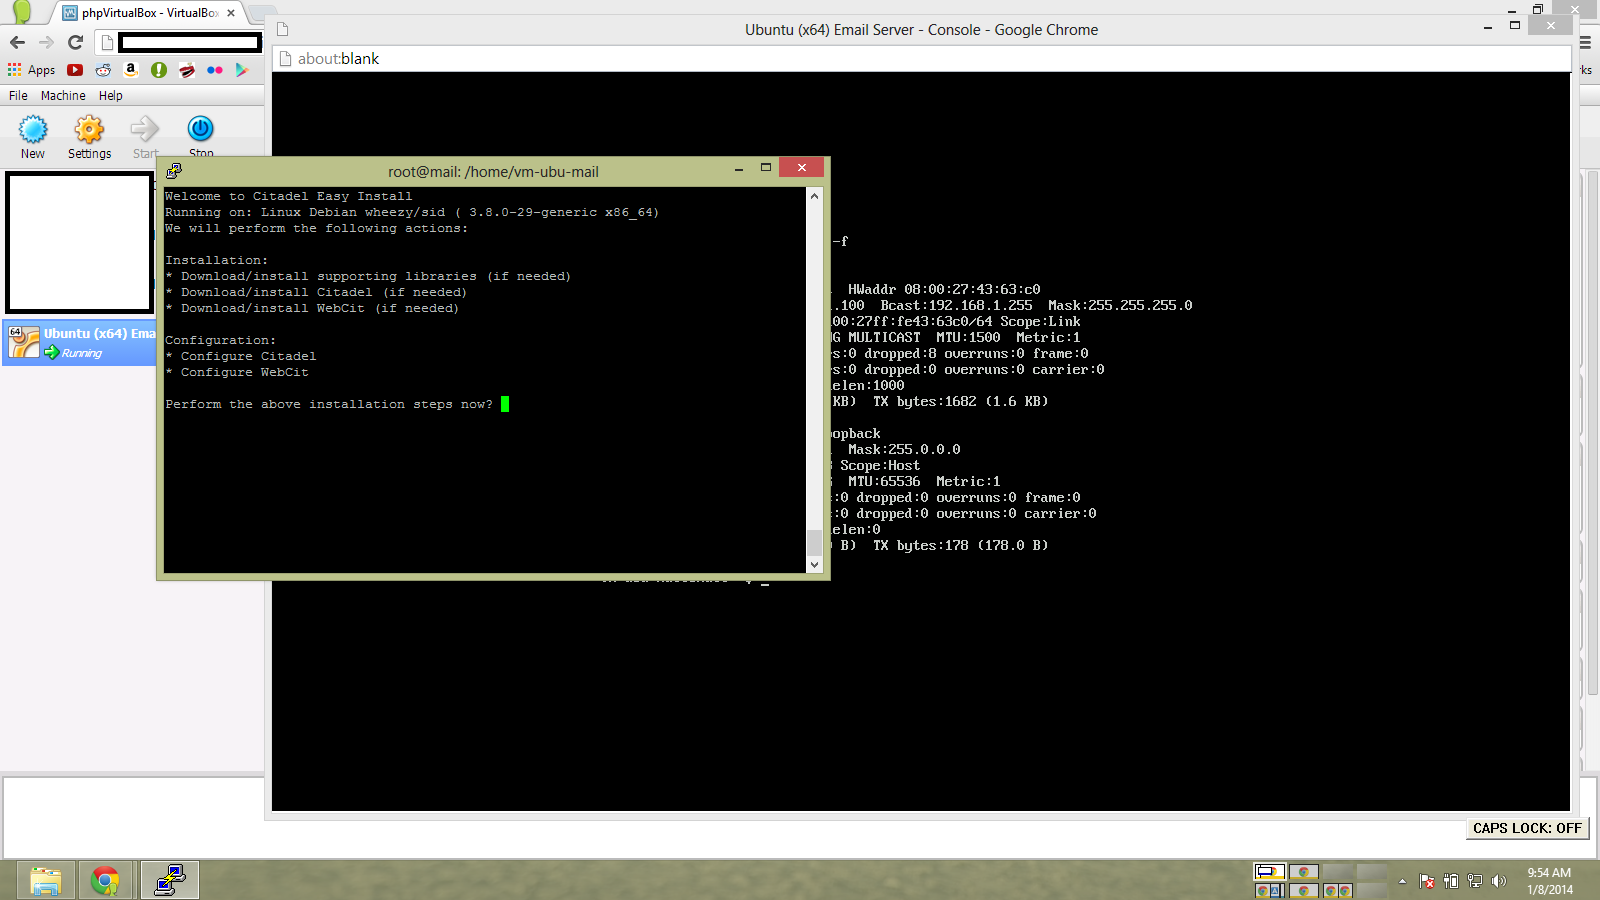
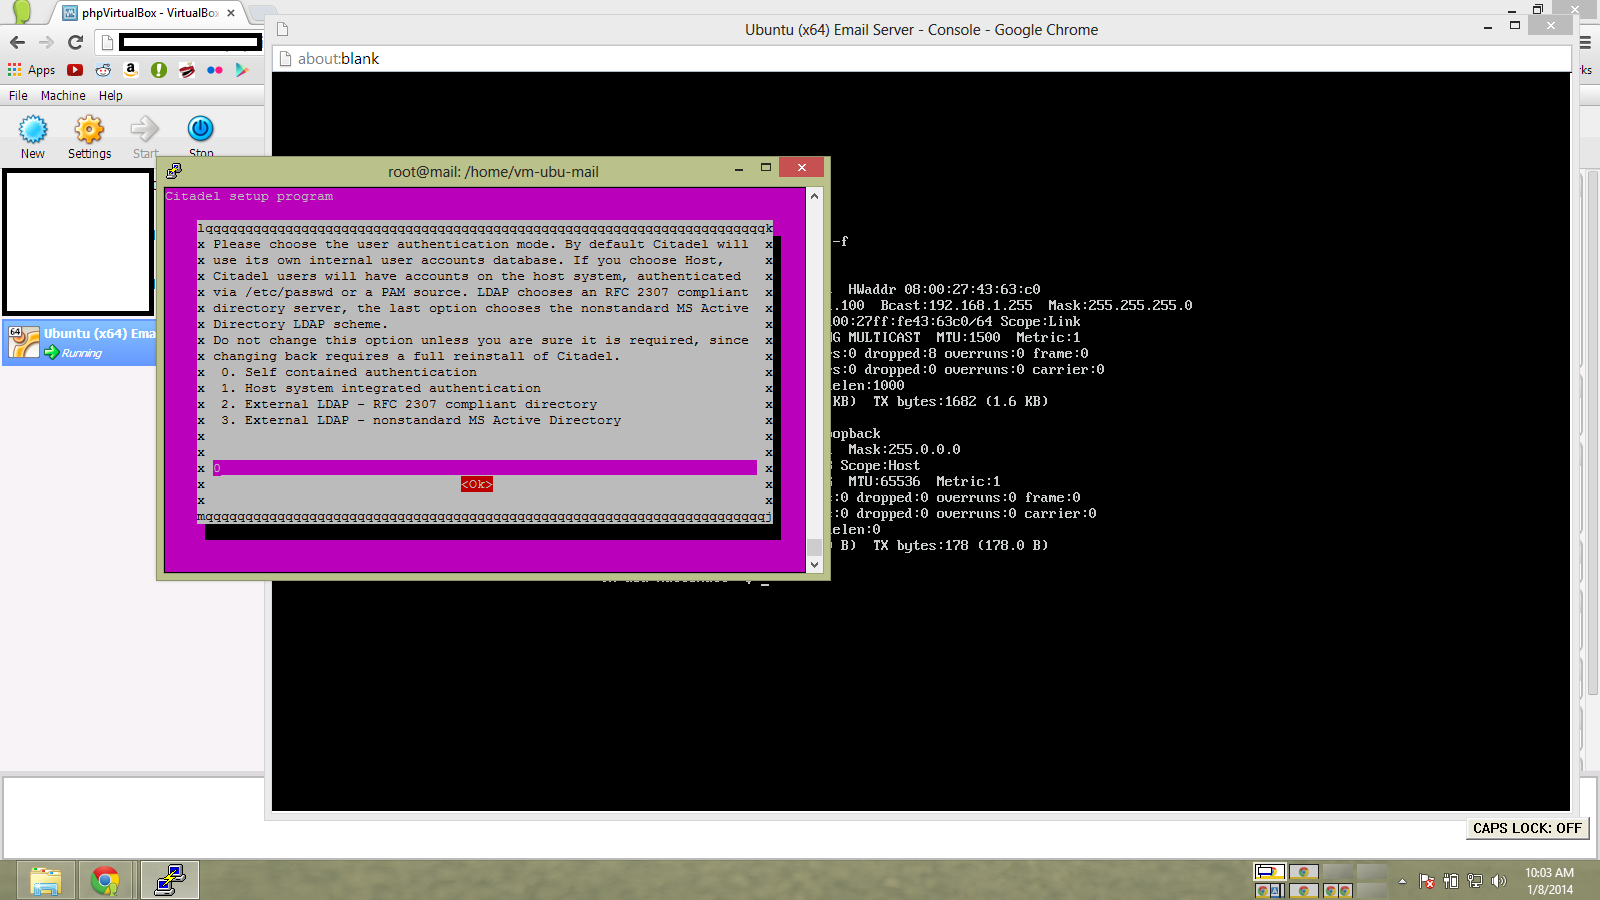
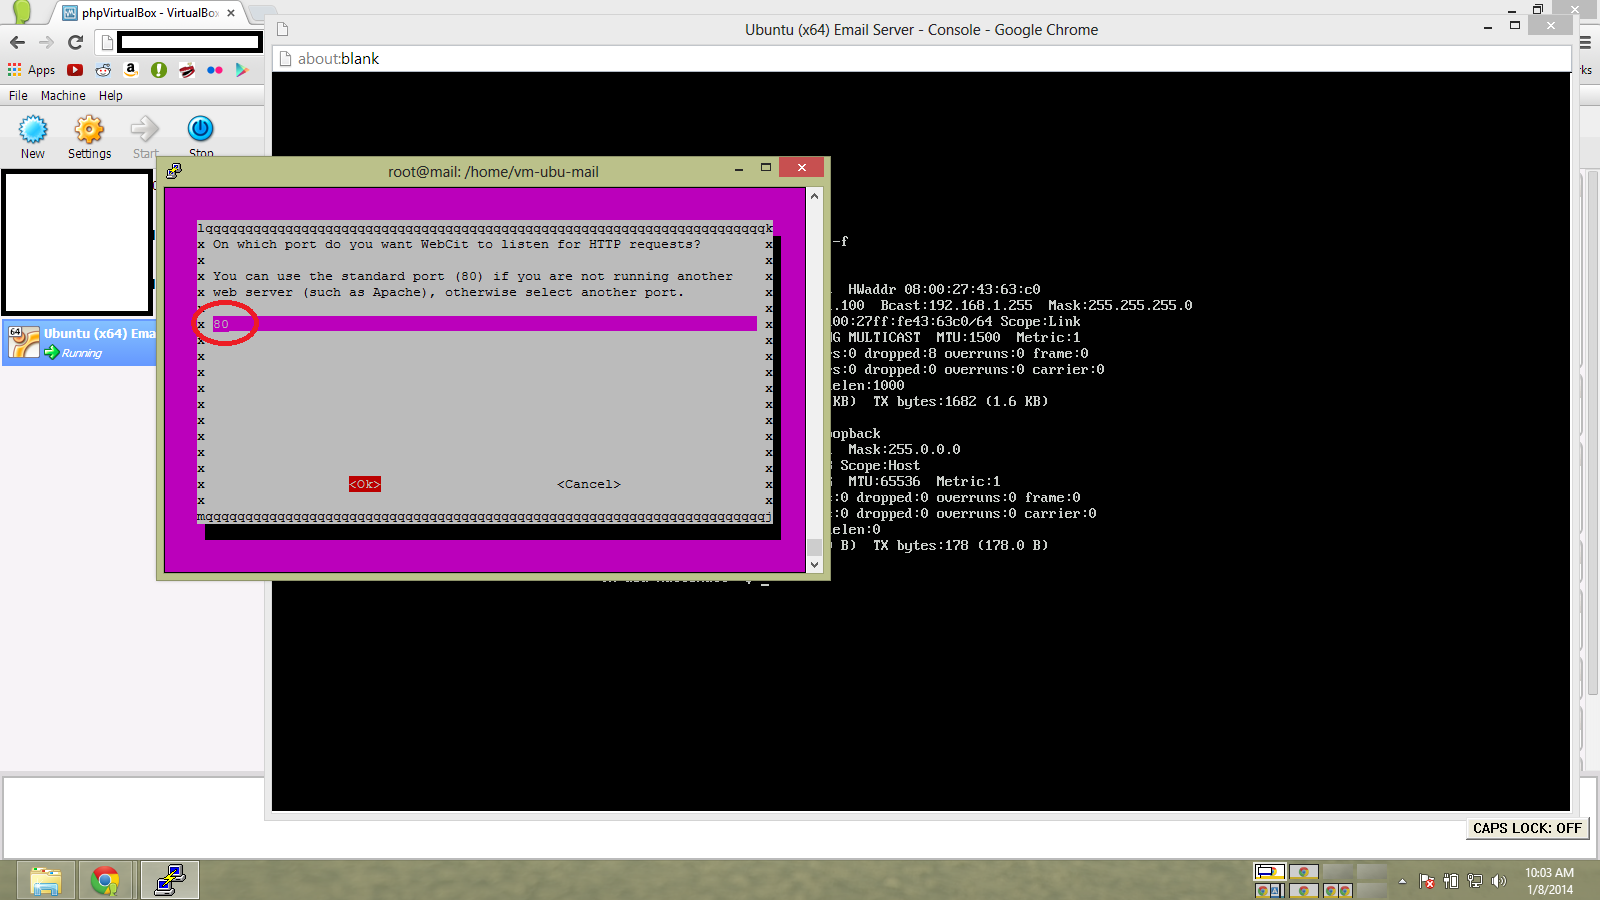
and go through the citadel install process.


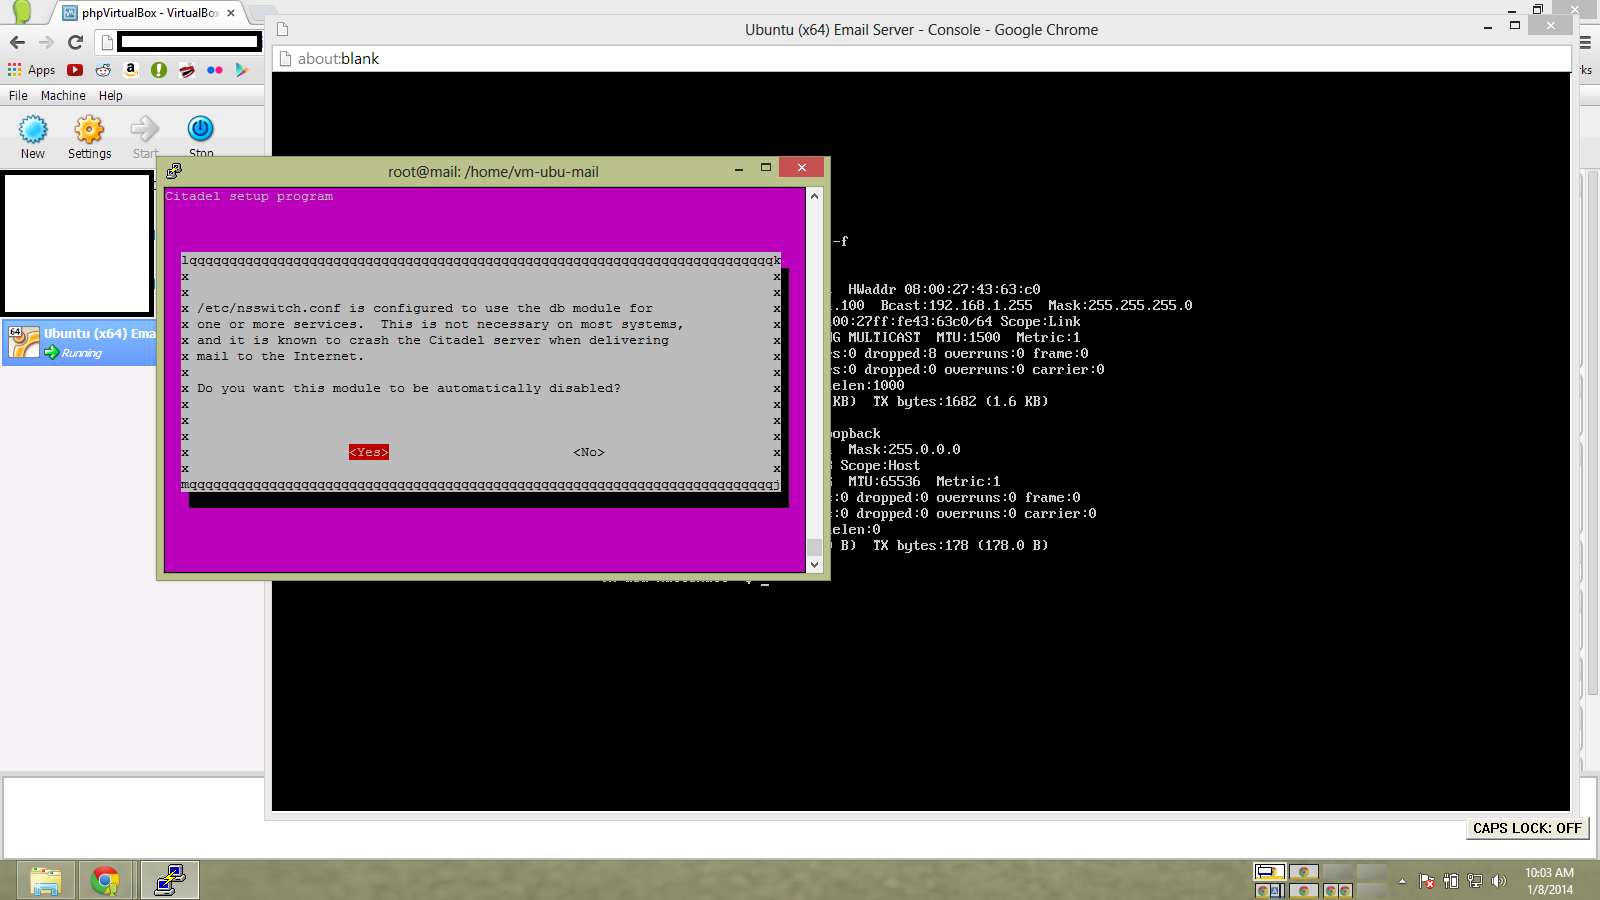

I’m changing the default port to 80 for now, just for simplicity.

After the install, reboot the VM.

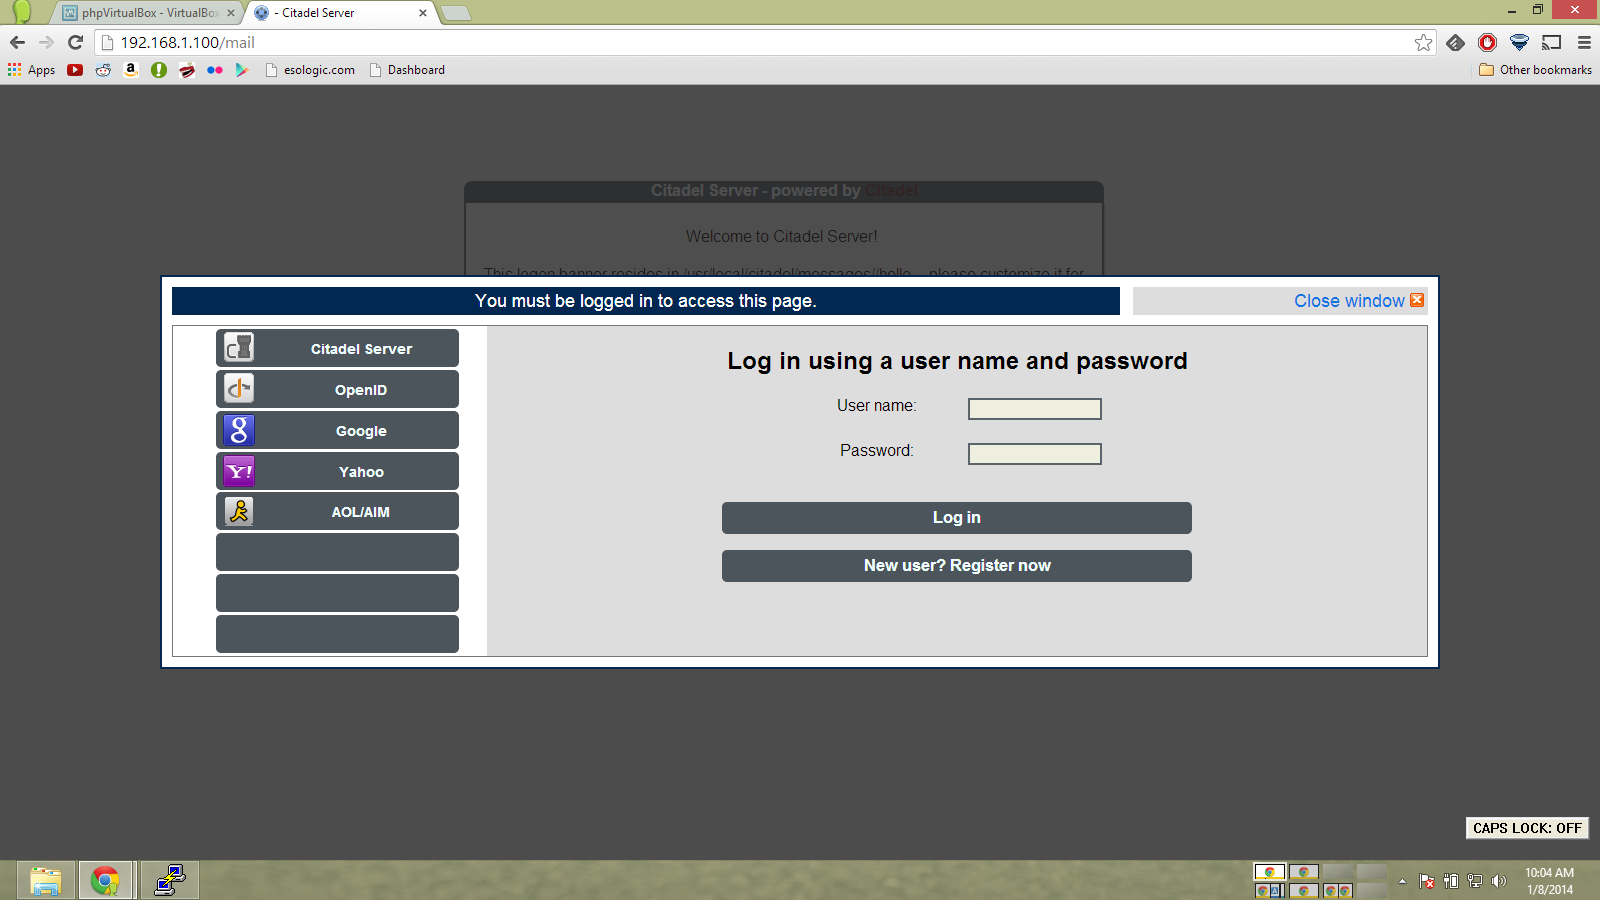
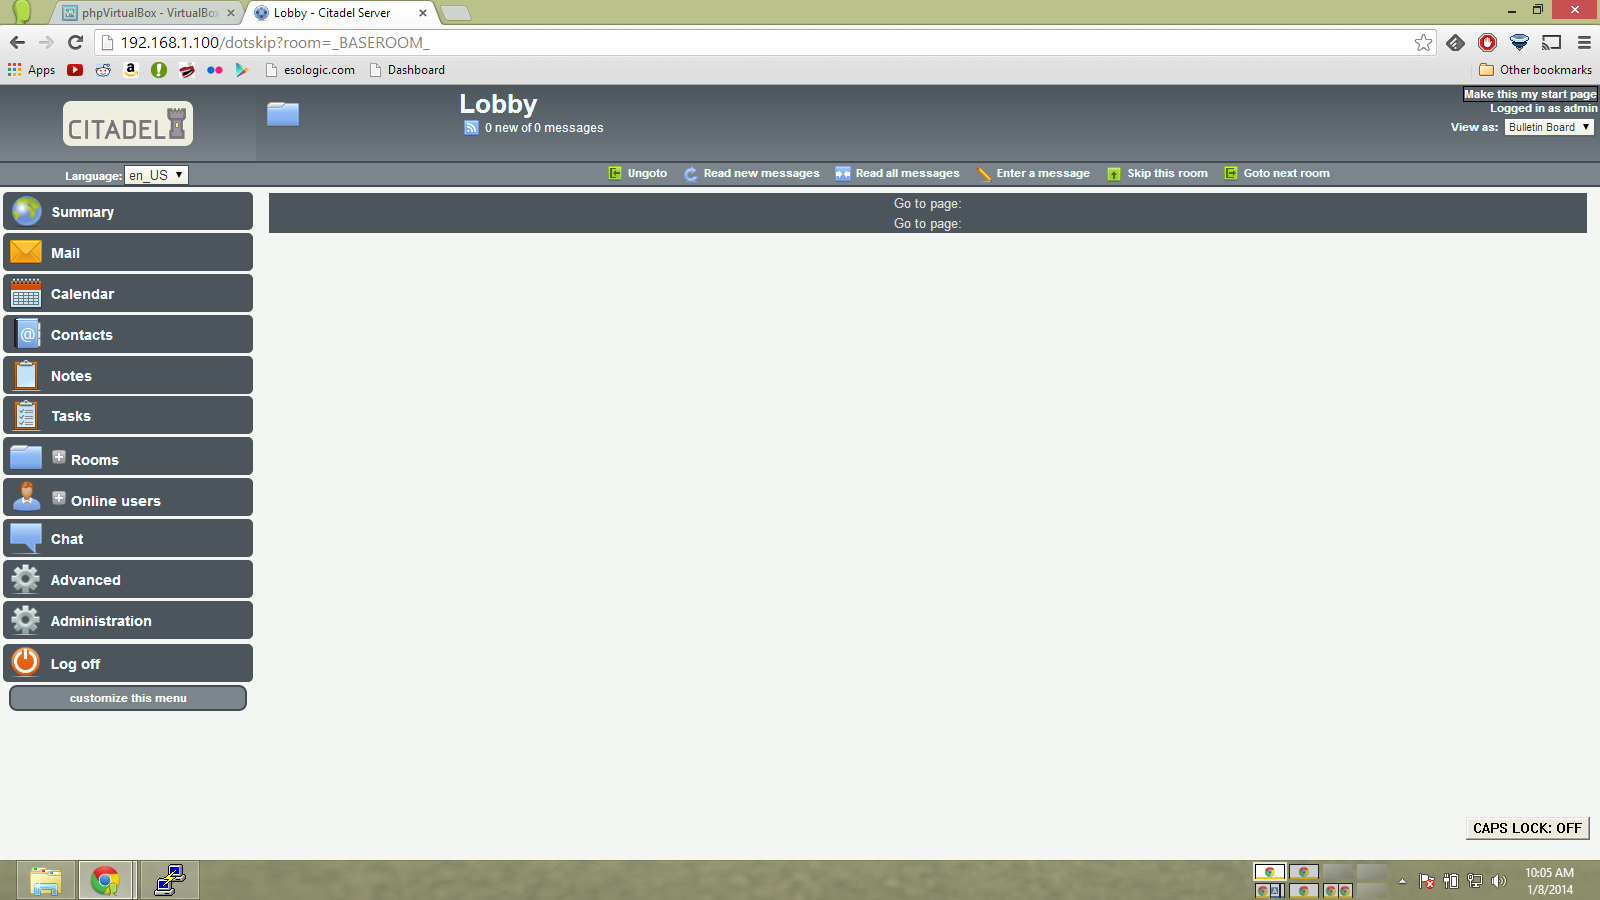
Now log in to citadel!
Now we need to do MX forwarding. My DNS host is network solutions, but the process is very similar regardless to which provider you use.

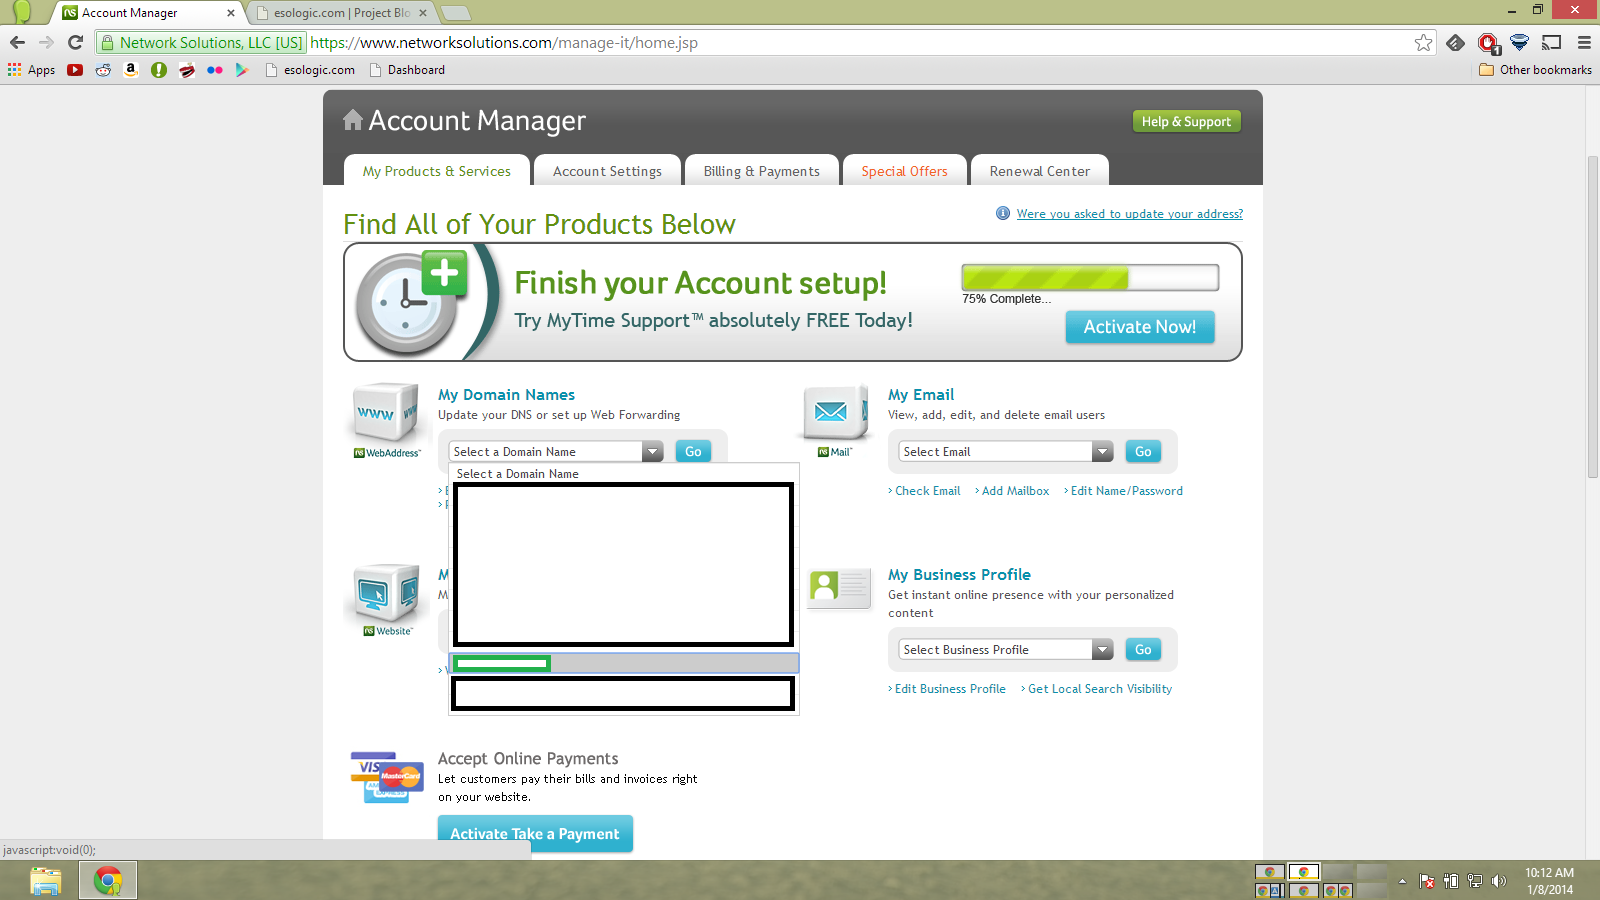
Again, your domain is represented by the green box.
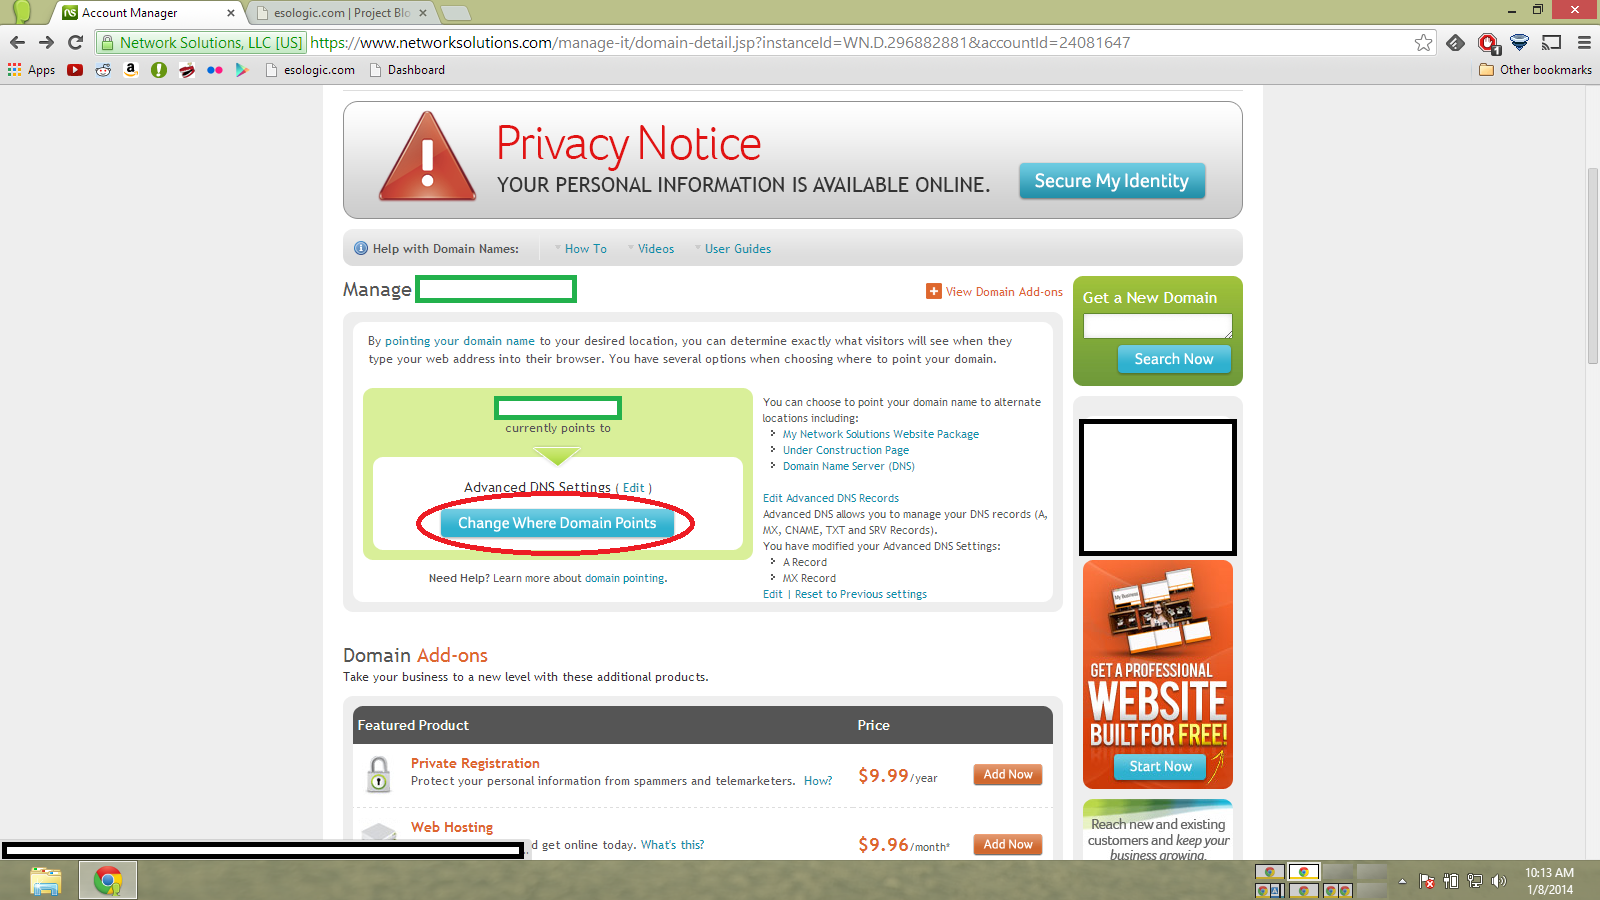
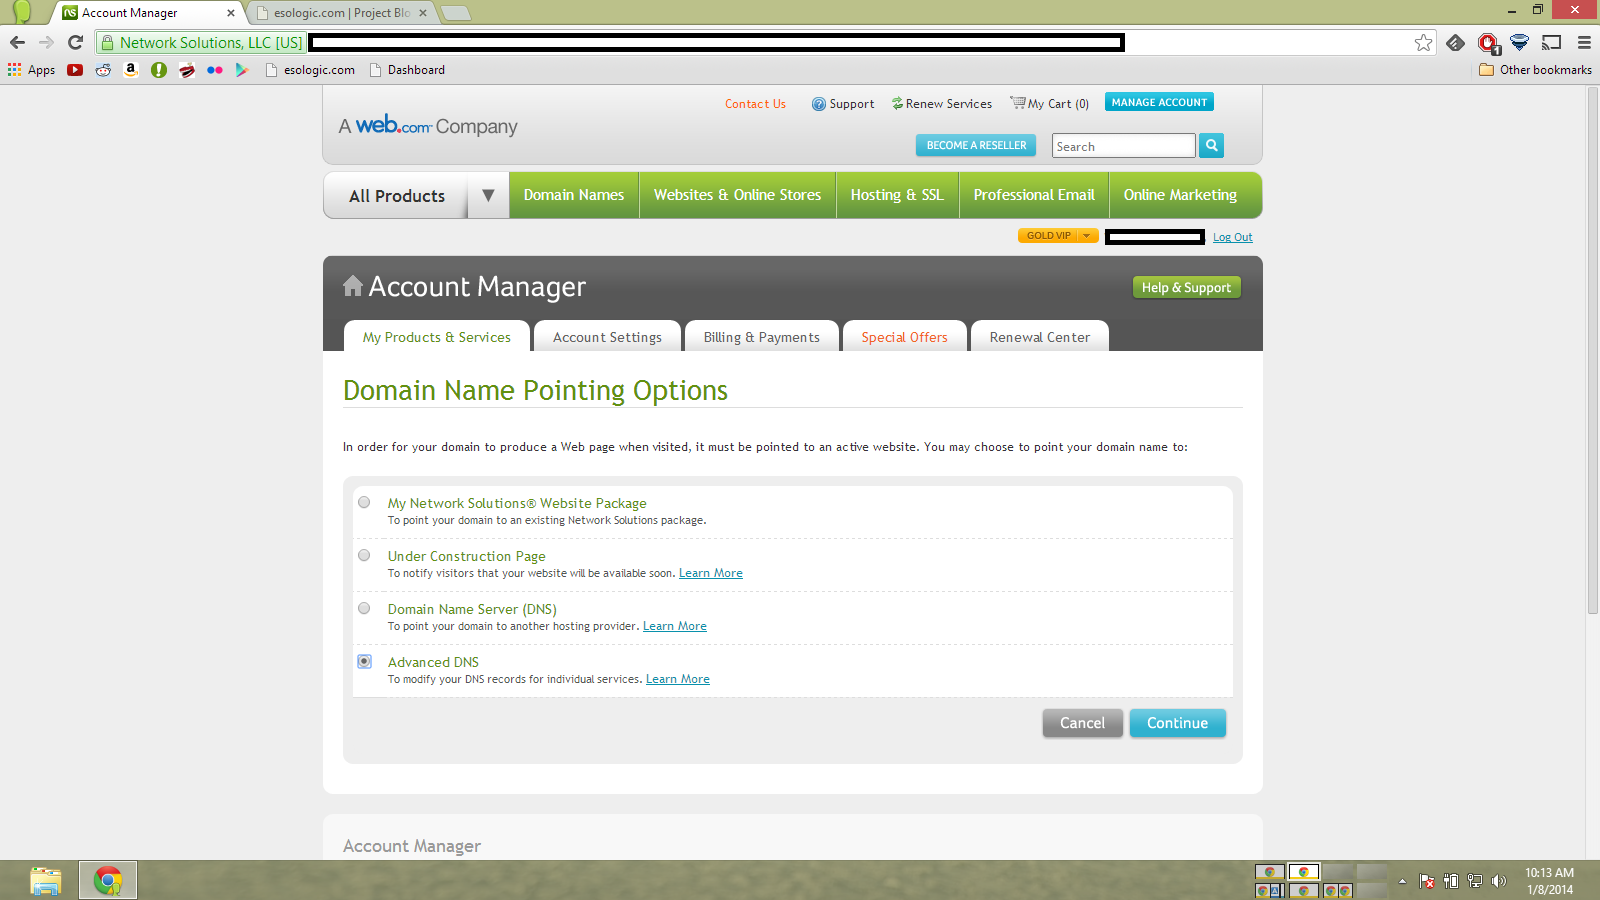
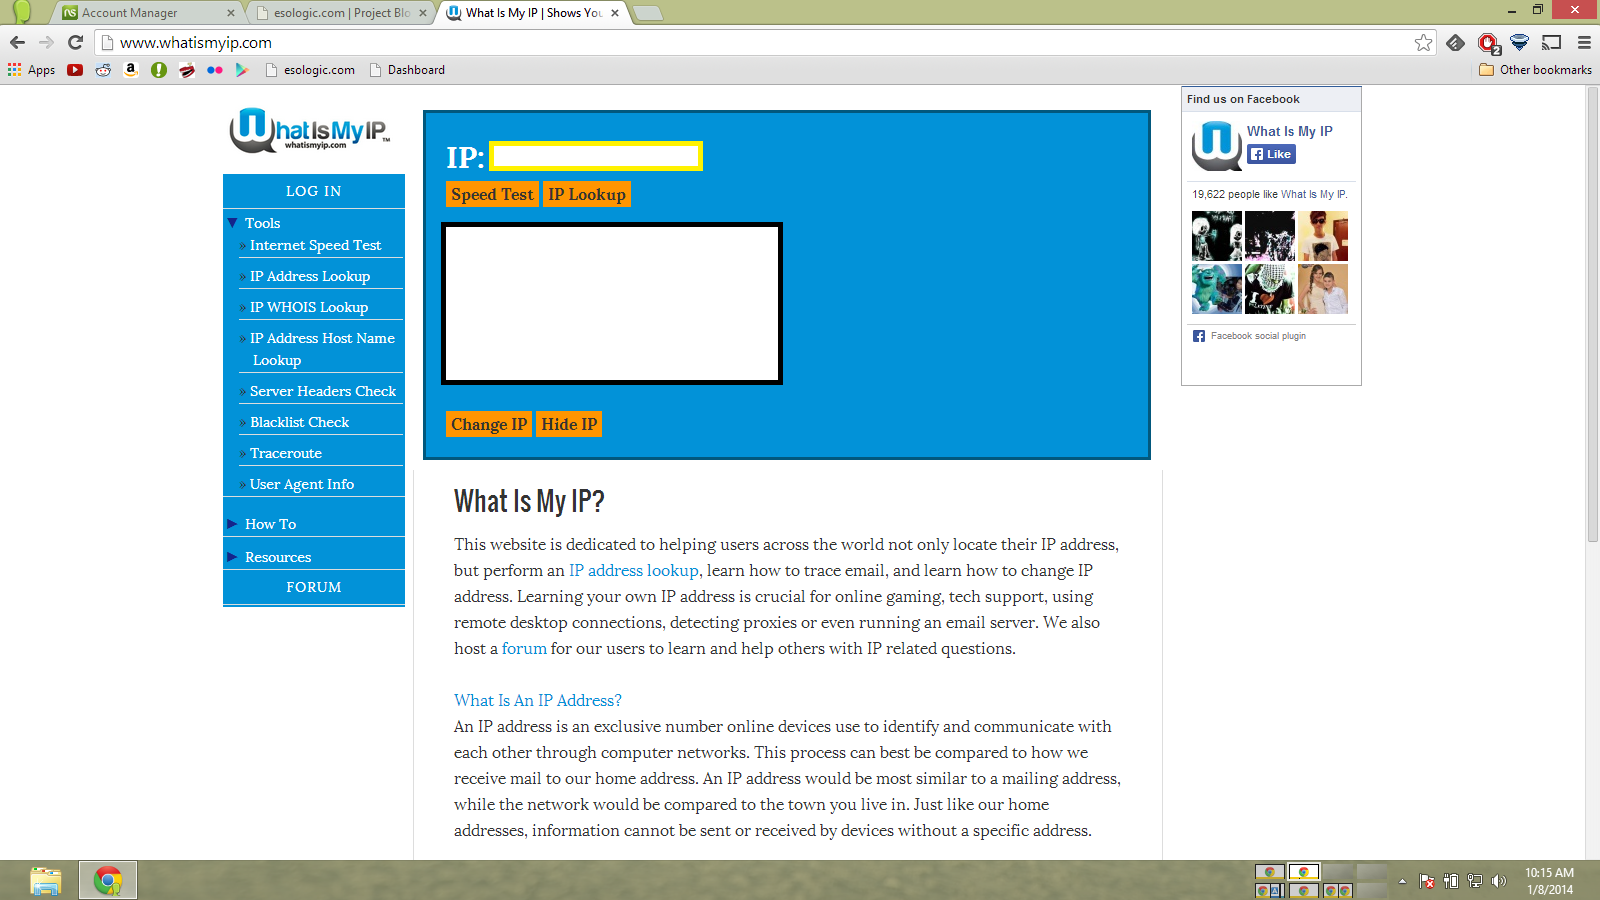
The yellow box is your IP
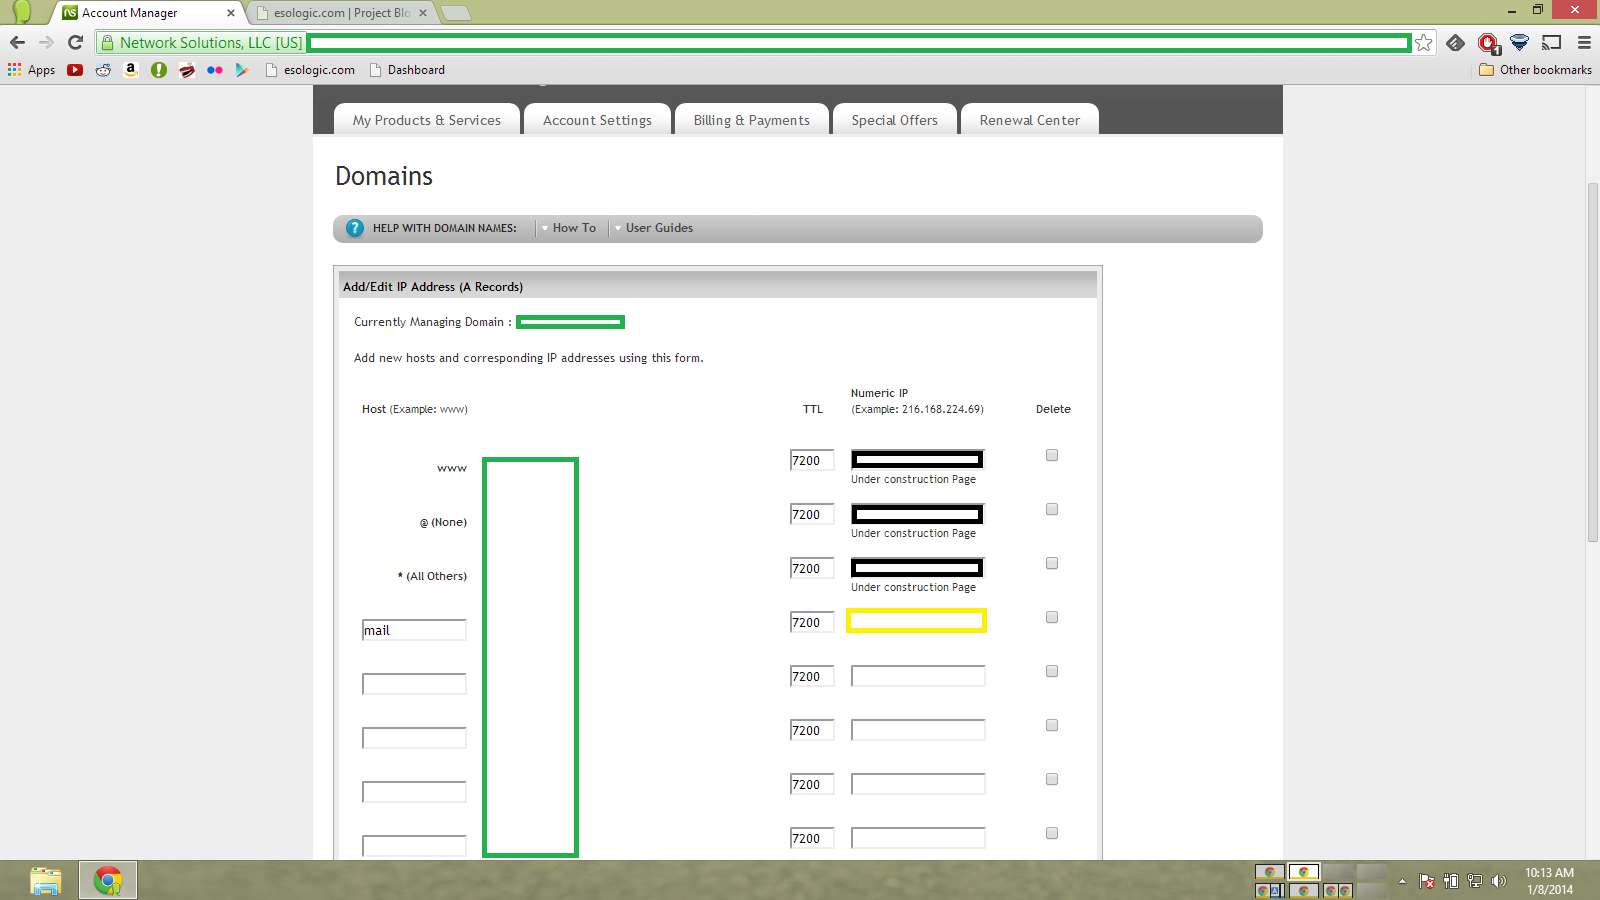
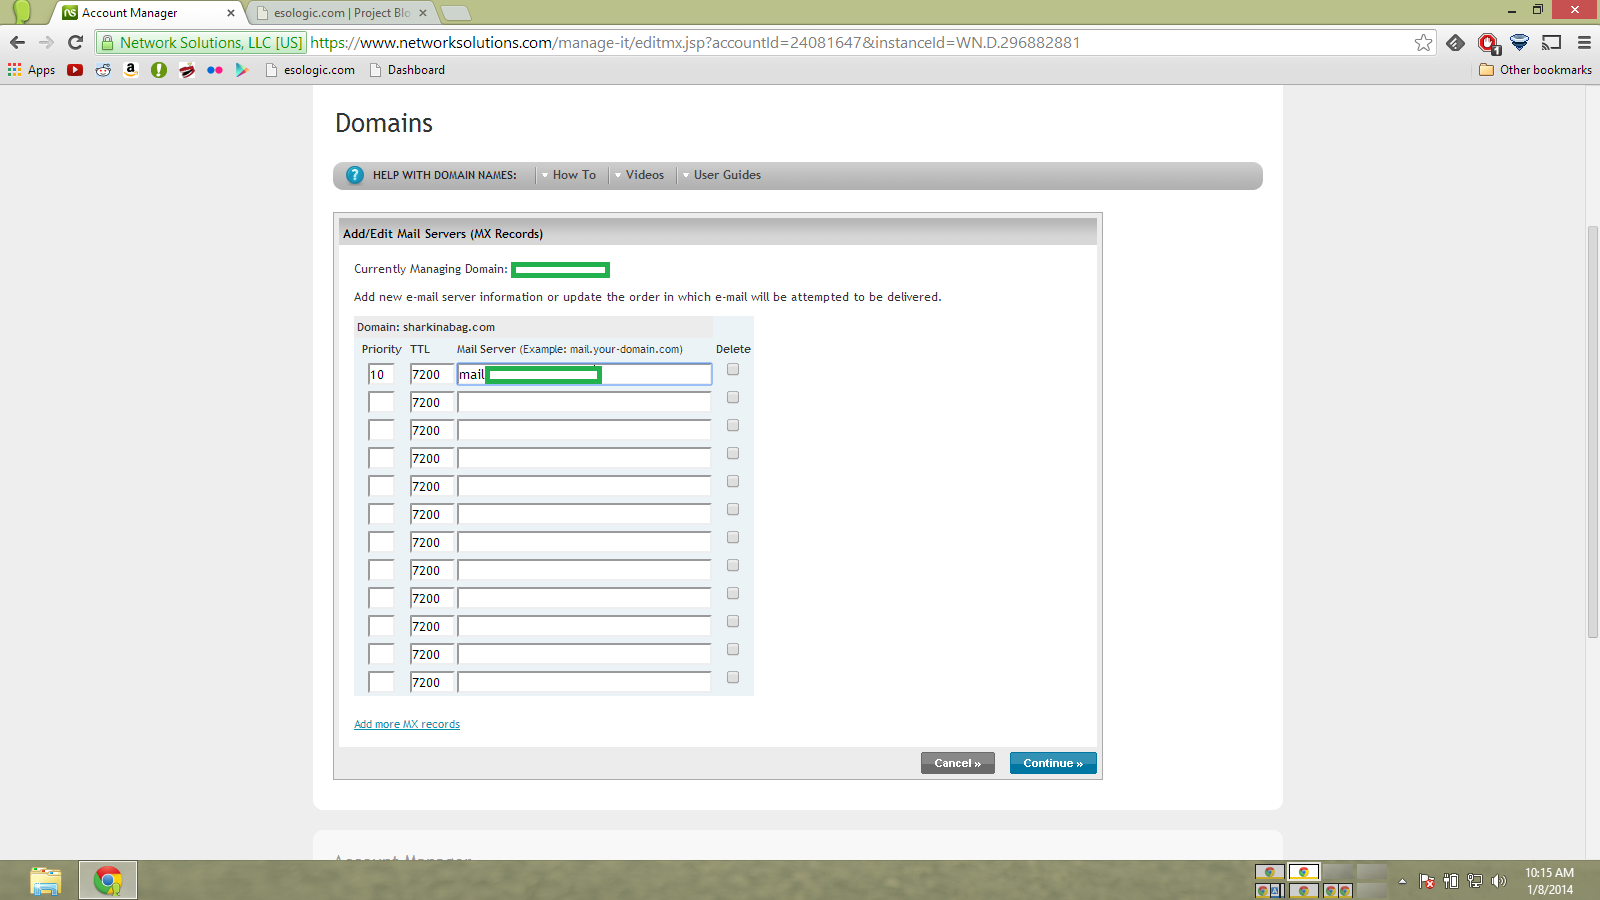
You can use whatismypi to determine your IP address. If it is dynamic, you can use No-IP to get a static one .
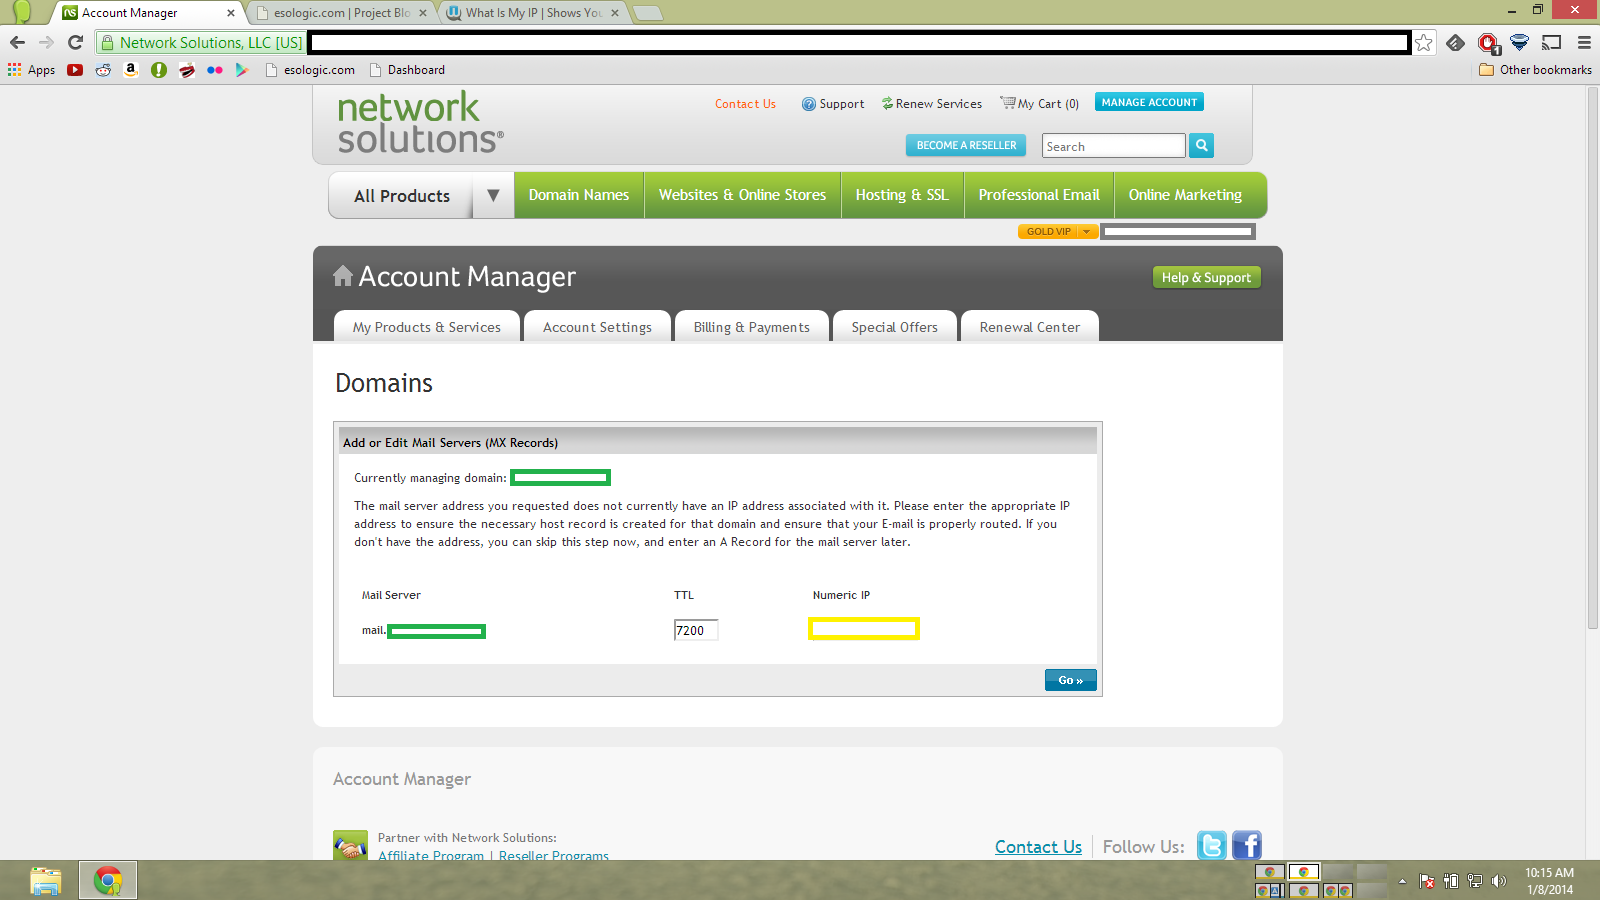
The records should look something like this.
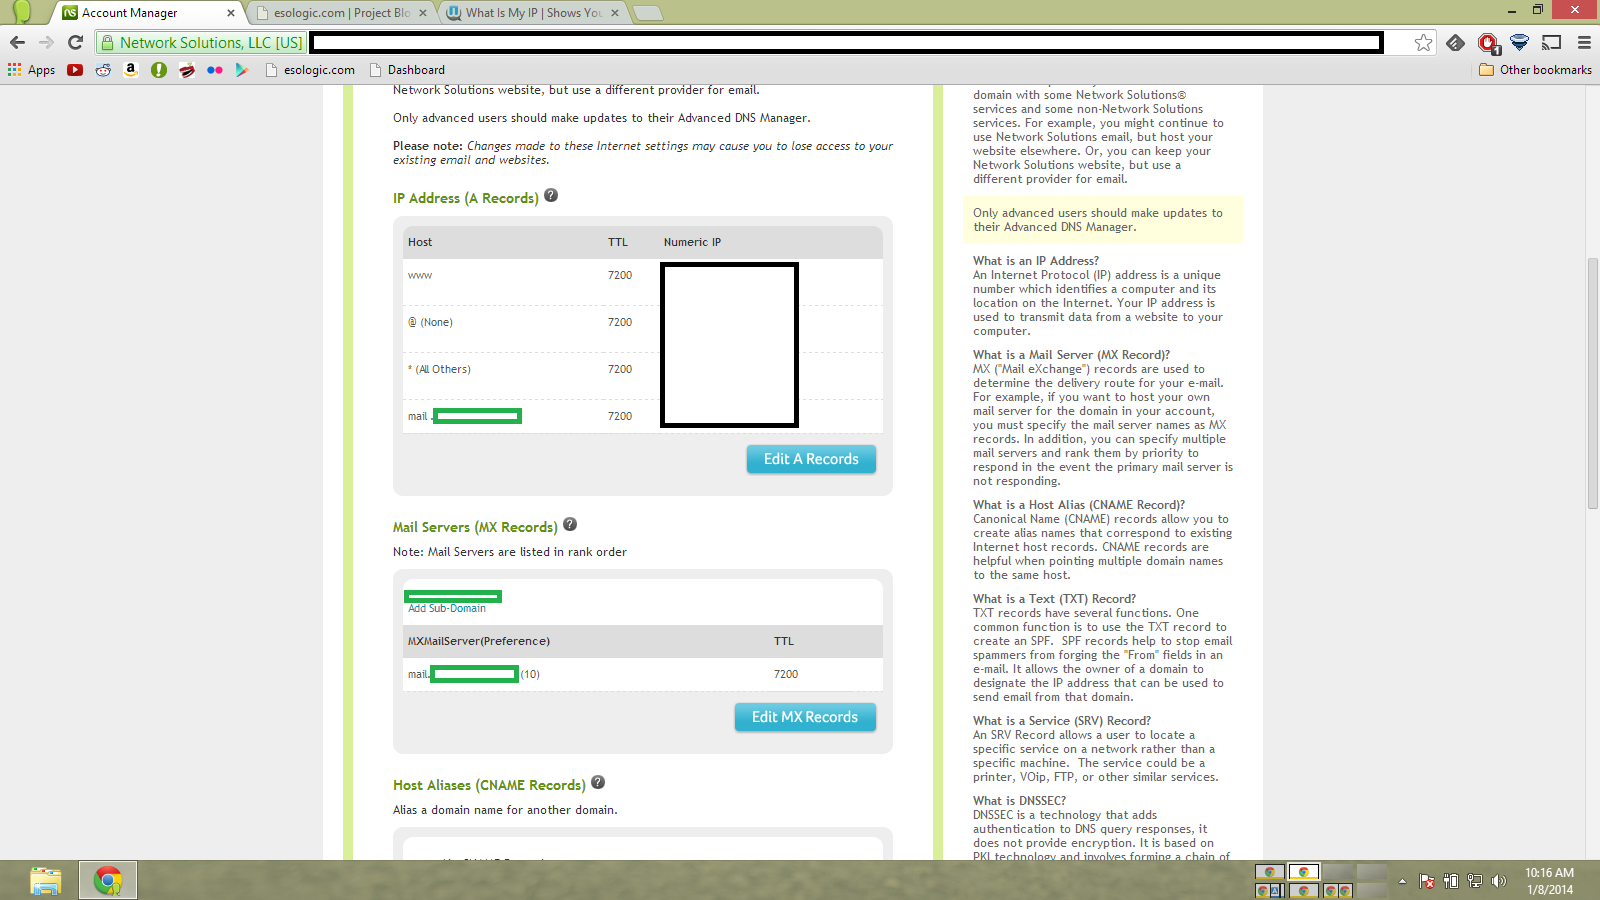
Now in citadel, you need to go to ‘Administration’ -> ‘Domain names and Internet mail configuration’ and add your domain.
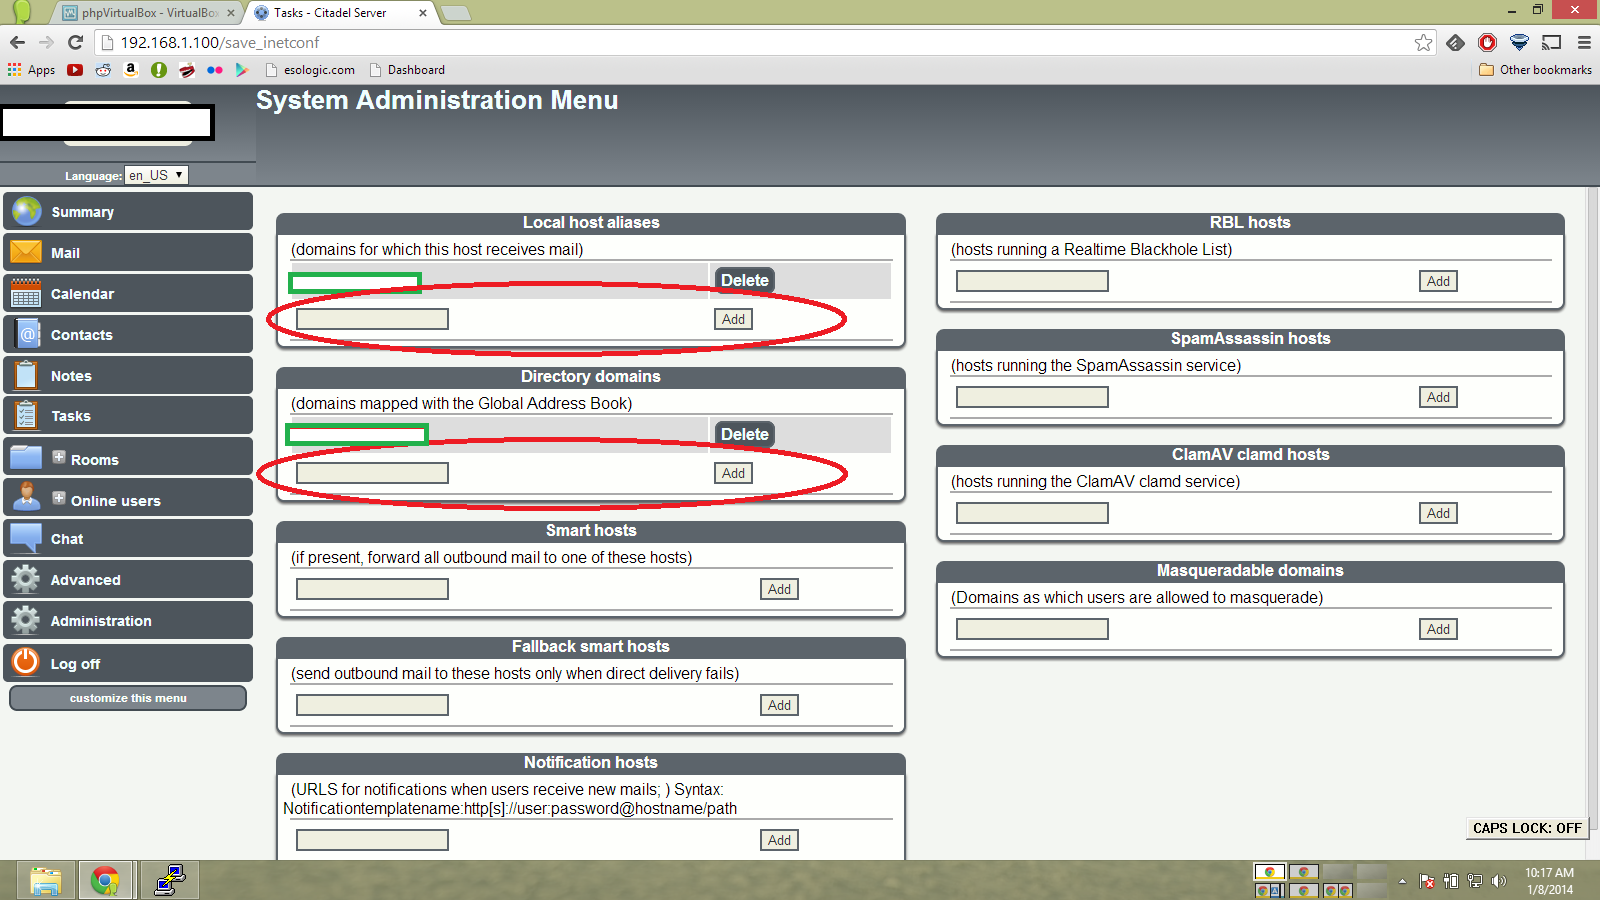
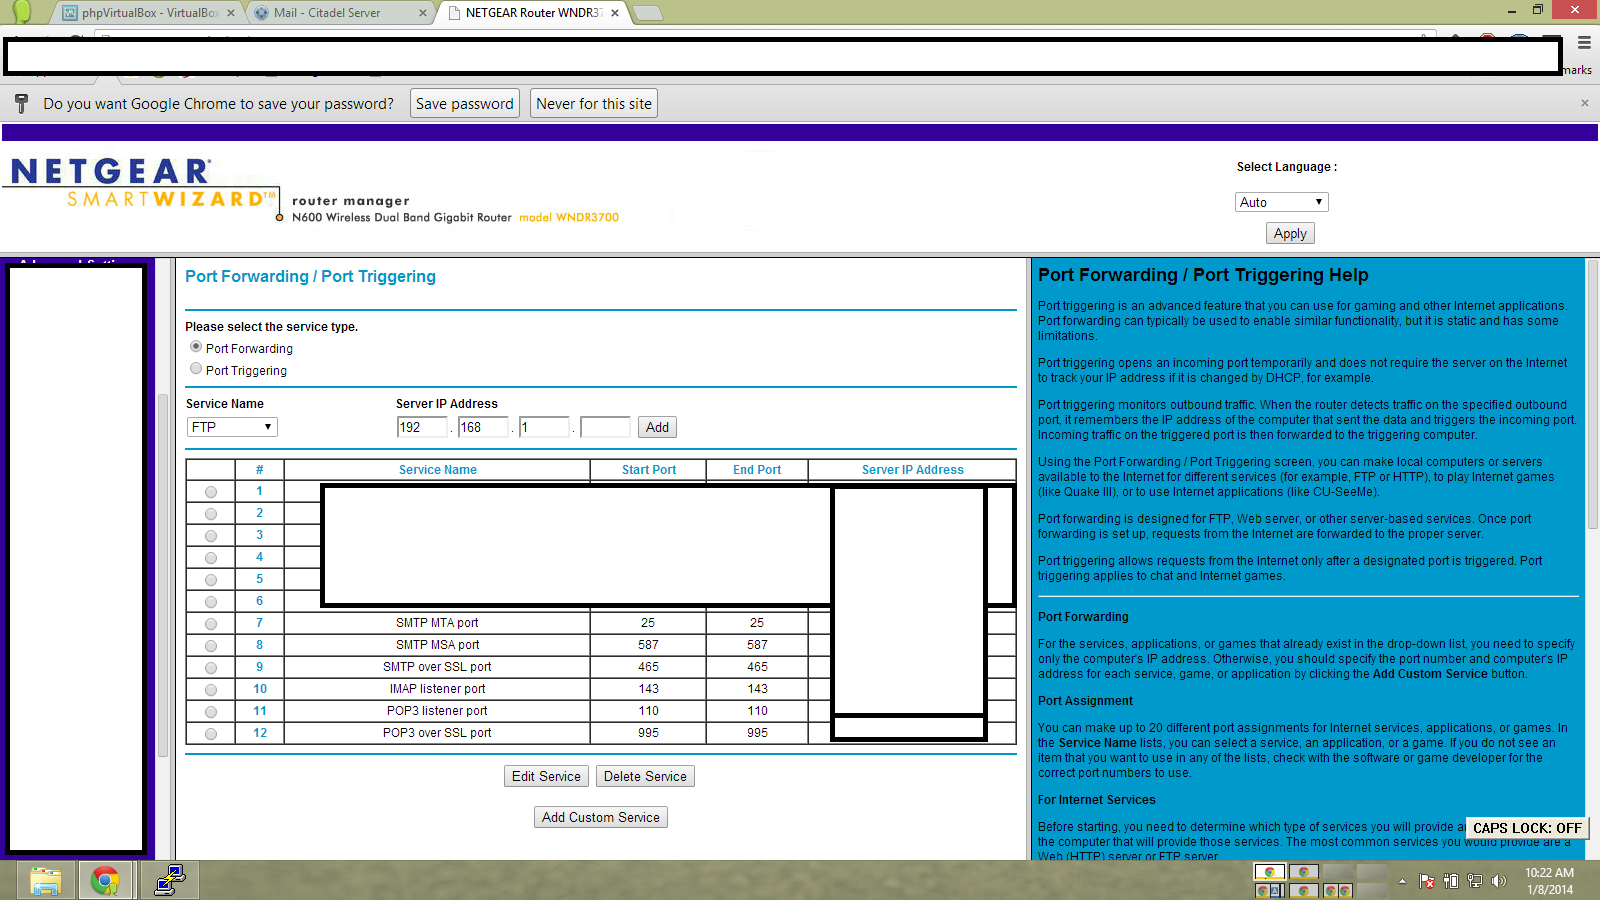
Now open the following ports on your router. This is dangerous, but IMO worth it.
Now we test!
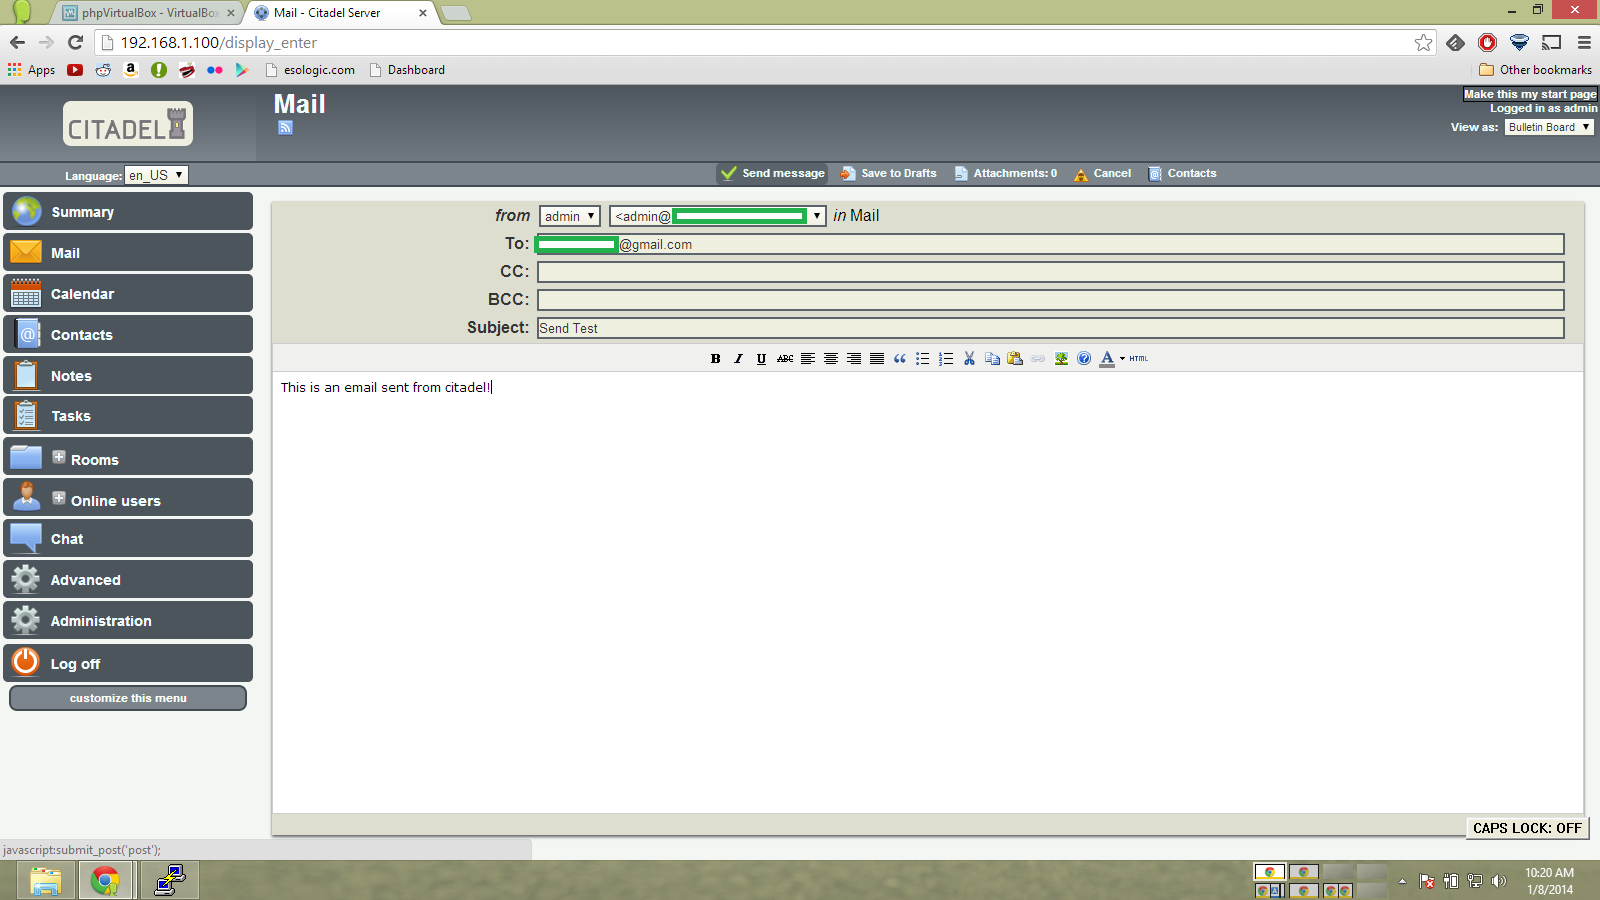
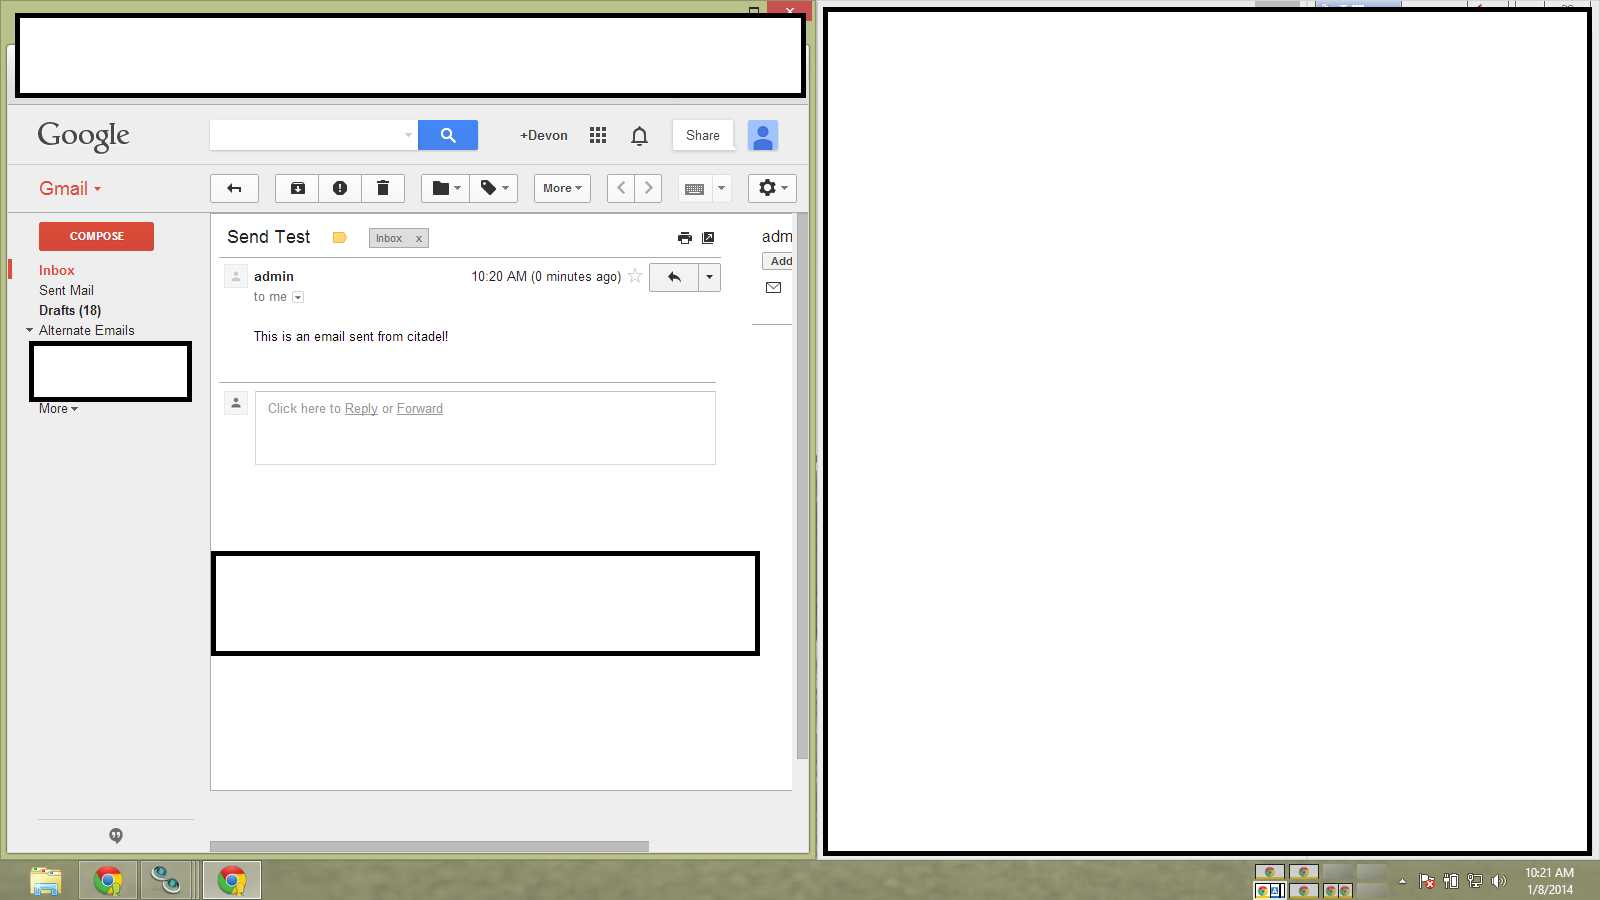
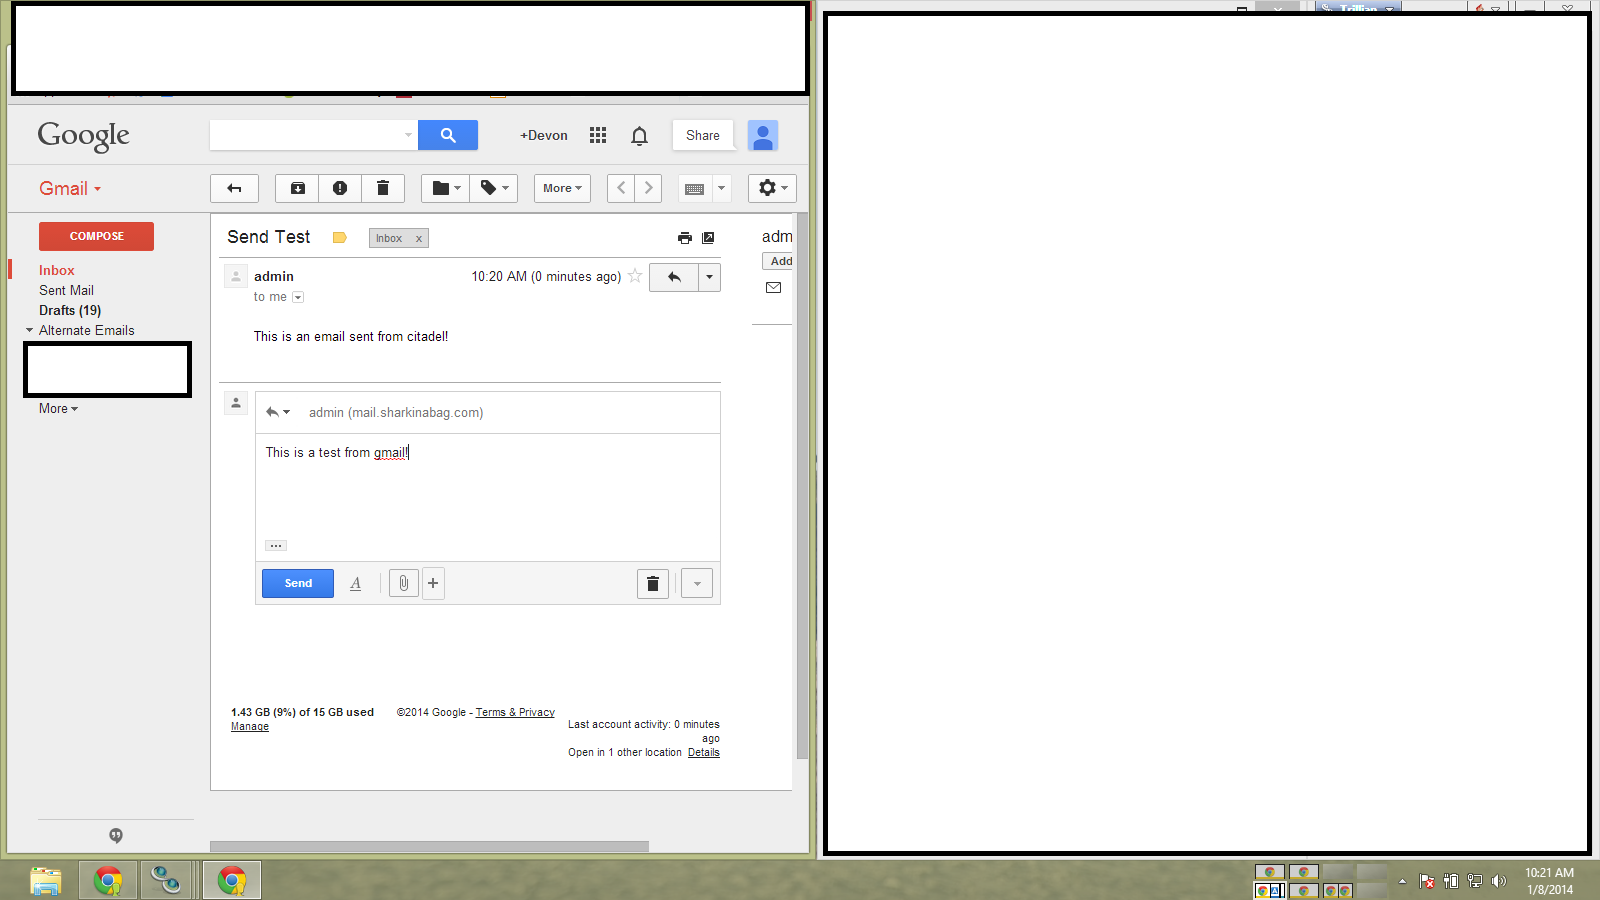
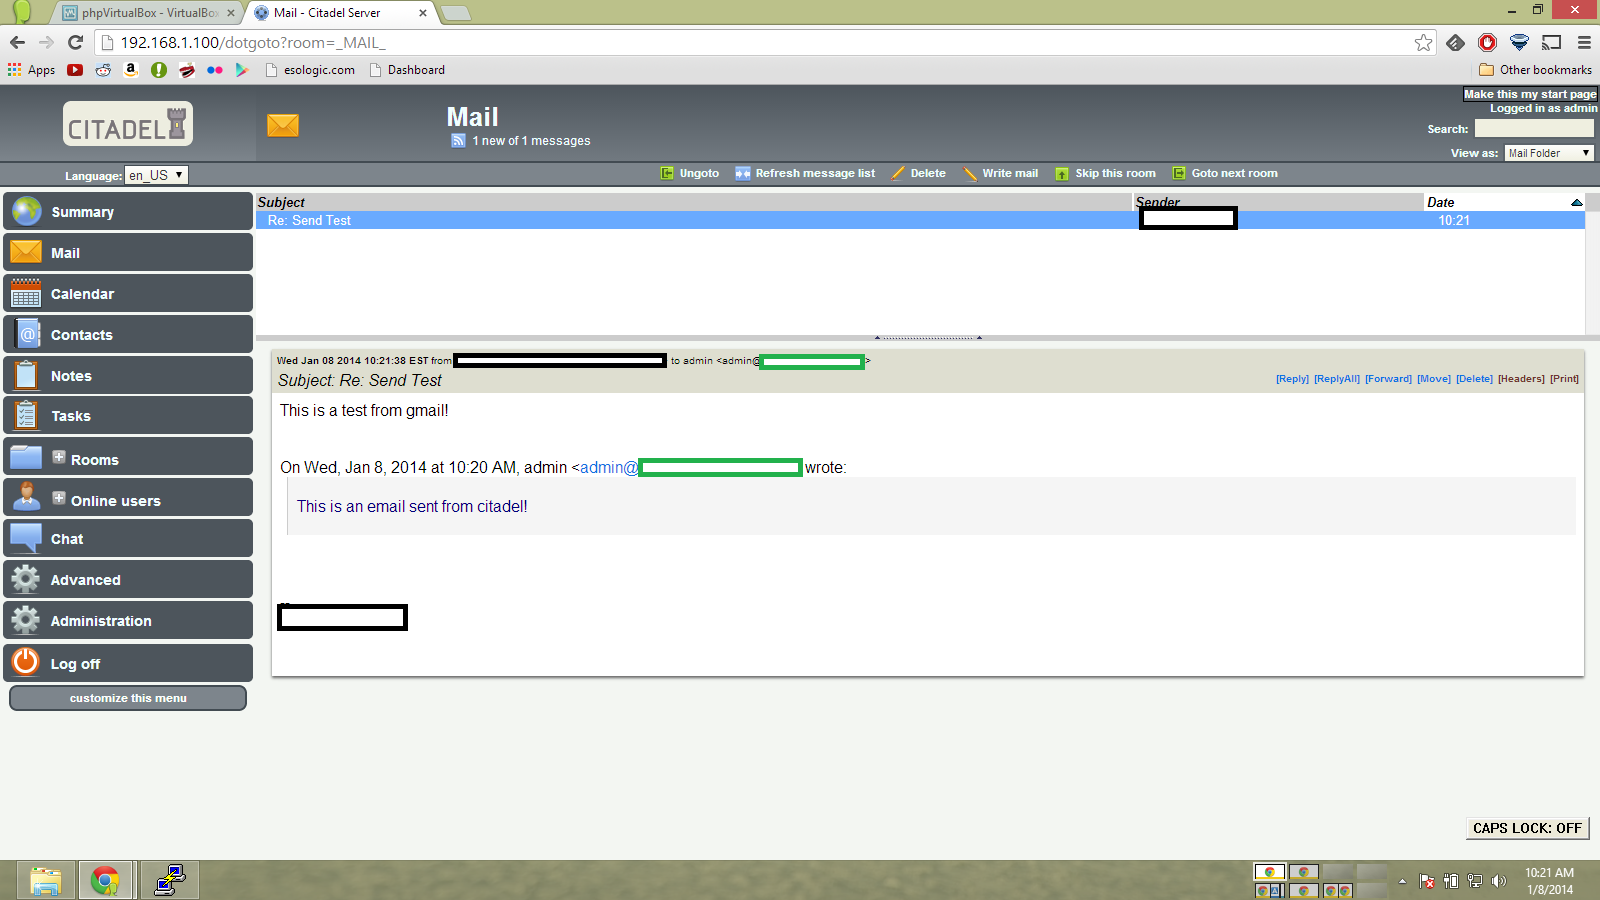
There we go! Pretty much no cost email addresses!
Thanks for reading, leave any improvements in the comments.

Okay! So for now, I’ve landed on Citadel for the email server software that I’m going to use. I’ve bounced around between four different clients (iredmail, Citadel, Ubuntu’s Suite, and Zimbra) and have landed on Citadel because I can install it (lol) and because it suites my needs better. The other software suites are basically wrappers of a bunch of smaller discrete softwares that build up the Ubuntu Suite. This is fine for dedicated servers, but since I’m going to be running this inside of a Virtual Machine, it is more convenient for me to use Citadel.
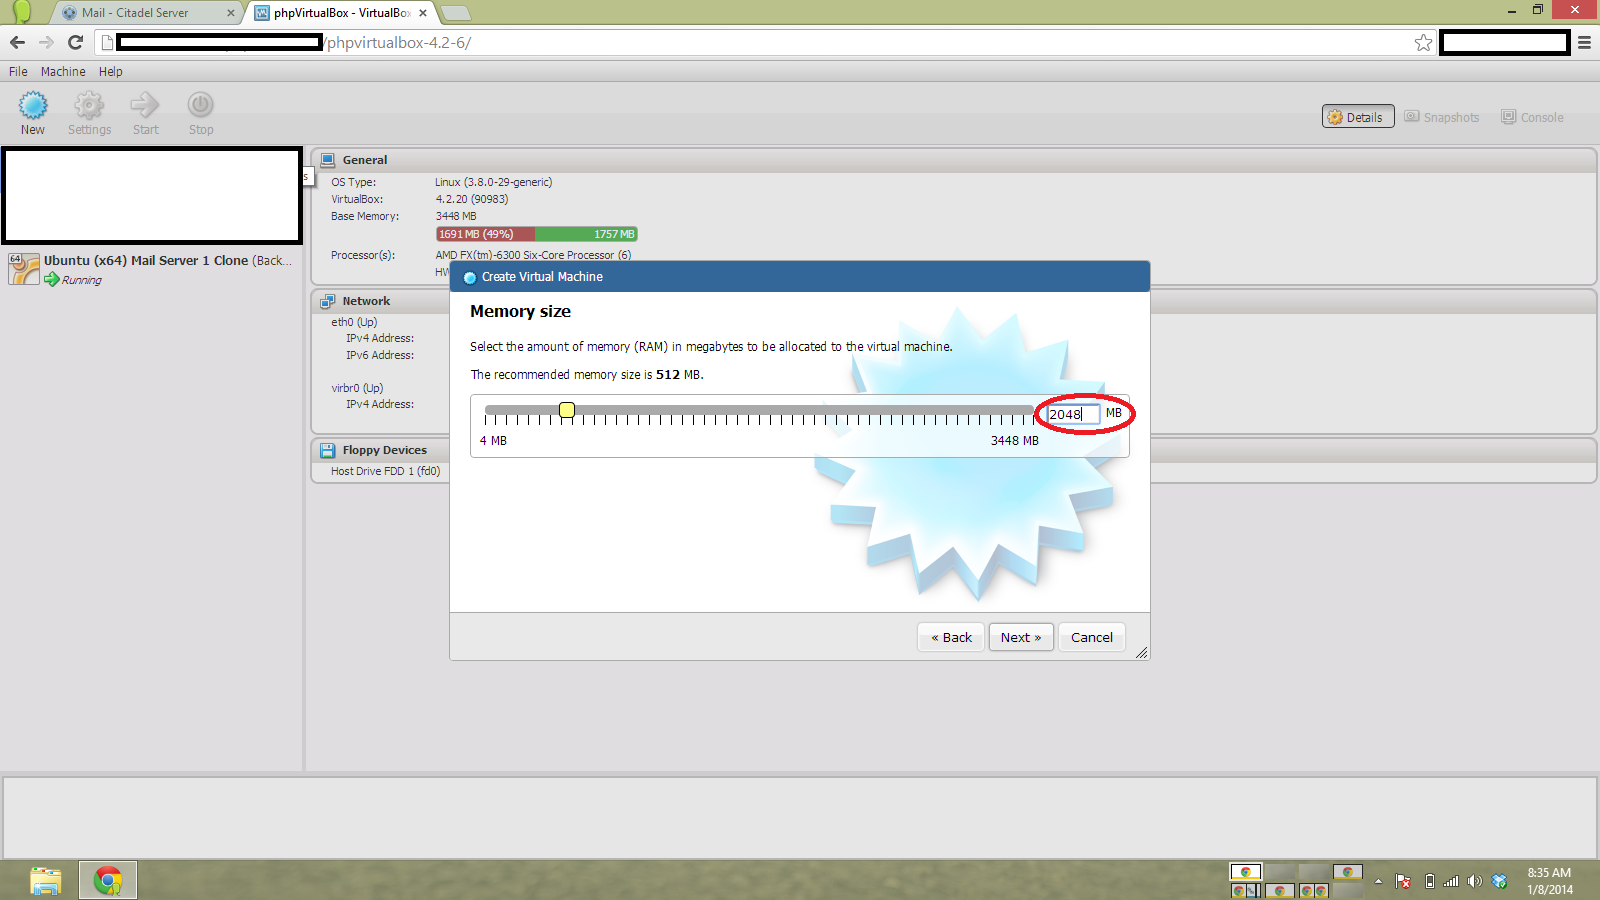
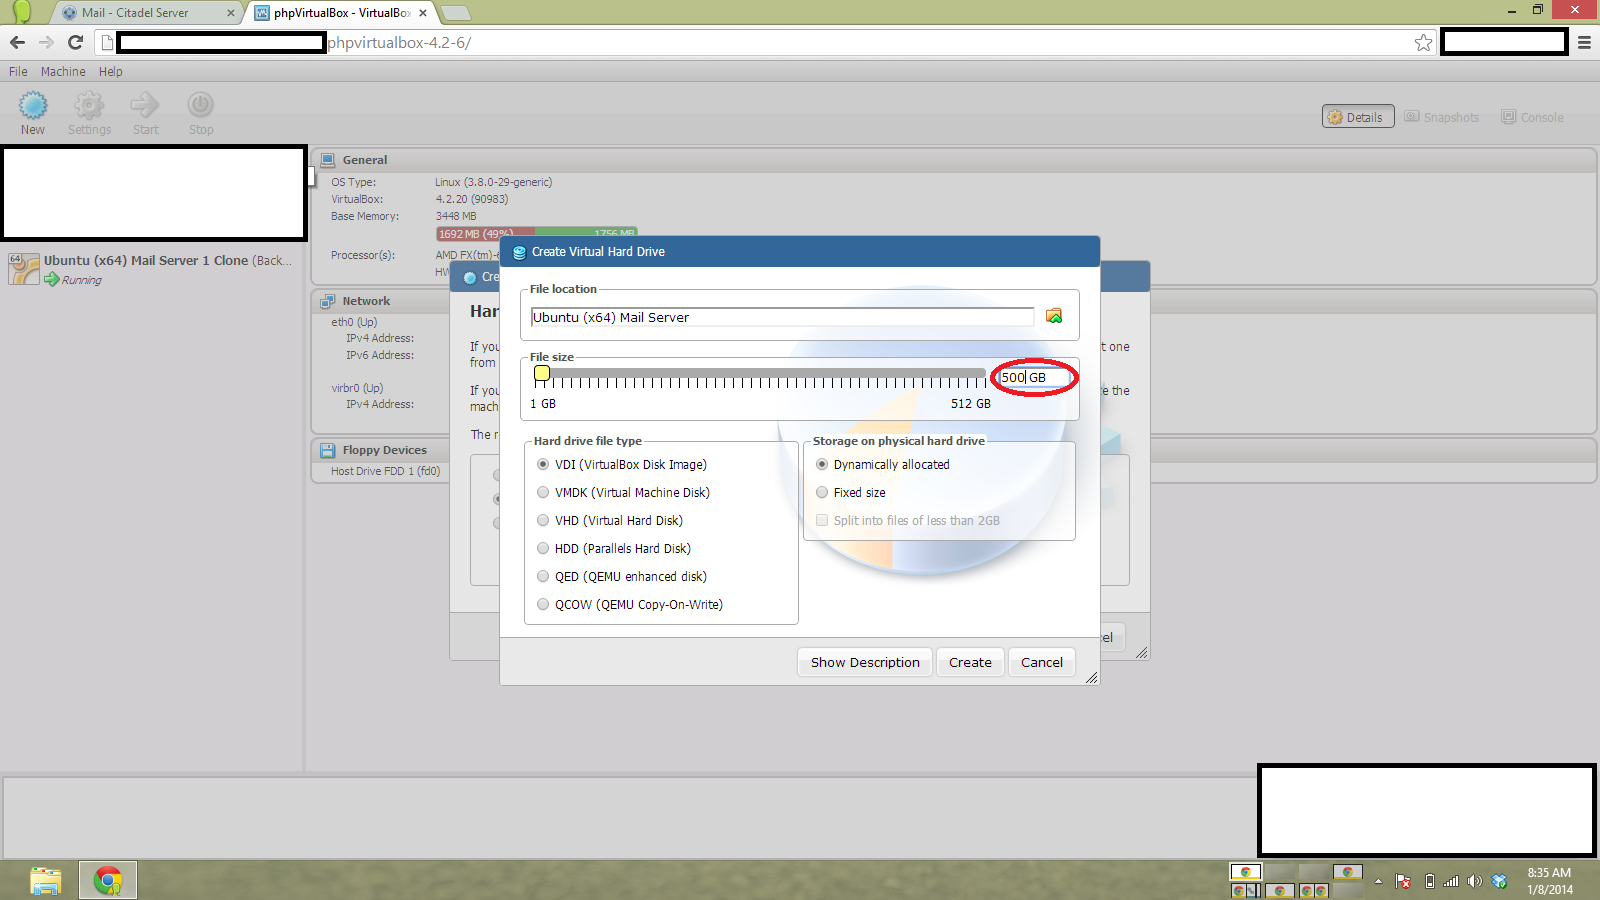
The install is pretty simple once you get the prerequisites installed and prep the VM itself.
Since it’s a server, a static IP address on the network will be very useful. Setting the IP address of a Virtual Machine is surprisingly simple, or at least it is in my case.
You set the IP you want manually as done here, and to configure the VM you set the network to be attached to a bridged adapter as seen here:
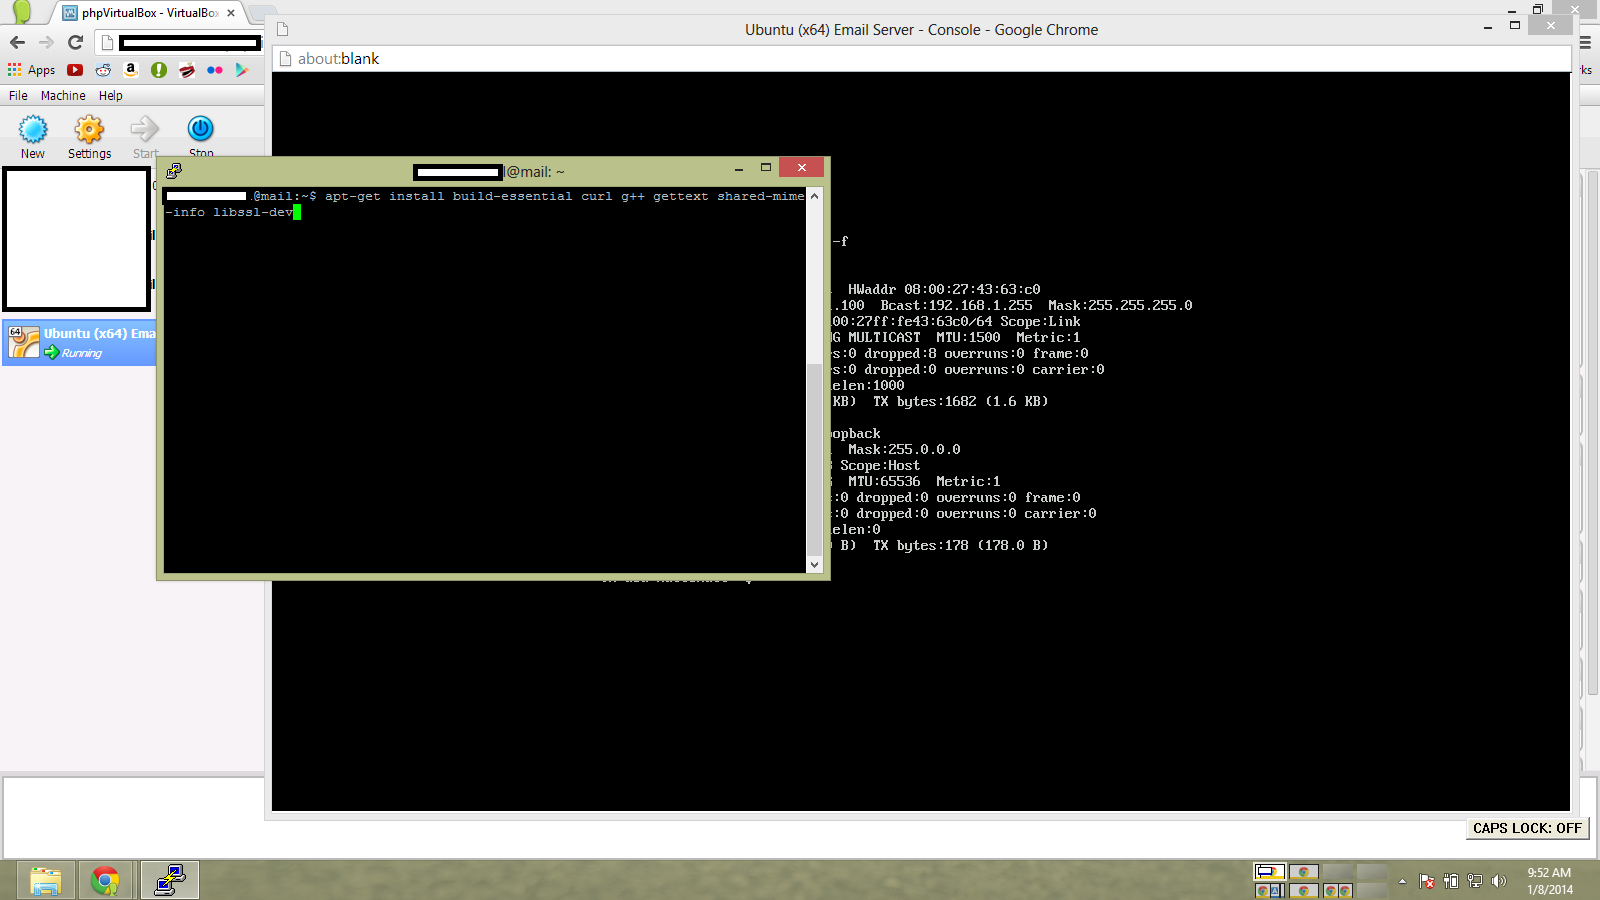
To install citadel, run the following commands per the citadel install guide.
</p>

<pre>apt-get update
apt-get install build-essential curl g++ gettext shared-mime-info libssl-dev
curl http://easyinstall.citadel.org/install | bash</pre>
<p style="text-align: left;">
And the install should go off without a hitch. You can then navigate to yourserverip/mail to access citadel.
.png)
So I wrote a program that makes really big numbers in python in an attempt to break a VM. Here’s the code:
number = 2
count = 0
while 1:
 number = number*number
 count = count + 1
 print str(count) + ' Compounds , ' + str(len(str(number))) + ' Digits'
I left it on for a few days and ended up with this:
.png)
Someone try and beat 26 compounds!